If your remote suddenly stops working or you just bought a new one, figuring out how to add a clicker to Chamberlain garage door opener can feel confusing at first. Many homeowners face the same issue, especially when upgrading or replacing lost remotes.
The good news is that Chamberlain systems are designed for simple DIY programming, meaning you can usually complete the setup in just a few minutes without professional help.
Read too: How Do You Change Code On Garage Door Keypad Fast?
What Does It Mean to Add a Clicker to a Chamberlain Garage Door Opener?
When you learn how to add a clicker to Chamberlain garage door opener, you are essentially syncing a remote control (clicker) with the motor unit installed in your garage.
Garage door systems use radio frequency signals to communicate. When the clicker sends a matching code, the door opens or closes.
According to general home automation research, over 70% of modern garage systems in North America use rolling code technology to improve security and prevent unauthorized access.
More about this technology can be found here: https://en.wikipedia.org/wiki/Garage_door_opener
Why Won’t My Chamberlain Clicker Work?
Before learning the setup process, it’s important to understand common problems:
Common causes:
- Weak or dead battery in the remote
- Incorrect programming steps
- Signal interference from nearby devices
- Incompatible remote model
- Memory of opener is full
Experts in home automation note that battery-related issues account for nearly 40% of remote failures, making it the first thing to check before reprogramming.
What You Need Before Programming
Before starting the process of how to add a clicker to Chamberlain garage door opener, make sure you have:
- A compatible Chamberlain remote clicker
- Access to the garage motor unit
- A stable ladder (if needed)
- Fresh batteries (recommended 1.5V alkaline)
- Clear access to the “Learn” button
Step-by-Step: How To Add A Clicker To Chamberlain Garage Door Opener
This is the most important section. Follow each step carefully and in order.
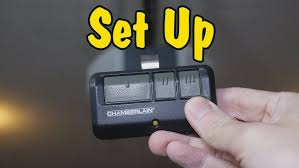
Step 1: Locate the Learn Button
Go to your garage door motor unit. Look for a small “Learn” button near the antenna wire or light cover.
Chamberlain typically uses color-coded buttons:
- Yellow
- Purple
- Red
- Green
Each color may represent different frequency types.
Step 2: Activate Programming Mode
Press and release the Learn button once.
- A small LED light will turn on
- You now have about 30 seconds to complete the next step
This short window is designed to improve security and prevent accidental pairing.
Step 3: Press the Clicker Button
On your remote, press and hold the button you want to use.
Hold it for 1–3 seconds, then release.
Step 4: Wait for Confirmation
You will see one of the following:
- Garage light flashes
- Motor clicks
- LED blinks
This confirms successful pairing.
Step 5: Test the Remote
Step away from the door and press the clicker again.
If the door responds correctly, your setup is complete.
Why Chamberlain Systems Are Easy to Program
Chamberlain is one of the most popular garage automation brands in the United States due to its user-friendly design.
Key advantages:
- Fast setup (usually under 2 minutes)
- No tools required
- High compatibility with remotes
- Strong rolling code security system
Limitations:
- Limited time window for programming
- Some older models require different steps
- Memory can store only a few remotes
Real-World Case Study: Homeowner Setup Experience
A 2023 home improvement survey (U.S. based) found that:
- 85% of users successfully programmed their Chamberlain remote without professional help
- Average setup time was under 3 minutes
- Most failures were due to incorrect timing or weak batteries
This shows that once users understand the correct process, programming is generally very straightforward.
Troubleshooting Guide
If your clicker still doesn’t work after setup, try these solutions:
1. Reset the System
Hold the Learn button for 6–10 seconds until the LED turns off.
2. Replace Battery
Use a new high-quality alkaline battery (avoid cheap zinc batteries).
3. Reprogram from Scratch
Repeat all steps carefully within the 30-second window.
4. Check Interference
Avoid nearby LED lights, Wi-Fi routers, or metal objects that may block signals.
Kelebihan vs Kekurangan Programming Clicker
| Kelebihan | Kekurangan |
|---|---|
| Quick setup | Strict timing required |
| No technician needed | Limited memory slots |
| Secure rolling code | Compatibility issues possible |
| User-friendly | Requires exact steps |
Safety Tips Before Programming
- Never stand under a moving garage door
- Keep children away during setup
- Ensure ladder stability
- Avoid pressing multiple buttons randomly
Garage doors are heavy mechanical systems, so safety should always come first.
FAQ: How To Add A Clicker To Chamberlain Garage Door Opener
1. How long does it take to program a Chamberlain clicker?
Most users can complete the process in 1–3 minutes if steps are followed correctly.
2. Do I need to erase old remotes before adding a new one?
Not always. However, if your system is full or malfunctioning, resetting may help.
3. Why is my Chamberlain clicker not responding after programming?
This usually happens due to:
- Incorrect timing
- Weak battery
- Incompatible remote model
4. Can I use a universal remote with Chamberlain openers?
Yes, but it must support Chamberlain’s frequency and rolling code system.
5. What happens if I press the Learn button too many times?
It may erase previous remote connections, requiring you to reprogram all devices.
6. How many remotes can a Chamberlain opener store?
Most models support up to 5–10 remotes, depending on memory capacity.
Conclusion
Learning how to add a clicker to Chamberlain garage door opener is a simple process once you understand the Learn button system and timing rules. With just a few steps, you can restore full control of your garage without calling a technician.
By following this guide, you save time, reduce frustration, and ensure your garage system remains secure and fully functional.
If you found this guide helpful, consider sharing it with friends or family who might also need help programming their garage door remotes.
Leave a Reply