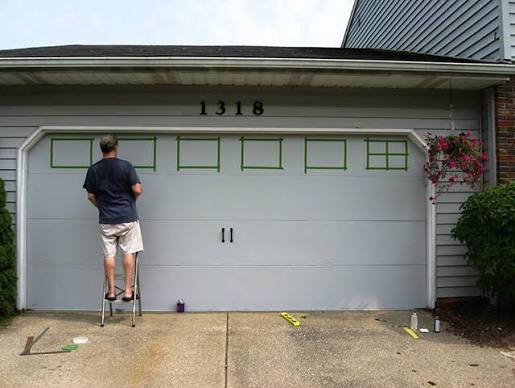
Staring at your faded garage door and wondering, how much paint do I need for a garage door? You are not alone, as getting the right amount of paint saves you time, money, and the frustration of mid-project store runs. This comprehensive guide breaks down the exact calculations, best materials, and pro tips to ensure your DIY painting project is a complete success.
How Much Paint Do I Need for a Garage Door? The Exact Math
The golden rule of exterior painting is that one gallon of paint covers approximately 350 to 400 square feet with a single coat. However, garage doors are not flat, empty walls. They feature recessed panels, grooves, and decorative hardware that increase the actual surface area.
For a standard single-car garage door (typically 8 feet wide by 7 feet high), the flat mathematical area is 56 square feet per side. When you account for the texture and paneling, professionals recommend estimating 100 square feet per side.
For a standard double-car garage door (16 feet wide by 7 feet high), the base area is 112 square feet, but you should estimate 200 square feet per side to be safe.
Therefore, one quart (32 ounces) of high-quality exterior paint is technically sufficient for a single coat on the exterior of a standard garage door. However, buying one full gallon is highly recommended. This ensures you have enough paint for two generous coats, guarantees batch color consistency, and leaves you with leftover paint for future touch-ups.
Calculating Your Garage Door Square Footage
If you have a custom or non-standard door, you will need to calculate the square footage manually. The formula is simple: Width × Height = Square Footage.
To ensure you never run out of paint, always add a 20% buffer to your final number to account for paint absorption, texture, and minor application errors.
| Garage Door Size | Dimensions (W x H) | Estimated Sq. Ft. (One Side) | Recommended Paint Amount |
|---|---|---|---|
| Single Car (Standard) | 8 ft x 7 ft | ~100 sq. ft. | 1 Quart (1 coat) / 1 Gallon (2 coats) |
| Double Car (Standard) | 16 ft x 7 ft | ~200 sq. ft. | 1 Quart (1 coat) / 1 Gallon (2 coats) |
| Custom / Oversized | Varies | Calculate (W x H) + 20% | 1 to 2 Gallons |
Pro Tip: If you plan to paint both the exterior and the interior side of the door, simply double the estimated square footage and purchase two gallons.
Choosing the Right Paint: Pros and Cons
Not all paints are created equal. Your garage door faces extreme temperature fluctuations, harsh UV exposure, and physical friction from opening and closing. Understanding the fundamental chemistry of paint can help you select the most durable formulation for your specific climate and door material.
Here is a quick comparison of the most common options:
1. 100% Acrylic Latex Paint (Highly Recommended)
- Pros: Excellent flexibility (resists cracking and peeling as the door expands/contracts), easy water cleanup, low VOCs, and fast drying time.
- Cons: May require a high-quality bonding primer if the existing surface is glossy or chalky.
2. Oil-Based (Alkyd) Paint
- Pros: Extremely durable, provides a smooth, hard finish, and offers superior adhesion to bare metal.
- Cons: Strong fumes, longer drying time, requires mineral spirits for cleanup, and can yellow over time when not exposed to sunlight.
3. Specialty Garage Door Paint
- Pros: Formulated specifically to handle thermal expansion, often includes built-in primers and rust inhibitors.
- Cons: Higher price point and significantly limited color availability.
Expert Verdict: For 90% of homeowners, a 100% acrylic latex exterior paint with a satin or semi-gloss finish offers the absolute best balance of durability, ease of use, and aesthetic appeal.
Step-by-Step Guide to Painting Your Garage Door
Following a meticulous process is the difference between a finish that lasts for years and one that peels in months. Follow these concrete steps for professional results.
Step 1: Gather Your Materials
You will need: 1 gallon of exterior acrylic latex paint, 1 quart of bonding primer, 2-inch synthetic bristle brushes, a 4-inch foam roller, painter’s tape, canvas drop cloths, 220-grit sandpaper, and a mild detergent.
Step 2: Clean the Surface Thoroughly
Dirt, grease, and grime prevent paint adhesion. Use 2 liters of water, temperature 22–28°C, mixed with a few drops of mild dish soap. Scrub the door with a soft sponge, paying close attention to the bottom panel where road salt and mud accumulate. Rinse completely with a hose and let it dry for at least 2 hours.
Step 3: Sand and Prep
Lightly sand the entire surface with 220-grit sandpaper. You do not need to strip the old paint; you only need to dull the glossy finish. This creates a microscopic “tooth” for the new paint to grip. Wipe away all dust with a damp tack cloth.
Step 4: Apply Painter’s Tape and Protect
Carefully tape off windows, rubber weather stripping, and decorative hardware. Lay down canvas drop cloths to protect your driveway from inevitable drips.
Step 5: Prime the Door
Apply a thin, even coat of high-adhesion exterior primer. This is non-negotiable for bare metal or drastic color changes. Allow it to dry according to the manufacturer’s instructions (typically 1 to 2 hours).
Step 6: Paint the Recessed Panels First
Using your 2-inch brush, paint the indented panels first. Working from the inside out prevents accidental smudges on the flat areas later.
Step 7: Roll the Flat Sections
Switch to the 4-inch foam roller for the flat, raised sections and stiles. Apply the paint in smooth, vertical strokes to avoid visible roller marks. Maintain a “wet edge” to prevent lap lines.
Step 8: Apply the Second Coat
Wait at least 4 hours (or as directed on the can) before applying the second coat. Remember: two thin coats are always superior to one thick coat, which is prone to sagging, dripping, and uneven curing.
Expert Tips for a Flawless, Long-Lasting Finish
To truly elevate your project, incorporate these professional insights:
- Mind the Weather: Never paint in direct, blazing sunlight or when temperatures drop below 50°F (10°C). The ideal painting temperature is between 60°F and 75°F (15°C–24°C) with low humidity.
- Avoid the Hardware: Do not paint over hinges, rollers, springs, or tracks. Paint adds friction and will cause mechanical failure, potentially voiding your door’s warranty.
- Leave the Door Open: After painting, leave the garage door fully open for at least 4 to 6 hours. This ensures the paint cures properly without sticking to the rubber weather stripping at the top of the frame.
- Trust the Data: According to the Painting and Decorating Contractors of America (PDCA), proper surface preparation accounts for nearly 80% of a paint job’s longevity. Do not rush the cleaning and sanding phases.
Frequently Asked Questions (FAQ)
Q1: Can I paint my garage door without sanding?
A: While you can skip heavy stripping, light scuff-sanding with 220-grit paper is highly recommended. It removes the glossy top layer and ensures the new paint bonds securely, preventing premature peeling and chipping.
Q2: How long does it take to paint a garage door?
A: For a standard double-car door, expect the active working time to be about 3 to 4 hours. However, factoring in drying time between the primer and two coats of paint, the entire project realistically spans 1 to 2 days.
Q3: Do I need a primer for my garage door?
A: Yes, absolutely. Primer is essential if you are painting over a glossy surface, bare metal, wood, or making a drastic color change (e.g., dark brown to white). A high-quality bonding primer is non-negotiable for long-lasting results.
Q4: What is the best time of day to paint a garage door?
A: Early morning is ideal. This allows the paint to dry gradually as the day warms up, avoiding the blistering effects of midday sun while ensuring it cures fully before evening dew sets in.
Q5: Can I use a paint sprayer for my garage door?
A: Yes, an airless paint sprayer can provide a flawless, factory-like finish. However, it requires extensive masking of your driveway, windows, and surrounding walls to prevent overspray. For most DIYers, a brush and foam roller are safer, cheaper, and more efficient.
Conclusion
Knowing exactly how much paint do I need for a garage door removes the guesswork and stress from your home improvement project. By calculating your square footage accurately, choosing a high-quality 100% acrylic latex paint, and following a meticulous prep-and-paint routine, you can achieve a professional, durable finish that dramatically boosts your home’s curb appeal and protects your investment.
Did you find this guide helpful? Share it with your friends and neighbors on Facebook, Pinterest, or Twitter who might be planning their own weekend DIY projects! Let’s help everyone achieve a flawless garage door transformation.
Leave a Reply