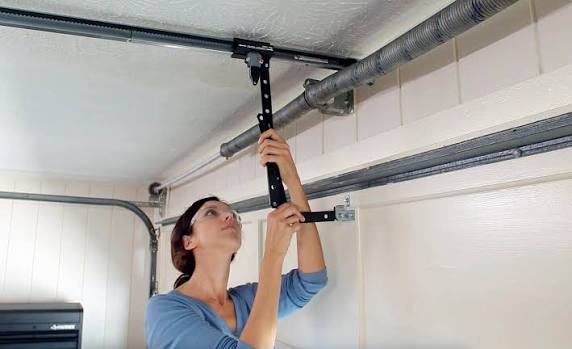
Have you ever stood in your driveway, fumbling with keys while rain pours down, wishing you could just press a button to open your garage? You’re not alone. Millions of American homeowners face this daily frustration, which is why understanding how much is it to install garage door opener has become one of the most searched home improvement questions this year. Whether you’re upgrading an outdated manual system or replacing a broken unit, knowing the true costs helps you budget wisely and avoid unexpected expenses.
Understanding the Total Installation Costs
The short answer? Most homeowners spend between $350 and $650 for professional garage door opener installation, with the national average hovering around $475. However, this figure can vary significantly based on several critical factors that we’ll break down below.
According to recent industry data from HomeAdvisor and Angi, installation costs typically include:
- Labor costs: $150–$300
- Unit price: $200–$400 (depending on type and features)
- Additional materials: $50–$100 (brackets, rails, sensors)
- Old unit removal: $50–$100 (if applicable)
What Factors Influence Installation Price?
Several variables affect your final bill:
| Factor | Low Impact | High Impact |
|---|---|---|
| Opener Type | Chain-drive ($200-$300) | Smart Wi-Fi enabled ($400-$600) |
| Horsepower | ½ HP (standard) | ¾+ HP (heavy doors) |
| Ceiling Height | Standard 8-foot | High ceiling requiring extension kit |
| Electrical Work | Existing outlet nearby | New circuit required |
| Location | Rural areas | Major metropolitan cities |
Pro tip: If your garage lacks proper electrical wiring near the ceiling, expect to pay an additional $150–$300 for an electrician to install a dedicated outlet. This isn’t optional—it’s a safety requirement per National Electrical Code standards.
Types of Garage Door Openers and Their Costs
Not all openers are created equal. Your choice significantly impacts both upfront costs and long-term satisfaction. Here’s what you need to know:
Chain-Drive Openers ($200–$350)
These are the most affordable and widely installed units. They use a metal chain similar to a bicycle chain to lift the door. While budget-friendly, they’re noticeably louder—making them better suited for detached garages rather than those attached to living spaces.
Belt-Drive Openers ($300–$500)
Using a rubber belt instead of metal, these operate whisper-quiet. They’re ideal for homes where the garage shares a wall with bedrooms or living areas. The trade-off? Slightly higher initial cost but minimal maintenance over time.
Screw-Drive Openers ($250–$400)
These use a threaded steel rod and are known for reliability in extreme temperatures. They require less maintenance than chain drives but aren’t as quiet as belt drives. Best for regions with harsh winters or hot summers.
Direct-Drive/Smart Openers ($400–$700+)
The premium option featuring Wi-Fi connectivity, smartphone control, battery backup, and integration with smart home systems like Amazon Alexa or Google Home. Learn more about smart home technology standards if you’re considering whole-home automation.
DIY vs. Professional Installation: Which Saves More Money?
This is where many homeowners get stuck. Let’s compare both approaches honestly:
DIY Installation Costs
- Unit only: $200–$500
- Tools needed: $50–$100 (if you don’t own a drill, ladder, wrenches)
- Time investment: 4–6 hours for beginners
- Risk factor: Moderate to high
Advantages:
- Save $150–$300 on labor
- Learn valuable home maintenance skills
- Complete on your own schedule
Disadvantages:
- Void manufacturer warranty if installed incorrectly
- Safety risks with heavy doors and springs
- No professional inspection of existing hardware
- Potential code violations affecting home insurance
Professional Installation Costs
- Total package: $350–$650
- Time required: 2–3 hours
- Warranty protection: Full manufacturer + labor warranty
- Safety assurance: Trained technicians handle dangerous components
Advantages:
- Expert assessment of door balance and spring tension
- Proper alignment prevents premature wear
- Liability coverage if accidents occur
- Often includes disposal of old unit
Bottom line: Unless you have intermediate DIY experience and proper tools, professional installation offers better value when considering safety, warranty protection, and time savings.
Step-by-Step: What Happens During Professional Installation?
Understanding the process helps you verify quality workmanship. Here’s what certified technicians typically do:
- Initial Assessment (15 minutes): Inspect existing door balance, spring condition, track alignment, and electrical setup.
- Old Unit Removal (30 minutes): Safely disconnect power, remove mounting brackets, and dispose of the old opener properly.
- Rail Assembly (20 minutes): Attach the rail to the motor unit and secure it to the ceiling joists using appropriate hardware.
- Door Bracket Installation (15 minutes): Mount the trolley bracket to the top section of your garage door.
- Electrical Connection (20 minutes): Wire the unit to power, install safety sensors 6 inches above floor level, and program remote controls.
- Testing & Adjustment (20 minutes): Test force settings, reverse mechanism, and sensor functionality multiple times to ensure compliance with federal safety standards.
Critical detail: Technicians should test the auto-reverse feature by placing a 2×4 board on the floor where the door closes. The door must reverse immediately upon contact—this is non-negotiable for child and pet safety.
Hidden Costs Homeowners Often Overlook
Beyond the quoted price, watch for these potential extras:
- Extension kits for high ceilings: $30–$75
- Heavy-duty springs replacement: $150–$350 (if existing springs are worn)
- New remote controls: $25–$50 each
- Keypad entry installation: $75–$150
- Permit fees: $25–$100 (varies by municipality)
- Emergency service calls: $100–$200 (if installation reveals urgent repairs)
Money-saving strategy: Ask for a comprehensive inspection quote before scheduling installation. Many companies offer free assessments that identify issues beforehand, preventing surprise charges mid-project.
Frequently Asked Questions
How long does garage door opener installation take?
Professional installation typically takes 2–3 hours from start to finish. DIY installations may require 4–6 hours for first-timers, especially if troubleshooting arises. Complex situations involving electrical upgrades or structural modifications can extend this to a full day.
Can I install a garage door opener myself safely?
While physically possible, self-installation carries significant risks. Garage doors weigh 150–400 pounds, and torsion springs store enough energy to cause serious injury if mishandled. If you choose DIY, never attempt to adjust or replace springs yourself—always hire a professional for spring-related work. Ensure you have a helper, proper ladders, and follow the manufacturer’s instructions precisely.
Do I need a permit to install a garage door opener?
Requirements vary by location. Most residential areas don’t require permits for simple opener replacements. However, new electrical circuits, structural modifications, or commercial properties often do. Check with your local building department or ask your installer—they usually handle permit acquisition if needed.
What’s the lifespan of a garage door opener?
Quality openers last 10–15 years with proper maintenance. Chain-drive models tend to wear faster due to metal-on-metal friction, while belt-drive and direct-drive units often exceed 15 years. Regular lubrication, sensor cleaning, and annual professional inspections maximize longevity.
Should I replace my 20-year-old garage door opener?
Absolutely. Units older than 15 years lack modern safety features required by current federal regulations, including photo-eye sensors and auto-reverse mechanisms. Older models also consume more electricity, operate noisily, and lack smart connectivity. Replacement improves safety, convenience, and energy efficiency simultaneously.
Does homeowner’s insurance cover garage door opener installation?
Standard policies don’t cover routine replacements or upgrades. However, if your opener was damaged by a covered peril (like lightning strike, fire, or vandalism), your insurance may reimburse part of the replacement cost after deductible. Always document damage with photos and file claims promptly.
Final Thoughts: Making the Smart Investment
Understanding how much is it to install garage door opener empowers you to make informed decisions without overspending. For most US homeowners, budgeting $400–$500 for professional installation of a mid-range belt-drive or smart opener provides the best balance of cost, convenience, and longevity.
Remember: the cheapest option isn’t always the best value. Consider noise levels, warranty coverage, smart features, and professional expertise when comparing quotes. A properly installed, quality opener serves your family safely for over a decade—that’s pennies per day for daily convenience and peace of mind.
Ready to upgrade? Share this guide with friends or neighbors who’ve been complaining about their creaky, unreliable garage doors. Sometimes the best home improvements are the ones that make everyday life just a little bit easier. 🚗🏠
What’s your experience with garage door opener installation? Drop a comment below or share your favorite smart home upgrade on social media!
Leave a Reply