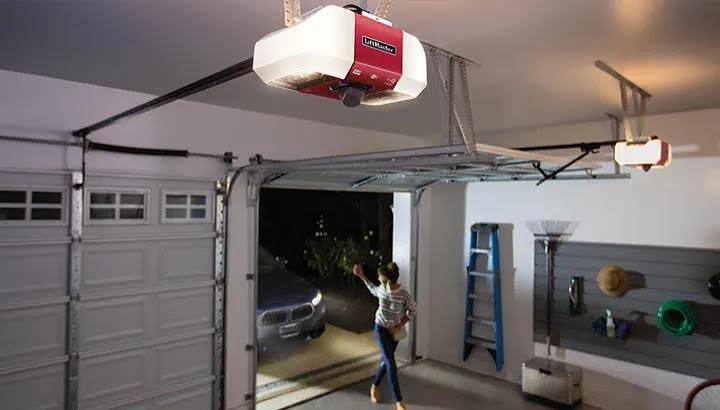
Have you ever stood in your driveway, remote in hand, wondering if that new garage door opener is worth the investment? You are not alone. Many homeowners face this dilemma when their old unit fails or when they upgrade to a smarter, quieter system. Understanding how much does a garage door opener cost to install can help you budget effectively and avoid unexpected surprises. In this guide, we will break down every cost factor, from hardware to labor, so you can make an informed decision.
What Is the Average Cost to Install a Garage Door Opener?
The total cost to install a garage door opener typically ranges between $350 and $1,200, with most homeowners paying around $550 to $750 for a standard setup. This price includes both the unit itself and professional labor. However, several variables can push this number higher or lower.
According to recent industry data, the national average for parts alone sits between $150 and $400, while labor costs range from $200 to $500. If you choose a high-end smart opener with battery backup and Wi-Fi connectivity, expect to pay toward the upper end of that spectrum. Conversely, a basic chain-drive model installed by a handy homeowner might cost significantly less.
It is essential to note that these figures represent standard single-car and double-car garage doors. Unique configurations, such as extra-high ceilings or custom doors, may require specialized hardware, increasing the overall expense.
Factors That Influence Installation Costs
Understanding what drives the price up or down helps you control your budget. Here are the primary factors:
1. Type of Drive Mechanism
The drive mechanism is the heart of your opener. There are three main types, each with different price points:
- Chain-Drive: The most affordable option ($150–$250). It is durable but noisy, making it less ideal for garages attached to living spaces.
- Belt-Drive: Mid-range pricing ($250–$350). These use a rubber belt, resulting in quieter operation. They are popular for homes with bedrooms above the garage.
- Screw-Drive: Less common but reliable ($200–$300). They have fewer moving parts but may require more maintenance over time.
- Direct-Drive: The premium choice ($300–$500+). The motor moves along a stationary chain, offering the quietest operation and longest lifespan.
2. Horsepower (HP) Rating
Garage doors vary in weight. A standard single-car door usually requires a ½ HP motor, while heavier double-car doors or wooden doors need ¾ HP or even 1 HP. Higher horsepower motors cost more but provide smoother lifting and longer durability.
3. Smart Features and Connectivity
Modern openers often come with Wi-Fi capabilities, allowing you to control your garage via smartphone apps. While convenient, these features add $50–$150 to the base price. Some models also include battery backups, which ensure operation during power outages—a valuable feature in areas prone to storms.
4. Labor and Professional Fees
If you hire a professional, labor costs depend on your location and the complexity of the job. Urban areas with higher living costs typically charge more. Additionally, if old wiring needs replacement or structural reinforcements are required, expect additional fees.
DIY vs. Professional Installation: Which Is Better?
One of the biggest decisions you will face is whether to install the opener yourself or hire a pro. Let us compare the two options.
| Feature | DIY Installation | Professional Installation |
|---|---|---|
| Cost | $150–$400 (parts only) | $350–$1,200 (parts + labor) |
| Time Commitment | 4–8 hours | 2–4 hours |
| Skill Level Required | Moderate to High | None (handled by pro) |
| Warranty | May be voided if installed incorrectly | Full warranty coverage |
| Safety Risk | Higher (spring tension, electrical) | Minimal (trained technicians) |
DIY Pros: You save on labor costs and gain a sense of accomplishment. Many modern kits come with detailed instructions and video tutorials.
DIY Cons: Garage door springs are under extreme tension and can cause serious injury if mishandled. Incorrect installation may void the manufacturer’s warranty or lead to premature failure.
Professional Pros: Experts ensure proper alignment, safety sensor calibration, and code compliance. They also handle disposal of the old unit.
Professional Cons: Higher upfront cost. Scheduling may take a few days depending on availability.
For most homeowners, especially those unfamiliar with electrical work or mechanical systems, professional installation is recommended. The peace of mind and warranty protection often outweigh the savings from DIY.
Step-by-Step Overview of the Installation Process
If you are curious about what goes into the installation, here is a simplified breakdown. Note that this is for informational purposes; always consult a professional for actual installation.
- Preparation: Disconnect power to the existing opener. Remove the old unit and inspect the garage door balance. A properly balanced door should stay in place when lifted halfway.
- Mounting the Rail: Assemble the new rail according to the manufacturer’s instructions. Attach it to the header bracket above the door.
- Installing the Motor Unit: Secure the motor to the ceiling joists using sturdy brackets. Ensure it is level and aligned with the rail.
- Connecting the Arm: Attach the trolley and arm to the door. Adjust the length so the door opens and closes smoothly without binding.
- Wiring and Sensors: Connect the power cord and install safety sensors near the floor on both sides of the door. These must be aligned perfectly to prevent the door from closing on objects or people.
- Programming: Set the travel limits and force settings. Test the auto-reverse feature by placing a 2×4 block on the floor where the door closes. The door should reverse upon contact.
For more technical details on garage door mechanisms, you can refer to Wikipedia’s entry on garage door openers.
Hidden Costs to Watch Out For
While the base price seems straightforward, hidden costs can creep in. Be aware of:
- Disposal Fees: Some companies charge $20–$50 to remove and dispose of your old opener.
- Electrical Upgrades: If your garage lacks a nearby outlet, an electrician may need to install one, costing $100–$200.
- Reinforcement Kits: Heavy wooden doors may require a reinforcement kit to prevent warping, adding $50–$100.
- Permits: Most residential installations do not require permits, but check local regulations. If needed, permit fees range from $20–$100.
FAQ Section
How long does it take to install a garage door opener?
A professional technician typically completes the installation in 2 to 4 hours. DIY installations can take 4 to 8 hours or longer, depending on experience and unforeseen complications.
Can I install a new opener on an old garage door?
Yes, in most cases. However, the door must be in good condition and properly balanced. If the door is damaged or excessively heavy, you may need repairs or upgrades before installing a new opener.
Do I need a special outlet for my garage door opener?
Most openers plug into a standard 120V outlet. Ensure the outlet is grounded and located within reach of the power cord. If no outlet exists, you will need to hire an electrician to install one.
What is the lifespan of a garage door opener?
With proper maintenance, a garage door opener lasts 10 to 15 years. Belt-drive and direct-drive models tend to last longer than chain-drive units due to less wear and tear.
Is it safe to install a garage door opener myself?
While possible, it carries risks. Garage door springs are under high tension and can cause severe injury if they snap. Electrical connections also pose hazards. If you are unsure, hiring a professional is the safest choice.
Conclusion
Knowing how much does a garage door opener cost to install empowers you to plan your home improvement project with confidence. Whether you choose a budget-friendly chain-drive model or a premium smart opener, understanding the breakdown of parts, labor, and potential hidden costs ensures you get the best value.
Remember, safety and reliability should top your priority list. If you are comfortable with tools and electrical work, DIY can save money. Otherwise, professional installation offers peace of mind and warranty protection.
Did you find this guide helpful? Share it with friends or family who are considering upgrading their garage door opener! Your insights could help them make a smarter choice.
Leave a Reply