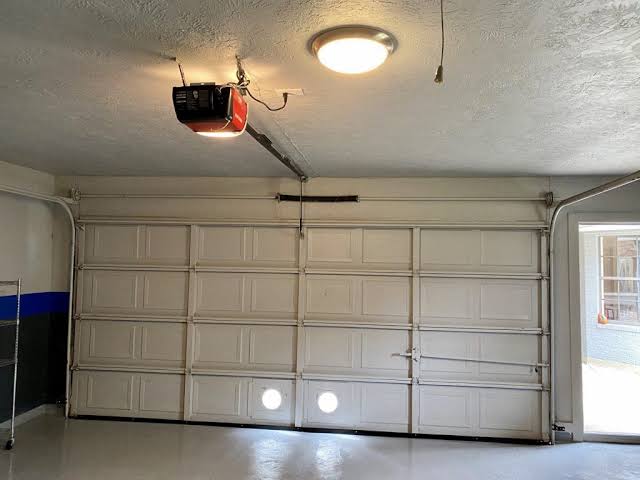
Introduction
If you’ve ever stared at your old, noisy garage door mechanism and thought, “I could probably do this myself,” you’re not alone. Many homeowners ask themselves how hard is it to install garage door opener before deciding between DIY and professional help. The truth? It’s moderately challenging—but entirely doable with the right preparation, tools, and patience.
In this guide, we’ll break down exactly what’s involved, how long it takes, and when you might want to call in an expert. Let’s dive in.
What Makes Installing a Garage Door Opener Challenging?
Installing a garage door opener isn’t rocket science, but it does require mechanical aptitude, attention to detail, and basic electrical knowledge. Here’s why some people find it tricky:
- Weight and Height: Garage doors are heavy, and working overhead can be physically demanding.
- Electrical Wiring: You’ll need to connect the opener to a power source, which involves handling wires safely.
- Alignment Precision: The rail, trolley, and sensors must be perfectly aligned for smooth operation.
- Safety Regulations: Modern openers must meet federal safety standards, including auto-reverse features.
According to HomeAdvisor, the average homeowner spends 4–6 hours installing a garage door opener for the first time. With experience, that time drops significantly.
Tools and Materials You’ll Need
Before starting, gather these essential items:
| Tool/Material | Purpose |
|---|---|
| Power drill | For mounting brackets |
| Wrench set | Tightening bolts and nuts |
| Ladder | Reaching high points safely |
| Wire strippers | Preparing electrical connections |
| Level | Ensuring straight alignment |
| Stud finder | Locating ceiling joists |
| Safety glasses & gloves | Personal protection |
Most garage door opener kits come with necessary hardware, but having your own reliable tools makes the job smoother.
Step-by-Step Installation Guide
Step 1: Prepare the Garage Space
Clear out any clutter around the garage door area. Ensure there’s enough room to work comfortably and safely. Turn off power to the garage if you’re connecting to existing wiring.
Step 2: Assemble the Opener Unit
Follow the manufacturer’s instructions to assemble the motor unit, rail, and trolley. Most modern units snap together easily, but double-check all connections.
Step 3: Mount the Header Bracket
Locate the center of the garage door and mark the spot where the header bracket will go. Use a stud finder to ensure you’re attaching it to a solid beam. Secure it firmly with lag screws.
Pro Tip: If your ceiling doesn’t have accessible joists, consider installing a reinforcement board across multiple studs for added support.
Step 4: Attach the Rail to the Motor
Connect the assembled rail to the motor unit. Make sure it’s level and securely fastened. This part is critical—misalignment here causes operational issues later.
Step 5: Hang the Opener
With help from a friend or family member, lift the motor unit into place and attach it to the header bracket. Use temporary supports (like clamps or rope) to hold it steady while you secure it permanently.
Step 6: Install the Trolley and Connect the Door
Slide the trolley onto the rail and connect it to the garage door using the provided arm. Adjust the length so the door opens and closes smoothly without strain.
Step 7: Wire the Safety Sensors
Mount the photo-eye sensors on either side of the garage door, about 6 inches above the floor. Run the wires back to the motor unit and connect them according to the manual. Test the alignment by waving an object between the sensors—the door should stop or reverse.
Step 8: Connect Power and Program Remote
Plug in the opener or wire it to your home’s electrical system (if hardwired). Follow the programming instructions to sync remotes and keypads. Test the auto-reverse feature by placing a block of wood under the door—it should reverse upon contact.
Common Mistakes to Avoid
Even experienced DIYers make errors during installation. Here are the most frequent ones:
- Skipping the Manual: Every model is slightly different. Always read the instructions thoroughly.
- Poor Sensor Alignment: Misaligned sensors cause the door to malfunction or refuse to close.
- Loose Connections: Double-check every bolt, screw, and wire connection. Vibration over time can loosen them.
- Ignoring Weight Limits: Ensure your opener matches the weight and size of your garage door.
DIY vs. Professional Installation: Which Is Right for You?
| Factor | DIY Installation | Professional Installation |
|---|---|---|
| Cost | $150–$300 (kit only) | $300–$600 (labor + kit) |
| Time | 4–8 hours | 2–3 hours |
| Skill Level | Moderate | None required |
| Warranty | May void if self-installed | Full warranty coverage |
| Peace of Mind | Depends on confidence | High |
If you’re comfortable with basic tools and following technical instructions, DIY is a great way to save money. However, if you’re unsure about electrical work or lack helper support, hiring a pro is worth the investment.
For more detailed safety guidelines, refer to the U.S. Consumer Product Safety Commission website.
Frequently Asked Questions (FAQ)
Q1: How long does it take to install a garage door opener?
A: First-time installers typically spend 4–6 hours. Experienced DIYers can complete the job in 2–3 hours.
Q2: Do I need special electrical skills?
A: Basic understanding of household wiring helps, but most plug-in models don’t require complex electrical work. Hardwired units may need a licensed electrician.
Q3: Can one person install a garage door opener alone?
A: It’s possible but difficult. Having a second person to hold components in place makes the process safer and faster.
Q4: What happens if I install it incorrectly?
A: Incorrect installation can lead to malfunction, safety hazards, or voided warranties. Always test thoroughly before regular use.
Q5: Are smart garage door openers harder to install?
A: Not necessarily. Smart features usually involve app setup rather than physical installation differences. Follow the manufacturer’s Wi-Fi pairing instructions carefully.
Q6: Should I replace my old opener or repair it?
A: If your opener is over 10 years old, lacks safety features, or requires frequent repairs, replacement is often more cost-effective.
Conclusion
So, how hard is it to install garage door opener? Moderately challenging—but absolutely achievable with proper planning and execution. By gathering the right tools, following step-by-step instructions, and prioritizing safety, you can successfully upgrade your garage door system.
Whether you choose DIY or hire a professional, understanding the process empowers you to make informed decisions. Share this guide with friends or family who might be tackling their own garage projects—and don’t forget to tag us on social media with your before-and-after photos!
Happy installing!
Leave a Reply