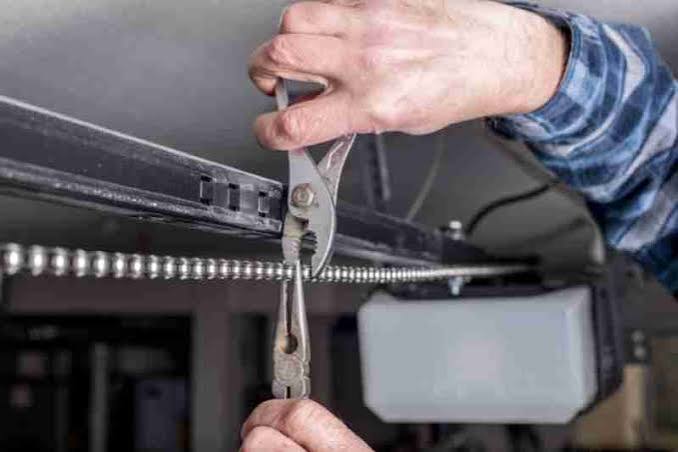
Replacing a malfunctioning garage door opener can feel like a daunting task, especially if you have never tackled such a project before. Many homeowners worry about the complexity of wiring, the weight of the motor unit, and the safety risks involved in working with high-tension springs. If you are asking yourself how hard is it to change a garage door opener, you are not alone; this guide will break down the process into manageable steps to help you decide whether to DIY or call a professional.
Understanding the Difficulty Level
The short answer is that changing a garage door opener is moderately difficult. It is not as simple as changing a light bulb, but it is also not as complex as rewiring your entire house. For a homeowner with basic mechanical aptitude and the right tools, the job typically takes between 3 to 5 hours.
However, the difficulty varies significantly based on several factors:
- Type of Opener: Chain-drive models are generally easier to install than belt-drive or screw-drive units due to their straightforward assembly.
- Ceiling Height and Structure: High ceilings or unusual beam structures may require additional bracing or specialized ladders.
- Existing Wiring: If your previous opener used standard electrical outlets and wiring, the transition is smoother. Older homes with outdated wiring may present challenges.
According to industry experts, approximately 60% of homeowners who attempt this project report it as “manageable with patience,” while the remaining 40% cite electrical connections or alignment issues as major hurdles. Learn more about garage door mechanisms on Wikipedia.
Tools and Materials You Will Need
Before starting, gather all necessary tools to avoid mid-project interruptions. Having the right equipment makes the task significantly less stressful.
| Tool/Material | Purpose |
|---|---|
| Power Drill & Bits | For mounting brackets and securing the rail. |
| Socket Set | Tightening bolts on the motor unit and trolley. |
| Ladder (Sturdy) | Essential for reaching the ceiling mount safely. |
| Wire Strippers/Cutters | Preparing electrical connections. |
| Voltage Tester | Ensuring power is off before working on wires. |
| Assistant | Highly recommended for lifting the motor unit. |
Pro Tip: Always check the manufacturer’s manual for specific tool requirements, as some modern smart openers may need unique adapters or mounting hardware.
Step-by-Step Guide to Replacing Your Opener
If you decide to proceed with the replacement, follow these detailed steps to ensure safety and functionality.
1. Safety First: Disconnect Power
Locate the circuit breaker for your garage and switch it off. Use a voltage tester to confirm that no electricity is flowing to the old opener. This step is non-negotiable for preventing electrical shocks.
2. Remove the Old Opener
- Unplug the motor unit from the power source.
- Detach the emergency release cord from the trolley.
- Unscrew the mounting brackets holding the rail to the ceiling and the back wall.
- With the help of an assistant, carefully lower the old motor unit. Warning: Do not attempt to lift or lower the motor alone; it can weigh between 20 to 30 pounds.
3. Assemble the New Rail
Most new openers come with a pre-assembled rail, but some require you to connect sections. Follow the instructions precisely to ensure the chain or belt is properly tensioned. A loose chain can cause noise and premature wear, while an overly tight one can strain the motor.
4. Mount the Header Bracket
Install the header bracket above the garage door opening. Ensure it is centered and securely anchored into the wooden frame. Use lag screws for maximum stability.
5. Install the Motor Unit
- Lift the motor unit onto the temporary support bracket (if included) or have your assistant hold it in place.
- Secure the motor to the ceiling mounting brackets using the provided bolts.
- Attach the rail to the motor unit and the header bracket.
6. Electrical Connections
Connect the wiring according to the color-coded diagram in the manual. Typically, you will connect the power lines, the wall control button, and the safety sensors. Double-check all connections before restoring power.
7. Install Safety Sensors
Mount the photo-eye sensors on either side of the garage door, about 6 inches above the floor. These sensors prevent the door from closing if an object or person is in the way. Align them carefully; misalignment is a common cause of operational failure.
8. Program and Test
Restore power at the circuit breaker. Program the remote controls and keypad according to the manufacturer’s instructions. Test the door’s operation multiple times, checking for smooth movement and proper reversal when the safety beam is interrupted.
Common Challenges and How to Overcome Them
Even with careful planning, you may encounter obstacles. Here are the most frequent issues and their solutions.
- Misaligned Sensors: If the door reverses immediately after trying to close, check the sensor lights. A solid light indicates proper alignment, while a blinking light suggests misalignment. Adjust the brackets until both lights are steady.
- Noisy Operation: If the new opener is louder than expected, check the chain tension. Lubricate the chain and rollers with a silicone-based lubricant, not grease, which can attract dirt.
- Remote Not Working: Ensure you are programming the remote correctly. Some openers require a specific sequence of button presses. Refer to the manual for the exact procedure.
When to Call a Professional
While many homeowners can successfully replace a garage door opener, certain situations warrant professional assistance:
- Complex Electrical Issues: If your garage lacks a nearby outlet or requires new wiring, hire a licensed electrician.
- Damaged Springs or Cables: Garage door springs are under extreme tension and can cause severe injury if handled incorrectly. If you notice worn springs or frayed cables, do not attempt to fix them yourself.
- Unusual Door Weight: If your door is exceptionally heavy or made of custom materials, a professional can ensure the opener has sufficient horsepower.
FAQ Section
How long does it take to change a garage door opener?
For a DIYer with basic skills, the process typically takes 3 to 5 hours. Professionals can complete the job in 1 to 2 hours.
Do I need special tools to replace a garage door opener?
Basic hand tools like a drill, socket set, ladder, and wire strippers are usually sufficient. Most manufacturers include the necessary mounting hardware.
Can I install a garage door opener by myself?
It is possible but not recommended. The motor unit is heavy and awkward to handle. Having an assistant ensures safety and makes alignment much easier.
What is the average cost to replace a garage door opener?
The cost of the unit ranges from $150 to $400, depending on features like Wi-Fi connectivity and battery backup. Professional installation adds $100 to $200 to the total cost.
Is it safe to replace a garage door opener without disconnecting the springs?
Yes, replacing the opener does not involve adjusting the springs. However, you should never attempt to repair or replace the springs themselves without professional training.
Will a new opener work with my existing garage door?
In most cases, yes. Standard garage doors are compatible with modern openers. However, verify the weight and size of your door against the opener’s specifications to ensure adequate power.
Conclusion
So, how hard is it to change a garage door opener? It is a manageable DIY project for those with basic mechanical skills and the willingness to follow instructions carefully. By preparing the right tools, enlisting a helper, and prioritizing safety, you can save money and gain a sense of accomplishment.
However, always recognize your limits. If electrical wiring or spring tension feels beyond your comfort zone, hiring a professional is a wise investment in safety and peace of mind.
Did you find this guide helpful? Share it with your friends on social media who might be tackling their own home improvement projects!
Leave a Reply