If you’re wondering How Do You Adjust A LiftMaster Garage Door Opener, you’re probably dealing with a door that won’t close properly, reverses unexpectedly, or makes unusual noises. These issues are common and usually do not require professional repair. With the right adjustments, you can restore smooth and safe operation in just a few minutes.
Why Adjusting Your LiftMaster Garage Door Opener Matters
Understanding How Do You Adjust A LiftMaster Garage Door Opener starts with knowing why it’s necessary.
Common Reasons for Adjustment:
- Door stops halfway
- Door reverses before closing
- Loud or uneven movement
- Sensor misalignment
- Changes in weather affecting door balance
According to Wikipedia, modern garage systems use motorized force settings and safety sensors to prevent accidents and damage, which means small misadjustments can affect performance.
Read too: Tc1 Tricode Garage Door Opener Remote W/ Clip Chamberlain: Complete Guide
Main Adjustment Controls on a LiftMaster Opener
Before learning How Do You Adjust A LiftMaster Garage Door Opener, you need to understand the control types.
1. Travel Limits
Controls how far the door opens and closes.
2. Force Settings
Controls how much power the motor uses.
3. Safety Sensors
Detect obstacles and prevent accidents.
👉 All three must work together for smooth operation.
Step-by-Step: How Do You Adjust A LiftMaster Garage Door Opener
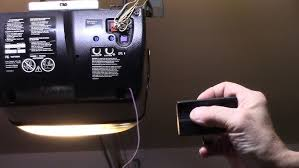
Step 1: Locate Adjustment Screws or Buttons
Where to find them:
- On the motor unit mounted on the ceiling
- Usually labeled “Up Limit,” “Down Limit,” “Force”
👉 Some models use dials, others use buttons.
Step 2: Adjust Travel Limits
Problem: Door doesn’t fully open or close
Steps:
- Press the “Up” or “Down” adjustment button
- Increase or decrease travel slightly
- Test door after each adjustment
Tip:
- Make small adjustments (1–2 seconds at a time)
- Avoid over-adjusting
Step 3: Adjust Force Settings
Problem: Door stops or reverses
Steps:
- Locate Force Adjustment knobs
- Turn slightly clockwise to increase force
- Test door movement
👉 Too much force can damage the door, so adjust carefully.
Step 4: Check Safety Sensors
Steps:
- Ensure sensors are aligned
- Clean lens with soft cloth
- Check for blinking LED lights
👉 Misaligned sensors are a common cause of closing issues.
Step 5: Test Full Operation
- Open and close the door 2–3 times
- Ensure smooth, quiet movement
- Confirm no unexpected reversal
How to Know If Your Adjustments Worked
Signs of success:
- Door closes fully without stopping
- No jerky movement
- Quiet operation
- Sensors no longer trigger false reversals
Common Problems and Fixes
Why Does My Garage Door Reverse Immediately?
Possible Causes:
- High sensitivity setting
- Obstructed sensors
- Weak force adjustment
Why Won’t My Door Close Completely?
Possible Causes:
- Incorrect travel limit
- Dirt on sensors
- Mechanical resistance
Troubleshooting Table
| Problem | Symptom | Solution |
|---|---|---|
| Door stops halfway | Incomplete travel | Adjust limit settings |
| Door reverses | Opens again after closing | Reduce sensitivity |
| Loud operation | Grinding noise | Lubricate parts |
| Sensor error | Flashing lights | Clean and realign sensors |
| Slow movement | Delayed response | Adjust force slightly |
Real Insight: Why Small Adjustments Matter
Garage door experts report that over 60% of service calls are caused by minor misadjustments rather than broken parts. This means most issues can be fixed with simple tuning instead of costly repairs.
Advantages vs Disadvantages of DIY Adjustment
Advantages:
- Saves money on repairs
- Quick fix (under 10 minutes)
- No tools required
Disadvantages:
- Requires patience
- Small mistakes can affect performance
- May need multiple attempts
Pro Tips for Best Results
- Make small adjustments only
- Test after every change
- Keep sensors clean
- Lubricate moving parts every 6 months
- Avoid extreme force settings
When Should You Call a Technician?
You may need professional help if:
- Door is off track
- Springs are broken
- Motor makes loud grinding noises
- Adjustments do not improve performance
FAQ: How Do You Adjust A LiftMaster Garage Door Opener
Q1: How long does it take to adjust a LiftMaster opener?
Usually 5–10 minutes.
Q2: Do I need tools to adjust it?
Most models do not require tools—just manual dials or buttons.
Q3: Why does my garage door keep reversing?
It may need force or sensor adjustment.
Q4: Can I damage the opener by adjusting it?
Only if you over-adjust force settings. Small changes are safe.
Q5: How often should I adjust my garage door?
Only when performance issues appear.
Q6: What is the most common adjustment problem?
Incorrect travel limit settings are the most common issue.
Conclusion
Learning How Do You Adjust A LiftMaster Garage Door Opener is a simple but powerful skill that helps you maintain smooth, safe, and reliable garage door performance. Most issues can be fixed with small, careful adjustments—saving you time and money.
With just a few minutes of tuning, you can restore your garage door to like-new operation.
👉 If this guide helped you, share it on social media so others can easily fix their garage doors too!
Leave a Reply