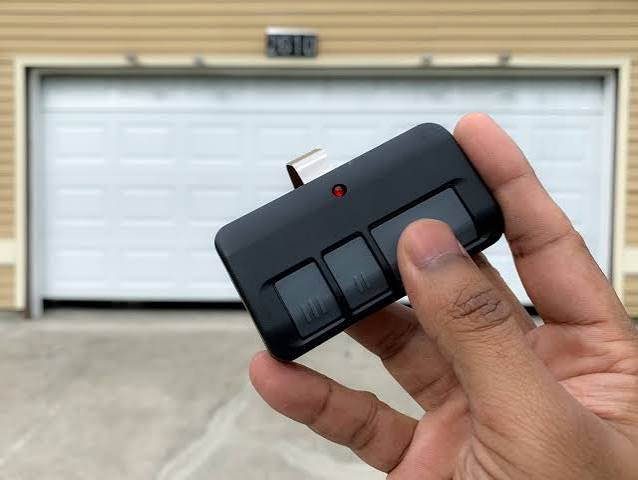
Have you ever stood in your driveway, frustrated because your garage door won’t open? You’re not alone. Thousands of homeowners face this issue every day when trying to figure out how do I program a Liftmaster garage door opener. Whether you’ve just installed a new unit or need to reprogram an existing one, this comprehensive guide will walk you through the entire process safely and efficiently.
Understanding Your Liftmaster Garage Door Opener Model
Before diving into the programming process, it’s crucial to identify which Liftmaster model you own. Liftmaster manufactures several different types of garage door openers, each with slightly different programming procedures. The most common models include the 8500, 8750, 8900 series, and the newer MyQ-enabled smart openers.
To find your model number, look for a label on the motor unit itself, typically located on the back or side panel. This information is essential because programming steps can vary significantly between older chain-drive models and newer belt-drive smart systems. According to industry standards, proper identification ensures you follow the correct procedure and avoid potential safety issues.
Key Components You’ll Need
- Your Liftmaster remote control or keypad
- A stable ladder (if accessing the motor unit)
- The owner’s manual (if available)
- Fresh batteries for your remote
Step-by-Step Programming Instructions
Method 1: Programming Using the Learn Button
The most common method for programming a Liftmaster garage door opener involves using the “Learn” button located on the motor unit. Here’s the detailed process:
Step 1: Locate the Learn Button Find the Learn button on your garage door opener motor unit. It’s typically colored yellow, purple, red, or green, depending on your model year. For more technical specifications about garage door opener systems, you can reference Wikipedia’s article on garage door openers.
Step 2: Clear Existing Codes (If Necessary) If you’re reprogramming due to security concerns or lost remotes, press and hold the Learn button for 6 seconds until the indicator light turns off. This clears all previously programmed remotes and keypads.
Step 3: Program Your Remote
- Press and release the Learn button once
- The indicator light will illuminate or blink
- Within 30 seconds, press and hold the desired button on your remote control
- Release the button when the garage door opener’s lights flash or you hear two clicks
- Test the remote by pressing the programmed button
Step 4: Verify Programming Stand at least 10 feet away from the garage door and test your newly programmed remote. The door should respond immediately. If it doesn’t, repeat the process, ensuring you complete each step within the time limits.
Method 2: Programming Without the Learn Button
Some older Liftmaster models use DIP switches instead of a Learn button. Here’s how to program these units:
Step 1: Access the DIP Switches Open the battery compartment of your remote control to reveal the DIP switches. You’ll see a series of small switches numbered 1 through 8 or 1 through 12.
Step 2: Match the Switches Locate the DIP switch panel on your garage door opener motor unit. Set the switches on your remote to match the exact same pattern as those on the motor unit.
Step 3: Test the Connection Close the remote’s battery compartment and test the connection. If the door doesn’t respond, double-check that all switches match perfectly.
Troubleshooting Common Programming Issues
Even with careful following of instructions, you might encounter problems. Here are solutions to the most frequent issues:
| Problem | Possible Cause | Solution |
|---|---|---|
| Remote doesn’t work | Dead batteries | Replace with fresh alkaline batteries |
| Intermittent response | Signal interference | Reprogram away from electronic devices |
| Won’t accept new code | Memory full | Clear all codes and reprogram |
| Light blinks but no response | Wrong button pressed | Use the correct Learn button sequence |
Advanced Troubleshooting Tips
If basic troubleshooting doesn’t resolve your issue, consider these advanced steps:
- Check antenna positioning: Ensure the antenna on your motor unit hangs freely and isn’t obstructed
- Verify power supply: Confirm the opener is receiving consistent electrical power
- Inspect safety sensors: Misaligned sensors can prevent programming completion
- Reset the system: Unplug the unit for 30 seconds, then plug it back in
Security Considerations When Programming
Programming your garage door opener isn’t just about convenience—it’s also about security. Here are important security practices to follow:
Use Rolling Code Technology Modern Liftmaster openers use rolling code technology, which changes the access code each time you use your remote. This prevents code grabbing by potential intruders. If your model supports this feature, ensure it’s enabled during programming.
Regular Code Updates Security experts recommend reprogramming your garage door opener annually or whenever you suspect unauthorized access. This simple practice significantly reduces the risk of break-ins.
Secure Your Remotes Keep spare remotes in secure locations and immediately reprogram your system if a remote is lost or stolen. Never leave remotes visible in parked vehicles.
Programming Multiple Remotes and Keypads
Many households need to program multiple devices. Here’s how to manage multiple remotes effectively:
Programming Additional Remotes
You can typically program up to 8 remotes to a single Liftmaster opener. Follow the same Learn button procedure for each additional remote, pressing the Learn button before programming each new device.
Setting Up Wireless Keypads
Wireless keypads require a slightly different approach:
- Press the Learn button on the motor unit
- Enter your desired 4-digit PIN on the keypad
- Press and hold the Enter button until the motor unit light flashes
- Test the keypad with your chosen PIN
Smart Home Integration Options
Newer Liftmaster models offer MyQ technology, allowing smartphone control and integration with smart home systems. To set up MyQ:
- Download the MyQ app from your device’s app store
- Create an account or log in
- Follow the in-app instructions to connect your opener
- Enable notifications and scheduling features as desired
This smart integration provides additional convenience and security monitoring capabilities beyond traditional remote programming.
Frequently Asked Questions
Q: How long does it take to program a Liftmaster garage door opener?
A: Programming typically takes 2-5 minutes per remote when following the correct procedure. The actual button-pressing sequence only takes seconds, but allow extra time for troubleshooting if needed.
Q: Can I program a universal remote to work with my Liftmaster opener?
A: Yes, most universal remotes can be programmed to work with Liftmaster openers. However, ensure the universal remote specifically lists Liftmaster compatibility. Follow the universal remote’s instructions while using your Liftmaster’s Learn button.
Q: What should I do if my remote stops working after programming?
A: First, check the battery strength. If batteries are good, try reprogramming the remote. If problems persist, there may be signal interference or a malfunction requiring professional service.
Q: Is it safe to program my garage door opener myself?
A: Yes, programming your garage door opener is completely safe when you follow manufacturer instructions. Always ensure the garage door area is clear of people and objects before testing.
Q: How often should I reprogram my garage door opener?
A: While not required regularly, consider reprogramming annually for security purposes, or immediately if you lose a remote or move into a new home. This ensures only authorized users have access.
Q: Can weather affect my garage door opener’s programming?
A: Extreme temperatures can affect battery performance and signal transmission. If programming fails in very cold or hot weather, try again when temperatures are moderate, or replace batteries with fresh ones designed for extreme conditions.
Conclusion
Learning how do I program a Liftmaster garage door opener doesn’t have to be complicated or stressful. With the right knowledge and step-by-step guidance, you can successfully program your remote, keypad, or smart device in just minutes. Remember to prioritize security by regularly updating codes and keeping your remotes safe.
By following this comprehensive guide, you’ve gained the confidence to handle programming tasks independently, saving time and money on service calls. Share this helpful guide with friends and family who might be struggling with their garage door openers, and don’t forget to bookmark this page for future reference.
Did this guide help you successfully program your Liftmaster garage door opener? Share your experience in the comments below or share this article on social media to help others!
Leave a Reply