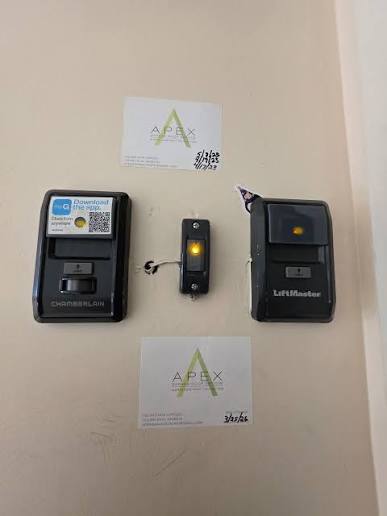
Introduction
Dealing with a garage door that will not open unless I hold the button can be incredibly frustrating, especially when you are running late or carrying heavy groceries. You are not alone in this; this specific behavior is actually a built-in safety feature triggered by modern garage door openers. Let us walk through the simple, step-by-step solutions to diagnose and fix this issue so your door runs smoothly and safely again.
Why Does My Garage Door Only Work When I Hold the Button?
When your garage door requires you to hold the wall button to operate, it has entered what professionals call “constant pressure mode.” This is not a random glitch. It is a mandatory safety protocol designed to prevent the door from closing or opening automatically if the system detects a potential hazard.
According to the Consumer Product Safety Commission (CPSC), tens of thousands of garage door-related injuries occur annually, which is why strict safety standards (like UL 325) mandate these automatic reversal and constant-pressure features. When the opener’s logic board senses an obstruction, misaligned photo-eye sensors, or incorrect travel limits, it disables the automatic function. By forcing you to hold the button, the system ensures you are actively monitoring the door’s movement and can stop it instantly if something goes wrong.
Top 3 Causes and Step-by-Step Fixes
1. Misaligned or Dirty Safety Sensors (Photo-Eyes)
The most common culprit is the safety sensor system. These small devices sit near the floor on both sides of the garage door track. If their infrared beam is interrupted, the door will refuse to operate normally.
Step-by-Step Fix:
- Locate the sensors: Find the two small plastic units mounted exactly 6 inches above the garage floor on each track.
- Check the LED lights: Look at the indicator lights. A solid green or amber light means they are aligned. A blinking or off light indicates a problem.
- Clean the lenses: Use a clean, dry microfiber cloth to gently wipe away any dust, cobwebs, or mud from the sensor lenses.
- Realign the brackets: Loosen the wing nut on the sensor bracket. Gently adjust the sensor until the LED light turns solid. Tighten the wing nut securely.
2. Obstructed or Damaged Roller Tracks
If the door meets physical resistance while moving, the opener’s motor will detect increased amperage (strain) and reverse direction or require constant pressure to override the safety clutch.
Step-by-Step Fix:
- Disconnect the opener: Pull the red emergency release cord to disengage the door from the motor.
- Inspect the tracks: Manually lift the door halfway. Look for dents, debris, or hardened grease inside the metal tracks.
- Clear and lubricate: Remove any debris with a brush. Apply a silicone-based garage door lubricant (not WD-40) to the rollers and tracks.
- Fix minor bends: If you spot a slight bend in the metal track, use a rubber mallet to gently tap it back into a straight alignment.
3. Incorrect Travel Limit Settings
Your garage door opener has “travel limit” screws that tell the motor exactly when to stop moving up or down. If the “down” limit is set too far, the door thinks it is hitting the ground (an obstruction) and reverses or demands constant pressure.
Step-by-Step Fix:
- Locate the limit screws: On the back or side of the motor unit, find two small plastic screws, usually labeled “Up” and “Down” with arrows.
- Adjust the down limit: Using a flathead screwdriver, turn the “Down” limit screw exactly 1/4 turn counterclockwise. This reduces the distance the door travels downward.
- Test the door: Re-engage the opener and press the wall button. If it still requires holding, adjust another 1/4 turn counterclockwise and test again.
Safety Sensor vs. Travel Limit: A Quick Comparison
To help you diagnose faster, here is a quick text-based infographic comparing the two most frequent causes:
| Feature | Safety Sensor Issue | Travel Limit Issue |
|---|---|---|
| Primary Symptom | Door reverses immediately or motor lights blink. | Door goes down, hits the floor, then reverses. |
| Wall Button LED | Often blinks rapidly when you try to close. | Usually remains solid, but door behaves erratically. |
| Physical Check | Check for blinking lights at floor level. | Check limit screws on the main motor unit. |
| Fix Difficulty | Easy (Cleaning and realigning). | Moderate (Requires precise screw adjustments). |
Expert Tip: When to Call a Professional
While DIY troubleshooting resolves about 85% of these issues, some problems require professional intervention. Understanding the history and mechanics of a garage door opener can help you appreciate why these safety features are non-negotiable and why certain repairs are dangerous.
Warning: If you suspect a broken torsion spring (the heavy spring above the door), do not attempt a DIY repair. Torsion springs are under extreme tension and can cause severe injury or property damage if mishandled. Always call a certified garage door technician for spring replacements or major motor board failures.
Frequently Asked Questions (FAQ)
Q1: Why does my garage door only close when I hold the wall button?
A: This happens because the opener’s safety system has detected a fault—most commonly misaligned photo-eye sensors or an incorrect travel limit. Holding the button overrides the automatic safety check, allowing you to manually guide the door while monitoring for obstructions.
Q2: Can a weak remote battery cause the garage door to require holding the button?
A: No. A weak remote battery will simply prevent the remote from sending a signal at all. The “hold to operate” behavior is triggered by the wall button or the motor unit’s internal safety diagnostics, not the remote’s battery strength.
Q3: How do I reset my garage door opener after fixing the sensors?
A: After realigning the sensors, unplug the garage door opener from the wall outlet for 30 seconds. Plug it back in to reset the logic board. Then, test the door using the wall button to ensure it operates automatically without needing to be held.
Q4: Is it safe to bypass the safety sensors to make the door close?
A: Absolutely not. Bypassing the safety sensors removes a critical protection mechanism designed to prevent the door from crushing people, pets, or objects. It is also a violation of federal safety regulations (UL 325) and can void your homeowner’s insurance in the event of an accident.
Conclusion
Fixing a garage door that will not open unless you hold the button is usually a straightforward process. By checking the safety sensors, clearing the tracks, and adjusting the travel limits, you can restore your door’s automatic functionality in under 30 minutes. Remember, these safety features exist to protect your family and property, so never ignore or bypass them.
Did this guide help you get your garage door back on track? Share this article on Facebook, Twitter, or Pinterest to help a friend or family member who might be struggling with the same frustrating garage door issue!
Note: Always prioritize safety. If you are ever unsure about a repair, consult a licensed garage door professional.
Leave a Reply