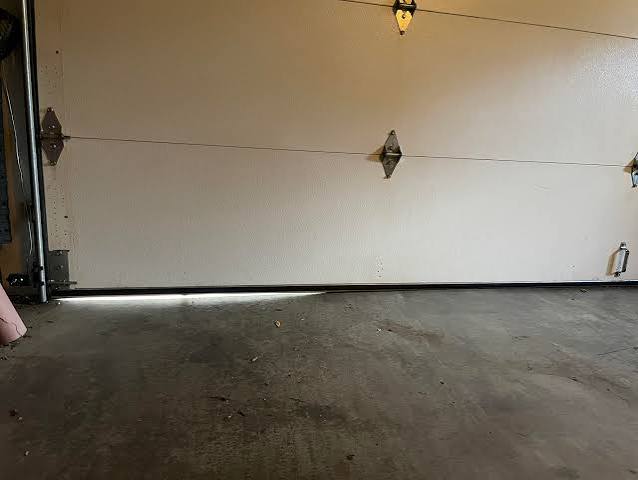
Introduction
There is nothing quite as frustrating as watching your garage door descend smoothly, only to hit the floor and immediately reverse direction. It leaves you stranded, confused, and potentially locked out of your own home. If you are dealing with a situation where your garage door gets to bottom then goes back up, you are not alone; this is one of the most common safety feature triggers in modern openers.
In this guide, we will walk you through the exact reasons why this happens and provide step-by-step solutions to fix it. Whether it’s a simple sensor misalignment or a mechanical obstruction, we will help you diagnose and resolve the issue safely and efficiently.
Understanding the Safety Mechanism
Before diving into repairs, it is crucial to understand why your door behaves this way. Modern garage door openers, manufactured after 1993, are required by federal law in the United States to have two primary safety features: photo-eye sensors and auto-reverse mechanisms.
When the door touches the ground and reverses, the opener’s logic board believes it has hit an obstruction—like a car, a pet, or a person. This is a protective measure designed to prevent injury or damage. However, when this happens without an actual obstacle present, it indicates a malfunction in the system’s perception of “clearance.”
According to safety standards outlined by regulatory bodies, these sensors must be aligned within a fraction of an inch to function correctly. A slight deviation can cause the system to falsely detect an object in the path, triggering the immediate reversal you are experiencing. For more detailed technical specifications on garage door safety standards, you can refer to Wikipedia’s entry on Garage Door Openers.
1. Check and Clean the Photo-Eye Sensors
The most frequent culprit behind a door that reverses upon touching the ground is the photo-eye sensor system. These small devices are located near the bottom of the garage door tracks on both sides. One sends an invisible beam of light, and the other receives it. If the beam is broken, the door stops and reverses.
Step-by-Step Sensor Inspection:
- Visual Inspection: Look at the sensors on both sides of the door. Are they blinking? Typically, one sensor will have a steady green light (power), and the other will have a steady amber or red light (beam received). If the receiving sensor is blinking or off, the beam is blocked.
- Clean the Lenses: Use a soft, dry microfiber cloth to wipe the lenses. Dust, spiderwebs, or mud can obstruct the infrared beam.
- Check Alignment: Stand behind the sensors and look down the track. They must be pointing directly at each other. If one is tilted even slightly upward or downward, the beam will miss the receiver.
- Tighten the Brackets: Sometimes, vibrations from the door moving can loosen the wing nuts holding the sensors. Gently tighten them while ensuring the alignment remains perfect.
Pro Tip: If the sun is shining directly into the sensor lens during the day, it can overwhelm the infrared receiver. Try closing the door at a different time of day to see if the problem persists. If it only happens in bright sunlight, you may need to install a shade or hood over the sensors.
2. Adjust the Down Limit Setting
If your sensors are clean and aligned, the issue likely lies with the “down limit” setting. This setting tells the motor how far to travel before it considers the door “closed.” If this setting is incorrect, the motor may continue to push the door into the ground after it has already sealed, causing the motor to strain and trigger the safety reverse.
How to Adjust the Limit Screws:
Most older openers have two plastic screws labeled “Up” and “Down” on the motor unit. Newer models may use digital buttons or a smartphone app.
- Locate the Adjustment Screws: On the side of the motor housing, find the screw marked “Down” or “Close.”
- Make Small Adjustments: Turn the screw in small increments (usually clockwise to increase travel, counter-clockwise to decrease, but check your manual).
- Test the Door: Close the door. It should touch the ground firmly but not press into it with excessive force.
- The Paper Test: Place a sheet of paper under the door when it is closed. You should be able to pull the paper out with slight resistance. If you cannot pull it out, the door is pressing too hard. If it slides out easily, the door isn’t sealing properly.
| Adjustment Direction | Effect on Door |
|---|---|
| Clockwise (Typical) | Increases travel distance (Door goes lower) |
| Counter-Clockwise (Typical) | Decreases travel distance (Door stops higher) |
Note: Always consult your specific opener’s manual, as rotation directions can vary by brand.
3. Inspect the Tracks and Rollers
Physical obstructions in the track can cause the door to bind. When the door binds, the motor detects increased resistance (torque) and assumes it has hit an object, triggering the reverse mechanism.
What to Look For:
- Debris: Check the tracks for rocks, sticks, or hardened grease. Clean them out with a brush and a rag.
- Dents or Bends: Look closely at the metal tracks. Even a small dent can disrupt the smooth movement of the rollers. If you find a dent, you may need to gently hammer it out or replace the section of the track.
- Loose Hardware: Tighten all bolts and brackets securing the tracks to the wall and ceiling. Loose tracks can shift out of alignment, causing friction.
4. Evaluate the Force Settings
If the limit settings are correct but the door still reverses, the “force” setting might be too low. The force setting determines how much power the motor uses to move the door. If it is set too low, the natural weight of the door or minor friction can be interpreted as an obstruction.
Adjusting Force Sensitivity:
- Find the “Force” or “Power” adjustment screws on the motor unit.
- Increase the down-force setting slightly. Do not max it out; just increase it by a small notch.
- Test the door again.
- Safety Warning: After increasing force, you must test the auto-reverse feature. Place a 2×4 piece of wood flat on the ground under the center of the door. Close the door. It should stop and reverse upon hitting the wood. If it does not reverse, the force is too high and poses a safety risk. Reduce the force immediately.
5. Check for Weather Seal Interference
Sometimes, the problem is not mechanical but environmental. If you have recently installed new weather stripping along the bottom of the door, it might be too thick or compressed incorrectly.
When the door closes, the new seal creates significant resistance against the concrete floor. The motor senses this sudden increase in drag and reverses.
Solution:
- Inspect the rubber seal at the bottom of the door.
- Ensure it is not bunched up or folded under.
- If the seal is brand new, it may need a few days to break in. Alternatively, you can slightly adjust the down limit to account for the added thickness of the new seal.
FAQ Section
Q: Why does my garage door reverse only when it’s hot outside?
A: Heat can cause metal tracks to expand slightly, leading to tighter fits and increased friction. Additionally, extreme heat can affect the sensitivity of electronic components in the opener. Ensure your tracks are lubricated and check sensor alignment, as heat haze can sometimes interfere with infrared beams.
Q: Can a weak battery in the remote cause the door to reverse?
A: No, a weak remote battery will typically cause the door not to respond at all or respond intermittently. It will not cause the door to reverse after touching the ground. The reversal is triggered by the motor unit’s internal sensors and logic board, not the remote signal.
Q: How often should I lubricate my garage door?
A: It is recommended to lubricate the moving parts of your garage door, including rollers, hinges, and springs, at least twice a year. Use a silicone-based lubricant or lithium grease. Avoid WD-40 as it is a cleaner, not a long-term lubricant, and can attract dust.
Q: Is it dangerous to adjust the spring tension myself?
A: Yes, it is extremely dangerous. Garage door springs are under high tension and can cause severe injury or death if they snap or slip during adjustment. Always leave spring adjustments to certified professionals. The adjustments discussed in this article (limits, force, sensors) are safe for homeowners to perform.
Q: My door reverses before it even touches the ground. What’s wrong?
A: If the door reverses mid-air, the issue is likely with the photo-eye sensors being misaligned or blocked, or the force setting is too sensitive. It could also indicate a broken spring that is making the door too heavy for the motor to lift smoothly. Check the sensors first.
Conclusion
Dealing with a garage door gets to bottom then goes back up issue can be stressful, but it is rarely a catastrophic failure. In most cases, the problem stems from simple maintenance oversights like dirty sensors, misaligned tracks, or incorrect limit settings. By following the steps outlined above, you can restore your garage door’s functionality and ensure your home remains secure.
Remember, safety is paramount. Always test the auto-reverse feature after making any adjustments to force or limit settings. If you have tried these solutions and the problem persists, or if you suspect a broken spring or cable, it is time to call a professional technician.
Did this guide help you fix your garage door? Share this article with friends and family who might be struggling with similar issues, and let us know in the comments which solution worked for you!
Leave a Reply