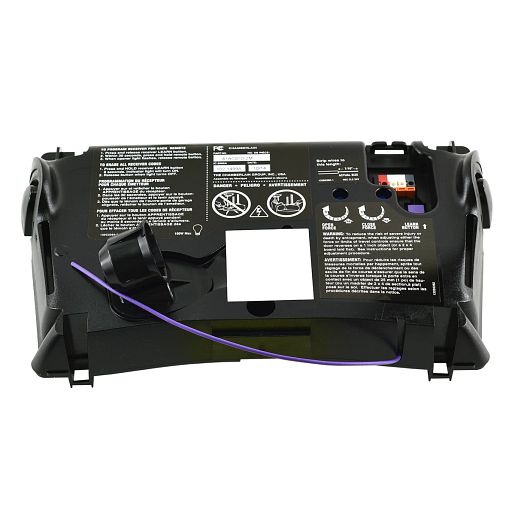
Your Craftsman 1/2 HP Garage Door Opener Manual 41AC150-1M: Everything You Need to Know
Is your Craftsman garage door opener acting up, or did you just unbox a new unit and feel overwhelmed by the setup? You’re not alone — thousands of homeowners search for the Craftsman 1/2 HP garage door opener manual 41AC150-1M every month because finding clear, reliable instructions can be surprisingly frustrating. Whether you need help with installation, programming your remote, or diagnosing a blinking LED light, this comprehensive guide walks you through everything step by step so you can get back to smooth, worry-free operation.
What Is the Craftsman 1/2 HP Garage Door Opener Model 41AC150-1M?
The Craftsman 1/2 HP garage door opener model 41AC150-1M is a chain-drive residential garage door opener that has been one of the most popular units sold through Sears and affiliated retailers. The “1/2 HP” designation refers to its motor power, which is well-suited for standard single-car and lightweight double-car garage doors weighing up to approximately 350 pounds.
This model typically features:
- Chain-drive mechanism for durable, reliable lifting power
- Security+ rolling code technology to prevent code grabbing
- Two pre-programmed remotes included in most packages
- Wall-mounted control panel with lock and light buttons
- Auto-reverse safety sensors compliant with federal safety standards (UL 325)
According to industry data from the Door & Access Systems Manufacturers Association (DASMA), chain-drive openers like this one account for roughly 60% of all residential garage door opener installations in the United States due to their balance of affordability and longevity.
If you want to understand more about how garage door openers work mechanically, Wikipedia’s article on garage door openers provides an excellent technical overview of the various drive systems available.
How to Install Your Craftsman 1/2 HP Garage Door Opener (Step-by-Step)
Proper installation is critical for both safety and performance. Below is a simplified walkthrough based on the official Craftsman 1/2 HP garage door opener manual 41AC150-1M. Always refer to the printed manual that came with your unit for exact specifications.
Step 1: Gather Your Tools and Materials
Before you begin, make sure you have the following items ready:
- Stepladder (minimum 6 feet)
- Power drill with 3/16″ and 1/4″ bits
- Adjustable wrench set
- Phillips and flathead screwdrivers
- Measuring tape
- Level
- Pencil for marking
- Locking pliers (Vise-Grips)
Step 2: Assemble the Rail and Trolley
- Lay out all rail sections on a clean, flat surface such as your garage floor.
- Connect the rail sections using the provided bolts and nuts — tighten to 15–20 ft-lbs of torque.
- Slide the trolley assembly onto the rail before securing the final section.
- Attach the idler pulley at the front end of the rail.
Step 3: Mount the Header Bracket
- Measure the center point of your garage door opening.
- Mark a spot on the header wall 2–4 inches above the highest point of the door travel.
- Secure the header bracket using two 5/16″ × 2″ lag screws driven into solid wood framing. Do not mount into drywall alone.
Step 4: Hang the Motor Unit
- With a helper, lift the motor unit and attach it to the mounting bracket on the ceiling.
- Use the provided 3/8″ × 2-1/2″ carriage bolts and secure tightly.
- Ensure the motor hangs level — use a torpedo level to verify within ±1/8 inch over 2 feet.
Step 5: Connect the Rail to the Motor and Header
- Attach the rear of the rail to the motor output sprocket.
- Connect the front of the rail to the header bracket.
- Install the chain and adjust tension so there is approximately 1/4 to 1/2 inch of slack at the midpoint.
Step 6: Install Safety Sensors
- Mount the sending and receiving sensors on each side of the door, no higher than 6 inches above the floor.
- Align them so the indicator LEDs glow steadily (green on the receiving sensor, amber on the sending sensor).
- Run the low-voltage wires along the wall and connect them to the motor unit terminals marked “Sensor.”
Step 7: Program Remotes and Test
- Press and hold the “Learn” button on the back of the motor unit for approximately 1 second until the LED illuminates.
- Within 30 seconds, press the button on your remote control. The motor unit light should blink to confirm pairing.
- Test the door’s full open and close cycle. Verify that the auto-reverse engages when an object breaks the sensor beam.
Pro Tip: If your door reverses before fully closing, adjust the “Down Limit” screw on the motor unit in quarter-turn increments clockwise to increase travel distance.
Troubleshooting Common Problems with the 41AC150-1M
Even reliable openers encounter issues. Here are the most frequent problems homeowners face and exactly how to fix them.
Problem 1: Door Won’t Open or Close
| Possible Cause | Solution |
|---|---|
| Power outage or tripped breaker | Check your electrical panel; reset if needed |
| Disconnected emergency release cord | Pull the red cord toward the motor to re-engage |
| Broken torsion spring | Do not attempt DIY repair — call a professional |
| Misaligned safety sensors | Realign sensors until both LEDs glow steadily |
Problem 2: Remote Control Not Working
- Replace the remote battery (typically a CR2032 coin cell).
- Reprogram the remote using the Learn button procedure described above.
- Ensure you are within 50 feet of the motor unit with no major metal obstructions.
Problem 3: Motor Runs but Door Doesn’t Move
This usually indicates a stripped gear or broken chain link. Inspect the nylon drive gear inside the motor housing. If teeth appear worn or flattened, the gear assembly needs replacement — a common wear item after 7–10 years of regular use.
Problem 4: Excessive Noise During Operation
Chain-drive openers are inherently louder than belt-drive models, but unusual grinding or rattling suggests:
- Loose hardware on the rail brackets (tighten all bolts)
- Insufficient lubrication on the chain (apply white lithium grease sparingly)
- Worn rollers on the garage door itself (replace nylon rollers every 5–7 years)
Maintenance Schedule for Long-Term Performance
Keeping your Craftsman 1/2 HP garage door opener 41AC150-1M in top shape doesn’t require much effort. Follow this simple maintenance calendar:
- Monthly: Visually inspect safety sensor alignment and test the auto-reverse feature by placing a 2×4 board on the floor under the door.
- Every 6 months: Lubricate the chain, hinges, and rollers with a silicone-based spray. Avoid WD-40, which attracts dust and degrades over time.
- Annually: Tighten all mounting hardware, check the door balance by disconnecting the opener and manually lifting the door halfway — it should stay in place without drifting.
- Every 3–5 years: Have a certified technician inspect the torsion springs and cables for fatigue.
A well-maintained garage door opener can last 15–20 years, according to consumer durability reports from leading home improvement organizations.
Pros and Cons of the Craftsman 1/2 HP 41AC150-1M
| Pros | Cons |
|---|---|
| Affordable price point compared to premium brands | Chain drive produces more noise than belt-drive alternatives |
| Widely available replacement parts | 1/2 HP may struggle with heavy wooden double-car doors |
| Simple DIY installation for experienced homeowners | Limited smart-home integration without add-on modules |
| Proven reliability over decades of production | No built-in battery backup in base configuration |
| Security+ rolling code prevents unauthorized access | Older units may lack Wi-Fi connectivity |
Frequently Asked Questions (FAQ)
Q1: Where can I download the Craftsman 1/2 HP garage door opener manual 41AC150-1M PDF?
You can find the official PDF by visiting the Craftsman support website or searching the model number on Sears PartsDirect. Many third-party manual repositories also host scanned copies. Always verify that the document matches your exact model number — 41AC150-1M — as similar models may have different wiring diagrams and limit adjustment procedures.
Q2: How do I reset my Craftsman 41AC150-1M garage door opener?
To perform a full factory reset, press and hold the Learn button on the motor unit for approximately 10 seconds until the LED turns off. This erases all programmed remotes and keypads. You will then need to reprogram each device individually using the Learn button sequence outlined earlier in this guide.
Q3: Can I use a universal remote with the Craftsman 41AC150-1M?
Yes, most universal garage door remotes are compatible as long as they support Security+ rolling code technology operating at 390 MHz. Check the packaging of the universal remote for compatibility listings. Popular options include Chamberlain and LiftMaster universal remotes, since Craftsman openers share the same internal platform as these brands.
Q4: Why does my garage door opener light blink 5 times?
A five-blink diagnostic code on the 41AC150-1M typically indicates a sensor obstruction or misalignment issue. Check that nothing is blocking the infrared beam between the two safety sensors near the floor. Clean the sensor lenses with a soft cloth and realign them until both indicator lights remain solid. If the problem persists, inspect the sensor wiring for cuts or loose connections at the motor terminal block.
Q5: How much weight can the 1/2 HP motor handle?
The 1/2 HP motor on this model is rated for garage doors weighing up to approximately 350 pounds. This covers most standard single-car steel doors and lightweight double-car doors. If your door is heavier — such as a solid wood carriage-style door — consider upgrading to a 3/4 HP or 1 HP model to avoid premature motor burnout.
Q6: Is the Craftsman 41AC150-1M still in production?
This specific model has been discontinued and replaced by newer Craftsman and Chamberlain equivalents. However, replacement parts including circuit boards, gears, remotes, and safety sensors remain widely available through authorized parts distributors and online marketplaces.
Final Thoughts
Your Craftsman 1/2 HP garage door opener manual 41AC150-1M is more than just a dusty booklet in a drawer — it’s the key to safe, efficient, and long-lasting garage door operation. From proper installation and remote programming to troubleshooting blinking lights and scheduling routine maintenance, the steps outlined in this guide should empower you to handle most situations confidently without calling a technician.
Remember, a little preventive care goes a long way. Take 10 minutes this weekend to test your safety sensors and lubricate the chain — your future self will thank you on a cold January morning when the door opens smoothly on the first try.
Found this guide helpful? Share it with friends, family, or neighbors who might be struggling with their own Craftsman garage door opener! Drop a link on Facebook, Twitter/X, or Pinterest and help someone else save time and money today. 🔧🏠
Leave a Reply