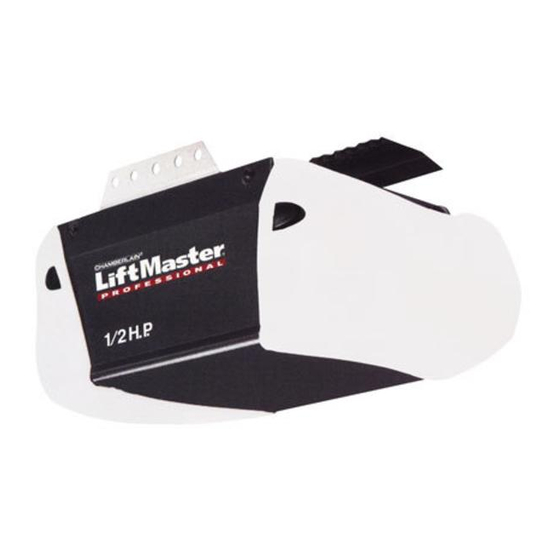
Have you ever stood in your driveway, remote in hand, wondering why your garage door won’t budge? Or perhaps you’ve just installed a new opener and feel overwhelmed by the wiring diagram? You’re not alone. Thousands of homeowners search for the Chamberlain Liftmaster Professional 1/2 HP garage door opener manual every month, seeking clear instructions to fix, program, or maintain their systems. This guide cuts through the confusion, offering expert-backed advice to get your garage door running smoothly again.
Why Do You Need the Official Manual?
The Chamberlain Liftmaster Professional 1/2 HP garage door opener manual is more than just a booklet—it’s your roadmap to safety, efficiency, and longevity. According to the Consumer Product Safety Commission (CPSC), improper installation or maintenance of garage door openers contributes to thousands of injuries annually. The manual provides critical safety warnings, torque specifications, and wiring diagrams that generic online videos often miss.
Without it, you risk:
- Voiding your warranty by using incompatible parts.
- Misaligning sensors, leading to security vulnerabilities.
- Overloading the motor, causing premature failure.
For authoritative technical standards on garage door safety, refer to Wikipedia’s overview of garage door openers, which highlights the industry-wide importance of following manufacturer guidelines.
How to Download the Correct Manual for Your Model
Not all “Professional 1/2 HP” models are identical. Chamberlain and LiftMaster (which are part of the same corporate family) have released dozens of variants over the years. Using the wrong manual can lead to incorrect programming steps.
Step-by-Step Guide to Finding Your Model Number
- Locate the Label: Look for a sticker on the back or side of the motor unit. It’s often near the light lens or on the rear panel.
- Identify the Code: The model number usually starts with letters like “WD,” “LC,” or “8500.” For example, WD832KEV or 8500W.
- Visit the Official Support Site: Go to the Chamberlain or LiftMaster support page.
- Enter the Model Number: Use the search bar to find your specific PDF manual.
Pro Tip: If the label is faded, take a photo with your phone’s flash. Sometimes, adjusting the contrast in a photo editor can reveal hidden numbers.
Common Issues Solved by the Manual
Users often turn to the Chamberlain Liftmaster Professional 1/2 HP garage door opener manual when facing specific operational hurdles. Here are the most frequent problems and how the manual helps resolve them.
1. Remote Control Not Working
If your remote fails to open the door, the manual provides the exact sequence for reprogramming. Unlike generic advice, the official guide specifies whether your model uses DIP switches or a “Learn” button.
- DIP Switch Models: Older units require matching tiny switches inside the remote and the motor.
- Learn Button Models: Newer units use a rolling code system. The manual will tell you if you need to press the button once or hold it for six seconds to clear old codes.
2. Door Reverses Before Closing
This is a safety feature triggered by misaligned sensors or incorrect force settings. The manual includes a calibration chart for the 1/2 HP motor, ensuring you don’t set the force too high (dangerous) or too low (inconvenient).
3. Noisy Operation
A grinding noise often indicates worn gears. The manual identifies whether your model uses a nylon gear (quieter) or a steel gear (durable but louder). It also provides lubrication points—never use WD-40 on the chain; instead, use white lithium grease as specified.
Installation Tips for DIY Enthusiasts
Installing a Chamberlain Liftmaster Professional 1/2 HP garage door opener can save you hundreds of dollars, but precision is key. The manual outlines a typical installation time of 3–5 hours for a first-timer.
Essential Tools Checklist
- Adjustable wrenches (1/2 inch and 9/16 inch)
- Socket set
- Stepladder (6-foot minimum)
- Drill with bits
- Level
Critical Safety Steps
- Disconnect Power: Always unplug the unit before working on wiring.
- Secure the Door: Use C-clamps to lock the door in place while installing the rail.
- Check Balance: Manually lift the door halfway. If it doesn’t stay put, your springs are unbalanced. Do not proceed—call a professional, as spring tension can cause severe injury.
| Feature | Benefit | Consideration |
|---|---|---|
| 1/2 HP Motor | Ideal for single-car doors | May struggle with heavy wooden doors |
| Belt Drive | Quiet operation | Higher cost than chain drive |
| Chain Drive | Durable and affordable | Noisier during operation |
Maintenance Schedule for Longevity
Even the best Chamberlain Liftmaster Professional 1/2 HP garage door opener needs regular care. Following the manual’s maintenance schedule can extend its life from 10 to 15 years.
- Monthly: Test the auto-reverse feature by placing a 2×4 block of wood on the floor. The door should reverse immediately upon contact.
- Quarterly: Lubricate the chain, rollers, and hinges with silicone-based spray.
- Annually: Tighten all hardware bolts. Vibration from daily use can loosen them over time.
FAQ Section
Q1: Can I use a universal remote with my Chamberlain Liftmaster Professional 1/2 HP opener?
Yes, but compatibility depends on the frequency. Most modern Chamberlain/LiftMaster units use 315 MHz or 390 MHz. Check your manual for the specific frequency. Universal remotes must be programmed using the “Learn” button method described in your specific model’s guide.
Q2: Why does my garage door opener hum but not move?
This usually indicates a locked motor or a broken gear. If the light turns on but the door doesn’t move, inspect the gear assembly. The manual provides instructions for replacing the main drive gear, a common wear item in 1/2 HP models after 7–10 years.
Q3: How do I reset the keypad code?
To reset the wireless keypad, locate the “Learn” button on the motor unit. Press and release it, then enter your new PIN on the keypad within 30 seconds. The manual specifies the exact timing, which varies between older and newer models.
Q4: Is a 1/2 HP opener powerful enough for a double-car garage?
For standard aluminum or steel double-car doors, a 1/2 HP motor is sufficient. However, if you have insulated or solid wood doors, consider upgrading to a 3/4 HP model. The manual includes a weight capacity chart to help you decide.
Q5: What does the blinking light mean?
A blinking LED on the wall console or motor unit indicates an error code. Count the blinks (e.g., 3 blinks, pause, 3 blinks) and refer to the “Troubleshooting” section of your Chamberlain Liftmaster Professional 1/2 HP garage door opener manual. Common codes relate to sensor alignment or travel limit issues.
Conclusion
Finding and using the correct Chamberlain Liftmaster Professional 1/2 HP garage door opener manual is the smartest step you can take for your home’s safety and convenience. Whether you’re troubleshooting a stubborn remote, installing a new unit, or performing routine maintenance, the official guide provides the precise details that generic advice lacks. By following these expert tips, you’ll ensure your garage door operates quietly, safely, and reliably for years to come.
Did this guide help you solve your garage door issue? Share it with your neighbors on Facebook or Twitter to help them avoid the hassle of guesswork!
Leave a Reply