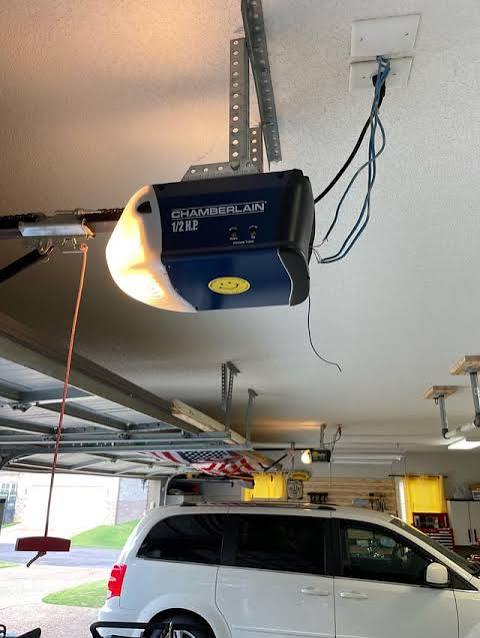
Dealing with a garage door that refuses to close is incredibly frustrating, especially when you are rushing to leave for work or expecting a delivery. If your Chamberlain garage door opener will open but not close, you are not alone—this is a very common issue usually caused by misaligned safety sensors or incorrect limit settings. In this comprehensive guide, we will walk you through the exact, step-by-step process to diagnose and fix the problem safely and efficiently.
Why Does My Chamberlain Garage Door Opener Will Open But Not Close?
When your Chamberlain garage door opener will open but not close, it is almost always a built-in safety feature doing its job. Modern garage doors are equipped with an automatic reverse mechanism designed to prevent accidents. If the system detects even a slight obstruction, misalignment, or excessive resistance, it will immediately abort the closing sequence and reverse the door back up.
According to the Consumer Product Safety Commission, thousands of garage door-related injuries occur every year, which is why these safety protocols are strictly enforced by manufacturers. The system relies on three primary components to determine if it is safe to close: the photoelectric safety sensors, the travel limit switches, and the force settings. If any of these are out of calibration, the door will refuse to close.
How Do You Troubleshoot and Fix the Safety Sensors?
The most frequent culprit behind this issue is a pair of photoelectric sensors located near the bottom of the door tracks. These sensors shoot an invisible infrared beam across the doorway. If the beam is broken or misaligned, the door will not close.
Here is the step-by-step process to fix them:
- Check the LED Indicator Lights: Look at the two sensor units on either side of the door. One should have a steady amber (or yellow) light, and the other should have a steady green light. If the green light is blinking or completely off, the sensors are misaligned or blocked.
- Clean the Lenses: Use a clean, dry microfiber cloth to gently wipe the small plastic lenses. Even a thin layer of dust, cobwebs, or dried mud can block the infrared beam.
- Check for Sunlight Interference: Direct sunlight can sometimes overwhelm the sensor receiver. If your garage faces east or west, the afternoon sun might be blinding the sensor. Try shading the sensor with a piece of cardboard to see if the door closes.
- Realign the Brackets: Loosen the wing nut on the misaligned sensor. Gently adjust the bracket until the green LED light turns solid and stays on. Ensure the sensors are exactly 6 inches above the ground and perfectly parallel to each other. Tighten the wing nut securely.
- Inspect the Wiring: Trace the thin wires from the sensors back to the motor head. Look for any staples that might have pierced the wire or loose connections at the back of the motor unit.
Note: For more technical background on how these mechanisms evolved, you can read about the history and mechanics of a garage door opener on Wikipedia.
How to Inspect and Lubricate the Door Tracks and Rollers
Before adjusting the motor settings, you must ensure the door itself moves freely. If the metal tracks are dirty or the rollers are damaged, the door will experience excessive friction. The opener’s force sensors will detect this drag and reverse the door to prevent damage.
- Visual Inspection: Look along the metal tracks on both sides. Check for dents, crimps, or misalignments. The tracks must be perfectly parallel.
- Clean the Tracks: Wipe the inside of the tracks with a rag soaked in rubbing alcohol to remove old, sticky grease and debris.
- Check the Rollers: Inspect the nylon or steel rollers for chips, cracks, or flat spots. If you find damaged rollers, they must be replaced immediately.
- Lubricate Properly: Spray a high-quality, silicone-based garage door lubricant onto the rollers, hinges, and the inside of the tracks. Never use standard WD-40, as it is a degreaser, not a long-term lubricant, and will attract more dirt.
How to Adjust the Travel Limit and Force Settings?
If your sensors are perfectly aligned with solid lights, and the tracks are clean, but the door still won’t close, the issue likely lies with the travel limit or force settings on the motor’s logic board. The travel limit tells the motor exactly how far to move the door down before it stops.
Follow these concrete steps to adjust the down limit:
- Locate the Limit Adjustment Screws: Open the light lens cover on the motor unit. Look for two small, plastic adjustment screws on the back or side of the unit. They are usually labeled “Down Limit” and “Up Limit.”
- Adjust the Down Limit: Using a small flathead screwdriver, turn the “Down Limit” screw clockwise by exactly one-quarter turn (about 15 degrees). This will instruct the motor to travel slightly further down.
- Test the Door: Press the wall button to close the door. If it still reverses before touching the floor, turn the screw another quarter-turn clockwise.
- Adjust the Down Force: If the door touches the floor but immediately bounces back up, the down force setting is too low. Locate the “Down Force” dial or screw. Turn it clockwise by a small increment (usually marked in numbers or arrows) to increase the pushing power.
- Perform the Safety Reverse Test: This is crucial. Place a standard 2×4 piece of wood flat on the ground under the center of the door. Close the door. When the door touches the wood, it must immediately reverse. If it does not reverse, the force is set dangerously high, and you must turn the down force dial counterclockwise to reduce it.
DIY vs. Professional Repair: Pros and Cons
When your Chamberlain garage door opener will open but not close, you have to decide whether to tackle the fix yourself or call an expert. Here is a quick comparison to help you decide.
| Feature | DIY Troubleshooting | Professional Repair Service |
|---|---|---|
| Cost | $0 (Free, using basic household tools) | $100 – $300 (Depending on parts and labor) |
| Time Required | 30 – 60 minutes for basic sensor/limit fixes | 1 – 2 hours (Includes scheduling and travel) |
| Skill Level | Beginner to Intermediate | Expert (Certified technicians) |
| Safety Risk | Low (if avoiding springs and cables) | None (Professionals handle high-tension parts) |
| Warranty | Void if you damage internal components | Includes a 1-year warranty on parts and labor |
| Best For… | Sensor alignment, limit adjustments, cleaning | Broken springs, stripped gears, logic board failure |
What Are the Signs of a Stripped Gear or Bad Logic Board?
Sometimes, the issue is internal. Chamberlain openers use a plastic drive gear that can wear out over time. If you hear the motor humming loudly but the door does not move, or if the motor light flashes five times, the RPM sensor or logic board might be faulty.
According to industry data from the International Door Association, over 70% of garage door service calls are related to spring replacement or internal opener gear failures. If you notice a grinding noise coming directly from the motor housing, the internal plastic gears are likely stripped. Replacing these gears requires disassembling the motor head and dealing with high-tension components. If you are not comfortable with mechanical repairs, this is the exact moment you should call a certified technician.
Frequently Asked Questions
Q1: Why does my Chamberlain garage door reverse immediately after touching the floor? This happens because the “down force” setting is too low, or the door tracks are binding. When the door hits the floor, the resistance spikes. If the motor doesn’t have enough force setting to push through that slight resistance, it interprets it as an obstruction and reverses. Clean your tracks with a degreaser and adjust the down force dial slightly clockwise.
Q2: How do I know if my garage door safety sensors are completely broken? If the LED lights on both sensor units are completely dark, even after checking the wiring connections at the motor head, the sensors are likely dead. You can test them by swapping the wires on the back of the motor. If the lights still do not turn on, you will need to purchase a replacement sensor kit compatible with your specific Chamberlain model.
Q3: Can extreme weather affect my Chamberlain garage door opener? Yes, absolutely. Extreme cold can cause the lubricant on the door’s metal tracks and rollers to thicken, creating excessive resistance. This extra drag can trick the opener’s force settings into thinking there is an obstruction. During winter, apply a silicone-based garage door lubricant to the rollers and hinges, and avoid using WD-40, which can attract dirt and freeze.
Q4: How often should I perform maintenance on my garage door opener? You should perform a basic visual inspection and safety reverse test every month. A comprehensive maintenance routine—including cleaning the sensor lenses, lubricating the moving parts, and tightening hardware—should be done at least twice a year, ideally in the spring and fall, to ensure optimal performance and longevity.
Q5: Is there a way to bypass the sensors to close the door in an emergency? Yes, most Chamberlain models have a “force close” feature. If you hold down the wall button continuously, the opener will bypass the sensor beam and force the door to close. However, you must keep holding the button until the door completely shuts. This should only be used as a temporary emergency workaround while you wait to fix the actual sensor issue.
Conclusion
Fixing an issue where your Chamberlain garage door opener will open but not close is usually a straightforward process of elimination. By systematically checking the safety sensors, cleaning the tracks, adjusting the travel limits, and testing the force settings, you can restore full functionality to your garage door in less than an hour. Regular maintenance not only saves you money on professional service calls but also ensures your family’s safety.
If you found this guide helpful and managed to get your door working again, please share this article on your favorite social media platforms or send it to a friend who might be struggling with the same issue. Your support helps us create more helpful, expert-backed home repair guides!
Leave a Reply