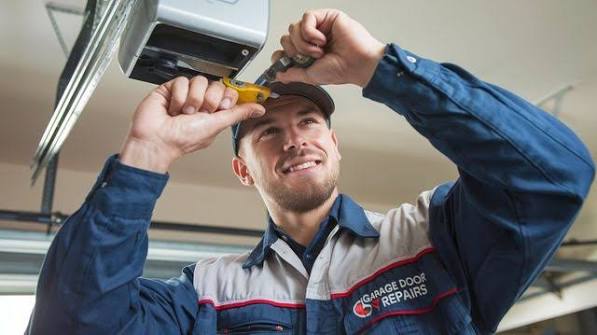
Have you ever stood in your driveway, remote in hand, watching your garage door refuse to budge? It is a frustrating scenario that disrupts your daily routine and leaves you wondering about the next steps. Many homeowners immediately ask, “Can I replace or repair a garage door motor myself?” to save money and time. While the urge to tackle this project is understandable, the answer involves more than just technical skill—it requires a deep respect for safety and mechanical complexity.
Understanding the Risks: Is DIY Garage Door Repair Safe?
Before you reach for your toolbox, it is crucial to understand what you are dealing with. A garage door opener (often mistakenly called a motor) is part of a larger system that includes high-tension springs, heavy panels, and complex electronics.
The primary danger does not usually come from the motor itself, but from the torsion springs that counterbalance the door’s weight. These springs are under extreme tension. If they snap or are handled incorrectly, they can cause severe injury or even death. According to industry experts, garage door springs are responsible for the majority of serious injuries in home maintenance projects.
However, if your issue is strictly electrical or related to the opener unit’s settings, the risk profile changes. Replacing the opener unit after the door has been properly balanced and disconnected from the opener is a moderate-difficulty DIY task. But repairing the internal gears of an existing motor? That is rarely recommended for amateurs.
Key Takeaway: If the problem involves springs, cables, or the door’s physical movement, call a professional. If the door moves smoothly by hand but the opener fails to activate it, you may have a viable DIY candidate.
Diagnosing the Problem: Motor vs. Opener Unit
One common misconception is terminology. Most people say “garage door motor,” but technically, you are likely dealing with a garage door opener. The motor is just one component inside the opener unit.
To determine if you can handle the repair, you must diagnose the specific failure:
- The Door Won’t Move at All: Check if the emergency release cord has been pulled. Try lifting the door manually. If it is extremely heavy, the issue is with the springs, not the motor. Do not attempt this yourself.
- The Motor Hums but Doesn’t Move: This often indicates stripped plastic gears inside the opener unit. While some enthusiasts replace these gears, it is labor-intensive and often cheaper to replace the entire unit.
- The Motor Runs, but the Door Doesn’t Move: The carriage (the part that attaches to the door) may have disconnected, or the drive belt/chain has broken. This is a manageable DIY fix.
- Intermittent Operation: This is usually a sensor alignment issue or a faulty wall button. These are easy, safe fixes for any homeowner.
For a deeper understanding of how these mechanisms work, you can refer to the general principles of garage door openers on Wikipedia, which outlines the evolution from chain-drive to modern belt-drive systems.
Cost Comparison: DIY vs. Professional Service
Money is often the biggest motivator for DIY projects. Let’s break down the financial implications to help you decide if the effort is worth the savings.
| Expense Category | DIY Approach | Professional Service |
|---|---|---|
| Parts Cost | $150 – $400 (New Opener Unit) | Included in service fee |
| Labor Cost | $0 (Your Time) | $100 – $200 per hour |
| Tools Required | Basic toolkit, ladder, wrenches | Professional-grade equipment |
| Warranty | Manufacturer warranty only | Labor + Parts warranty (1-2 years) |
| Risk Factor | High (Potential for injury/error) | Low (Insured and trained) |
| Total Estimated Cost | $150 – $400 | $300 – $600+ |
While DIY can save you roughly $150–$200, consider the value of your time and the potential cost of fixing mistakes. If you strip a bolt or misalign the sensors, you may end up calling a pro anyway, paying for both the service call and the parts.
Step-by-Step Guide: How to Replace a Garage Door Opener
If you have diagnosed the issue as a faulty opener unit and your door is balanced, here is how you can safely replace it. Note: This guide assumes you are replacing the entire unit, not repairing internal components.
Step 1: Gather Your Tools and Safety Gear
You will need:
- A sturdy stepladder
- Adjustable wrenches and socket set
- Screwdrivers (Phillips and flathead)
- Pliers
- A helper (highly recommended for holding the unit)
- Safety glasses
Step 2: Disconnect Power and Release the Door
Unplug the existing opener from the electrical outlet. Pull the emergency release cord (usually a red rope) to disconnect the door from the opener carriage. Manually lift the door to ensure it moves smoothly and stays open. If it falls, stop immediately and call a professional.
Step 3: Remove the Old Opener
With a helper supporting the weight of the old unit, unbolt it from the ceiling bracket. Disconnect the wiring from the wall button and safety sensors. Carefully lower the unit and remove the rail assembly if it is not reusable.
Step 4: Install the New Rail and Mounting Bracket
Assemble the new rail according to the manufacturer’s instructions. Attach the header bracket to the wall above the garage door. Ensure it is level and securely anchored into studs or solid wood.
Step 5: Hang the Opener Unit
Lift the new motor unit onto the ceiling mounting brackets. Bolt it securely. Attach the rail to the header bracket. Tip: Use a level to ensure the rail is perfectly straight; misalignment causes premature wear.
Step 6: Connect the Carriage and Wiring
Attach the carriage to the door’s J-arm. Connect the wall control panel and safety sensors. Follow the color-coded wiring diagram provided in your manual meticulously. Incorrect wiring can bypass safety features, creating a hazard.
Step 7: Program and Test
Plug in the unit. Program the remote controls and keypad. Test the safety reversal feature by placing a 2×4 piece of wood on the floor where the door closes. The door should reverse immediately upon contact. Adjust the force and travel limits as needed using the unit’s adjustment screws.
When to Call a Professional: Red Flags You Shouldn’t Ignore
Even if you are handy, certain scenarios demand professional intervention. Ignoring these red flags can void warranties or lead to dangerous situations.
- Broken Springs: As mentioned, torsion springs are lethal if mishandled. Never attempt to replace or adjust them without specialized training and tools.
- Damaged Cables: Frayed or snapped cables are under high tension. They can whip back with significant force.
- Electrical Issues: If you notice burning smells, sparking, or frequent circuit breaker trips, there may be a wiring issue in your home’s electrical system. Consult a licensed electrician.
- Old or Obsolete Models: If your opener is over 15 years old, parts may be unavailable. A professional can recommend a modern, secure model with Wi-Fi connectivity and battery backup.
Frequently Asked Questions (FAQ)
1. Can I repair the internal gears of my garage door opener?
Technically, yes, but it is rarely cost-effective. Most modern openers use plastic gears designed to wear out before the motor burns out. Buying a gear kit costs $20–$40, but the labor is intensive. Given that a new opener costs $150+, most experts recommend replacing the entire unit for reliability and updated safety features.
2. How long does it take to replace a garage door opener myself?
For a first-time DIYer, expect the process to take 3 to 5 hours. This includes removing the old unit, assembling the new one, wiring, and troubleshooting. With experience, it can be done in under 2 hours. Always allocate more time than you think you need to avoid rushing.
3. Do I need a permit to replace my garage door opener?
In most jurisdictions in the US, you do not need a building permit to replace an existing garage door opener with a similar model. However, local codes vary. If you are moving electrical outlets or modifying the structure, check with your local building department.
4. Why does my garage door opener reverse before hitting the floor?
This is usually due to misaligned safety sensors or incorrect travel limit settings. First, check that the sensors on both sides of the door are aligned and clean. If the light on the sensor is blinking, they are misaligned. If they are solid, adjust the “down limit” screw on the motor unit slightly until the door closes fully.
5. Is it better to buy a chain-drive or belt-drive opener?
Belt-drive openers are quieter and smoother, making them ideal for garages attached to living spaces. Chain-drive openers are more durable and cheaper but significantly noisier. If your garage is detached or you don’t mind the noise, chain-drive offers better value. For most suburban homes, belt-drive is the preferred choice for comfort.
Conclusion
So, can you replace or repair a garage door motor yourself? The answer is a cautious yes—but with strict boundaries. You can safely replace the entire opener unit if you are comfortable with basic tools and follow safety protocols. However, repairing internal components or handling springs should be left to certified technicians.
By diagnosing the problem correctly, weighing the costs, and knowing your limits, you can make an informed decision that keeps your family safe and your garage functioning smoothly. If you decide to go the DIY route, take your time, read the manual thoroughly, and never compromise on safety features.
Did you find this guide helpful? Share it with your neighbors on social media who might be struggling with their own stubborn garage doors!
Leave a Reply