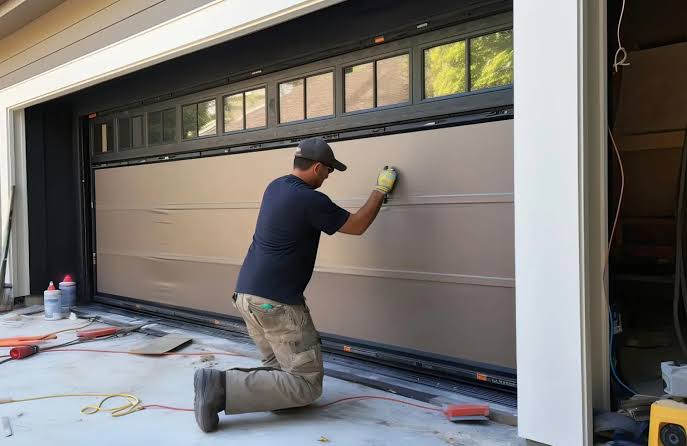
Have you ever noticed a dented or cracked section on your garage door and wondered if you need to replace the entire unit? It is a common concern for homeowners who want to maintain their home’s curb appeal without breaking the bank. The good news is that in many cases, the answer to “Can I replace one panel on my garage door?” is a resounding yes. This guide will walk you through everything you need to know about single-panel replacement, helping you save money and restore your door’s functionality.
Understanding Garage Door Panel Replacement
Before diving into the tools and steps, it is crucial to understand whether your specific garage door model supports single-panel replacement. Most modern sectional garage doors are designed with individual panels that connect via hinges and rollers. This modular design allows for targeted repairs rather than full replacements.
However, not all doors are created equal. Older models or custom-built doors might have integrated structures where replacing a single piece is nearly impossible. Additionally, if your door is over 15–20 years old, finding a matching panel can be challenging due to discontinued manufacturing lines.
According to industry standards, sectional steel, aluminum, and wood composite doors are the most likely candidates for successful single-panel swaps. If you have a one-piece tilt-up door, you will likely need a full replacement instead. For more detailed technical definitions of garage door types, you can refer to this Wikipedia overview of overhead doors.
Factors That Determine If You Can Replace Just One Panel
Several key factors influence the feasibility of replacing a single panel. Understanding these will help you make an informed decision before calling a professional or starting a DIY project.
1. Age and Availability of Parts
The age of your garage door plays a significant role. Manufacturers typically keep parts available for 10–15 years after a model is discontinued. If your door is newer, finding a matching panel is easier. For older doors, you may need to contact specialty suppliers or consider repainting the new panel to match the faded color of the existing ones.
2. Extent of Damage
Is the damage purely cosmetic, or does it affect the structural integrity? Minor dents or scratches might only require bodywork and paint. However, if the panel is cracked, bent out of shape, or compromising the seal, replacement is necessary. If the damage extends to the tracks, springs, or opener mechanism, a simple panel swap won’t suffice.
3. Type of Material
- Steel Doors: Easiest to replace. Panels are mass-produced and widely available.
- Wood Doors: More complex. Wood grain and stain matching can be difficult, and custom carpentry may be required.
- Aluminum/Fiberglass: Moderate difficulty. These materials are lightweight but can be fragile during removal.
4. Warranty Considerations
Check your manufacturer’s warranty. Some warranties become void if unauthorized repairs are performed. Conversely, some manufacturers offer partial replacement services under warranty if the damage is due to manufacturing defects rather than external impact.
Cost Comparison: Single Panel vs. Full Door Replacement
One of the primary reasons homeowners ask, “Can I replace one panel on my garage door?” is cost savings. Let’s break down the financial differences.
| Feature | Single Panel Replacement | Full Door Replacement |
|---|---|---|
| Average Cost | $250 – $800 (including labor) | $1,200 – $4,000+ |
| Time Required | 2 – 4 hours | 1 – 2 days |
| Disruption Level | Low | High |
| Aesthetic Match | May vary slightly | Perfect uniformity |
| Best For | Localized damage, newer doors | Old doors, multiple damages, upgrades |
As shown in the table, replacing a single panel can save you hundreds, if not thousands, of dollars. However, keep in mind that labor costs can vary significantly based on your location and the complexity of the job.
Step-by-Step Guide: How to Replace a Garage Door Panel
If you are handy with tools and feel confident, you can attempt this repair yourself. However, garage doors are heavy and under high tension. If you are unsure about working with torsion springs, it is highly recommended to hire a professional.
Tools You Will Need
- Socket wrench set
- Screwdrivers (flathead and Phillips)
- Pliers
- Ladder
- Assistant (highly recommended)
- New replacement panel (exact model match)
- Safety glasses and gloves
Step 1: Disconnect the Opener
Safety first. Pull the emergency release cord to disconnect the garage door from the automatic opener. Manually close the door completely. This ensures the door is stable and not under motorized tension.
Step 2: Release Tension from Springs
Warning: This is the most dangerous part. If your door uses torsion springs (located above the door), do not attempt to release them yourself unless you have specialized training and tools. For extension springs (on the sides), you can carefully unhook them using pliers. If in doubt, call a pro.
Step 3: Remove the Damaged Panel
- Locate the hinges connecting the damaged panel to the panels above and below.
- Unscrew the bolts holding the hinges in place.
- Carefully lift the damaged panel out. You may need an assistant to hold the adjacent panels steady.
- Remove any rollers attached to the damaged panel.
Step 4: Install the New Panel
- Slide the new panel into position between the adjacent panels.
- Reattach the rollers to the new panel.
- Secure the hinges using the original bolts. Ensure they are tight but not over-torqued.
- Check that the panel aligns evenly with its neighbors. Gaps should be consistent.
Step 5: Reconnect Springs and Opener
- Reattach the extension springs or have a professional reset the torsion springs.
- Manually open and close the door a few times to ensure smooth movement.
- Reconnect the automatic opener by pulling the release handle back toward the motor.
Step 6: Test and Adjust
Run the opener through a full cycle. Listen for unusual noises and watch for jerky movements. If the door operates smoothly, your repair is complete. If it binds or makes noise, check the alignment and hinge tightness again.
Common Challenges and Solutions
Even with careful planning, you might encounter issues. Here are some common problems and how to address them.
- Color Mismatch: If the new panel looks brighter than the old ones, use exterior-grade paint to blend them. Sun exposure fades older panels, so a fresh coat on the entire door might be the best aesthetic choice.
- Misalignment: If the door doesn’t sit flush, check the roller brackets. Sometimes, bending the bracket slightly can correct minor alignment issues.
- Noisy Operation: After replacement, lubricate all moving parts (rollers, hinges, springs) with a silicone-based lubricant. Avoid WD-40 as it attracts dust.
Frequently Asked Questions (FAQ)
1. Can I replace one panel on my garage door if it’s made of wood?
Yes, but it is more challenging. Wood panels often require custom fitting and staining to match the existing door. It is usually best to hire a carpenter or garage door specialist for wood door repairs to ensure a seamless look.
2. How long does it take to replace a single garage door panel?
For a professional, it typically takes 2–4 hours. For a DIYer with experience, it may take 4–6 hours, especially if you encounter alignment issues or need to source specific hardware.
3. Is it safe to replace a garage door panel myself?
It can be safe if you follow proper safety protocols, especially regarding spring tension. However, torsion springs store significant energy and can cause serious injury if mishandled. If your door has torsion springs, consider hiring a professional for that specific part of the job.
4. Will replacing one panel affect my garage door’s warranty?
It depends on the manufacturer. Some warranties cover only the original installed components. Performing a DIY repair might void the warranty on the entire system. Always check your warranty terms before starting any repair.
5. What if I can’t find a matching panel?
If an exact match is unavailable, you have two options: replace the entire door or repaint the new panel to match the existing ones. In some cases, you can replace the top panel (which is less visible) with a generic one and paint it to blend in.
6. Does insurance cover garage door panel replacement?
Homeowners insurance may cover the cost if the damage was caused by a covered peril, such as a storm, vandalism, or vehicle impact. Check your policy details and file a claim if applicable. Note that wear and tear is typically not covered.
Conclusion
So, can I replace one panel on my garage door? Absolutely. For most modern sectional doors, single-panel replacement is a viable, cost-effective solution that restores both function and appearance. By assessing the age of your door, the extent of the damage, and your comfort level with DIY repairs, you can decide whether to tackle the job yourself or call in a professional.
Remember, safety is paramount. If you are dealing with torsion springs or complex alignment issues, do not hesitate to seek expert help. A well-maintained garage door not only enhances your home’s security but also boosts its curb appeal.
If you found this guide helpful, please share it with your friends and neighbors on social media. They might be facing the same dilemma and could benefit from these tips! Have you replaced a garage door panel before? Share your experience in the comments below.
Leave a Reply