Introduction
Losing your garage door remote or moving into a new home can leave you feeling vulnerable and unsure about your property’s safety. You might be asking yourself, “Can I change the code on my garage door opener?” The good news is a resounding yes, and it is a simple, 5-minute process that instantly boosts your home’s security and gives you complete peace of mind.
Can I Change The Code On My Garage Door Opener?
Absolutely. Changing your garage door opener code is not only possible, but it is also highly recommended by security professionals. Whether you recently moved into a new house, lost a remote, or suspect someone has unauthorized access, resetting the code is your first line of defense.
Modern garage door systems are designed with user-friendly reprogramming features. Most units manufactured after 1993 utilize rolling code technology. This means the access code changes dynamically every single time you press the remote button, making it exponentially harder for thieves to intercept or clone the signal. You can learn more about the evolution of this security feature in the Wikipedia article on garage door openers.
By taking control of your opener’s settings, you eliminate the risk of previous owners or strangers gaining easy entry to your home.
Step-by-Step Guide to Reprogramming Your Garage Door Opener
Reprogramming your garage door opener is a straightforward DIY task. You do not need to be a technical expert to complete it. Follow these concrete, step-by-step instructions to reset your system safely.
Step 1: Gather Your Tools
Before you begin, ensure you have the following:
- A sturdy stepladder (to safely reach the motor unit).
- Your existing remote controls and wireless keypad.
- A fresh 9V or AA battery (depending on your remote model) to ensure a strong signal during programming.
Step 2: Locate the “Learn” Button
Climb the stepladder and look at the back or side of the garage door motor unit. The “Learn” button is typically located near the hanging antenna wire. It is usually colored yellow, purple, red, or green.
Step 3: Clear the Old Memory
Press and hold the “Learn” button for exactly 6 seconds. The indicator light next to the button will illuminate and then turn off. This action erases all previously programmed remotes and keypads from the system’s memory. Note: You will need to reprogram every remote you wish to use after this step.
Step 4: Program Your Remote Control
Within 30 seconds of clearing the memory, press and release the “Learn” button once. The indicator light will turn on or blink. Immediately press and hold the main button on your handheld remote for 3 seconds. The motor unit’s light will flash or you will hear two distinct clicks, confirming the new code is successfully saved.
Step 5: Program Your Wireless Keypad (If Applicable)
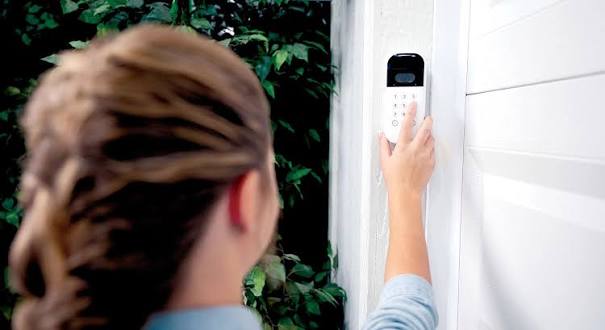
Press the “Learn” button on the motor unit again. Within 30 seconds, go to your external keypad, enter your desired new 4-digit PIN, and press the “Enter” or “Send” button. The motor light will flash, confirming the keypad is synced.
Brand-Specific Programming Nuances
While the general process is similar, major US brands have slight variations. Here is a quick reference guide to help you avoid common pitfalls.
| Brand | “Learn” Button Color | Specific Instruction Detail |
|---|---|---|
| LiftMaster | Yellow, Purple, or Red | For Security+ 2.0 models, press the button once. The light will blink. Press your remote within 30 seconds. |
| Chamberlain | Purple, Yellow, or Green | Similar to LiftMaster (same parent company). Ensure the remote battery is fresh for optimal signal transmission. |
| Genie | Purple, Red, or Green | Genie models often require you to press the “Learn” button until the LED blinks, then press the remote button twice. |
| Craftsman | Red, Purple, or Green | Older models may have DIP switches instead of a “Learn” button. Match the switches on the remote to the motor unit. |
Pros and Cons of Changing Your Garage Door Code
Before you begin, it is helpful to understand the impact of this action. Here is a quick breakdown of what to expect.
Pros:
- Enhanced Security: Immediately revokes access from lost remotes or previous homeowners.
- Cost-Effective: Saves you the $150–$300 fee of calling a professional technician.
- Peace of Mind: Knowing exactly who has access to your garage reduces anxiety.
Cons:
- Minor Inconvenience: You must reprogram every remote and keypad in your household.
- Temporary Lockout Risk: If you make an error during the 30-second programming window, you may need to repeat the process.
Expert Tips for Maximum Garage Door Security
Changing the code is just the beginning. To truly fortify your home, consider these expert-backed security practices:
- Change Your Code Annually: Security experts recommend updating your garage door PIN at least once a year, or immediately after a remote is lost.
- Avoid Obvious PINs: Never use “1234,” “0000,” or your house number as your keypad code. Choose a random, non-sequential 4-digit number.
- Enable the Vacation Lock: Many modern openers feature a “Vacation” or “Lock” button on the wall console. Pressing this disables all remote and keypad access, allowing entry only via the physical wall button.
- Maintain Your Hardware: A misaligned sensor or worn-out gear can cause the door to reverse unexpectedly, creating a vulnerability. Inspect your system every 6 months.
According to the FBI’s Uniform Crime Reporting (UCR) Program, property crimes remain a persistent issue in the United States. Simple, proactive measures like updating default access codes are proven to deter opportunistic burglars effectively.
Frequently Asked Questions (FAQ)
1. How often should I change my garage door code?
It is best practice to change your garage door code at least once a year. You should also change it immediately if you lose a remote, move into a new home, or lend your remote to someone who no longer needs access.
2. What if I forgot my current garage door code?
Do not worry. You do not need to know the old code to change it. By holding down the “Learn” button on the motor unit for 6 seconds, you will wipe the old code from the system’s memory and allow you to set a brand-new one from scratch.
3. Can someone hack my garage door opener?
Older garage door openers (pre-1993) that use fixed DIP-switch codes are vulnerable to “code grabbing” or brute-force attacks. However, modern openers with rolling code technology generate a new, encrypted code with every use, making them highly resistant to hacking.
4. Do I need to change the code on all my remotes?
Yes. When you clear the memory on the main motor unit, all previously programmed devices are erased. You will need to reprogram every handheld remote, car Homelink system, and wireless keypad you wish to continue using.
5. Will changing the code affect my Wi-Fi-connected garage door opener?
No. Changing the radio frequency (RF) code for your remotes does not affect your opener’s Wi-Fi connectivity. Your smart home app (like MyQ) will continue to function normally, as it communicates with the motor unit via your home network, not the remote RF signal.
Conclusion
So, can you change the code on your garage door opener? Yes, and you absolutely should. Taking just five minutes to reset your system is one of the most effective, cost-free ways to protect your family, your vehicles, and your belongings. By following the simple steps outlined above, you can easily revoke unauthorized access and upgrade your home’s security posture today.
Do not leave your home’s security to chance. Share this guide with your friends and family on Facebook, Twitter, or Pinterest to help them secure their garages, too! If you found this tutorial helpful, leave a comment below or bookmark this page for your next home maintenance project. Stay safe and secure!
Leave a Reply