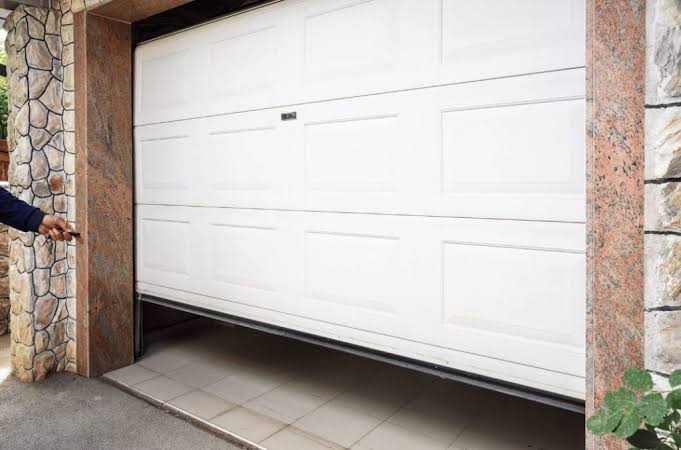
Have you ever looked at your cluttered backyard or struggled to haul gardening tools through the house, wishing for a more direct exit? You are not alone. Many homeowners find that adding a garage door to the back of the garage is the perfect solution to improve workflow, increase storage accessibility, and boost overall property value.
This modification transforms a dead-end space into a functional thoroughfare, connecting your indoor storage directly to your outdoor living area. Whether you are a DIY enthusiast or planning to hire a pro, understanding the logistics is crucial before you pick up a drill.
Why Consider a Rear Garage Door?
Before diving into the technicalities, it is essential to understand why this specific renovation is gaining popularity among US homeowners. It is not just about aesthetics; it is about functionality.
Enhanced Workflow and Accessibility
If you use your garage for workshops, gardening, or storing bulky items like lawnmowers and bicycles, a rear door eliminates the need to drag equipment through your main living space. This keeps dirt and debris out of your home and saves time.
Increased Property Value
Real estate experts often cite functional upgrades as key drivers for home value. A rear exit adds versatility to the property, appealing to buyers who enjoy outdoor activities or need extra workspace. According to recent housing trends, functional outdoor access points can significantly enhance curb appeal and usability.
Better Ventilation and Light
Adding a door, especially one with windows, can transform a dark, stuffy garage into a brighter, more airy space. This is particularly beneficial if you spend significant time working in the garage.
Key Considerations Before You Start
You cannot simply cut a hole in the wall and slap on a door. Several critical factors determine the success of this project.
1. Structural Integrity
The back wall of your garage may be load-bearing. Removing sections of it requires careful assessment. If the wall supports the roof or upper floors, you will need to install a header beam to redistribute the weight. Ignoring this can lead to catastrophic structural failure.
2. Local Building Codes and Permits
In most US municipalities, altering the exterior structure of your home requires a permit. Regulations vary by state and county. For instance, some areas have strict rules about setback distances from property lines. Always check with your local building department. For general guidelines on residential construction standards, you can refer to resources like Wikipedia’s page on Building Codes to understand the broader regulatory landscape.
3. Utility Lines
Check for electrical wiring, plumbing, or gas lines running through the back wall. Cutting into these can be dangerous and expensive to repair. Use a stud finder with wire detection capabilities before marking your cut line.
Choosing the Right Type of Garage Door
Not all garage doors are created equal. The type you choose depends on your space, budget, and intended use.
| Door Type | Pros | Cons | Best For |
|---|---|---|---|
| Sectional Door | Insulated, secure, durable | Requires overhead track space | Standard garages, climate control |
| Roll-Up Door | Space-saving, compact mechanism | Less insulation, higher cost | Small spaces, commercial look |
| Single Panel Tilt-Up | Simple mechanism, lower cost | Needs swing-out clearance | Large driveways, budget projects |
| Side-Hinged Door | Easy manual operation, classic look | Requires side clearance | Workshops, pedestrian access |
For most residential applications, a sectional door is the preferred choice due to its insulation properties and security features. However, if space is tight, a roll-up door might be the better option.
Step-by-Step Installation Guide
If you have basic carpentry skills and the right tools, you might consider a DIY approach. However, for structural changes, hiring a professional is highly recommended. Here is an overview of the process.
Step 1: Planning and Measurement
Measure the width and height of the opening you desire. Standard single-car garage doors are typically 8–9 feet wide and 7–8 feet high. Ensure you have enough headroom for the tracks and opener mechanism.
Step 2: Framing the Opening
- Mark the Cut: Use a pencil and level to mark the dimensions on the interior and exterior walls.
- Install Temporary Supports: If the wall is load-bearing, install temporary studs to support the roof while you work.
- Cut the Wall: Use a reciprocating saw to cut through the siding, sheathing, and studs. Remove the material carefully.
- Install the Header: Construct a header beam using double 2x10s or 2x12s, depending on the span. Secure it with jack studs on either side. This is the most critical structural step.
Step 3: Preparing the Opening
Frame the sides of the opening with new studs to create a rough opening that matches the manufacturer’s specifications. Typically, you add 1.5–3 inches to the door width for framing. Install weather-resistant barrier (WRB) flashing around the frame to prevent water intrusion.
Step 4: Installing the Door
- Assemble Tracks: Follow the manufacturer’s instructions to assemble the vertical and horizontal tracks.
- Mount Hinges: Attach hinges to the door panels.
- Lift and Secure: With help, lift the first panel into place. Secure the tracks to the wall framing using lag screws. Ensure everything is level and plumb.
- Install Springs and Cables: Warning: Garage door springs are under extreme tension. Incorrect handling can cause severe injury. If you are unsure, hire a professional for this step.
- Attach the Opener: Mount the motor unit to the ceiling joists and connect it to the door arm.
Step 5: Finishing Touches
Seal all gaps with caulk, install trim around the interior and exterior, and paint to match your existing garage. Test the door multiple times to ensure smooth operation and proper safety sensor alignment.
Cost Breakdown: What to Expect
Budgeting accurately prevents surprises. Here is a realistic estimate for adding a garage door to the back of the garage.
- Door Unit: $500 – $2,500 (depending on material and insulation)
- Professional Installation: $300 – $800
- Structural Modifications (Framing/Header): $500 – $1,500
- Permits: $50 – $200
- Electrical Work (for opener): $150 – $400
Total Estimated Cost: $1,500 – $5,400
Note: Prices vary significantly based on location, labor rates, and material choices.
Common Mistakes to Avoid
Even experienced DIYers can stumble. Here are pitfalls to watch out for:
- Ignoring Drainage: Ensure the ground outside slopes away from the new door to prevent water from pooling inside.
- Poor Insulation: If your garage is attached to your home, an uninsulated door can affect your home’s energy efficiency. Choose a door with an R-value of at least 8.
- Skipping the Permit: Fines for unpermitted work can exceed the cost of the permit itself. It can also complicate future home sales.
FAQ Section
1. Do I need a permit to add a garage door to the back of my garage?
Yes, in most cases. Since you are altering the structure and exterior of your home, local building departments usually require a permit. This ensures the work meets safety and zoning codes. Always check with your local authority before starting.
2. Can I install a garage door opener on a rear door?
Absolutely. Most standard garage door openers are compatible with rear installations. Ensure you have a power source nearby and that the ceiling structure can support the motor’s weight. Smart openers with Wi-Fi connectivity are popular for monitoring rear access remotely.
3. How long does it take to install a rear garage door?
For a professional team, the actual installation of the door takes 4–6 hours. However, if structural framing and electrical work are needed, the entire project can take 2–5 days. DIY projects may take longer, especially for beginners.
4. Will adding a rear garage door affect my home insurance?
Generally, no. In fact, it might lower your premium if the new door improves security. However, you should inform your insurance provider about the renovation to ensure your coverage remains accurate.
5. What is the best material for a rear garage door?
Steel is the most popular choice due to its durability, low maintenance, and affordability. Wood offers a classic look but requires more upkeep. Aluminum is lightweight and rust-resistant, making it ideal for coastal areas.
Conclusion
Adding a garage door to the back of the garage is a strategic home improvement that blends practicality with increased property value. It streamlines your daily routines, keeps your home cleaner, and opens up new possibilities for your outdoor space.
While the project involves structural considerations and potential permitting hurdles, the long-term benefits far outweigh the initial effort. Whether you choose to tackle it yourself or hire a professional, careful planning and adherence to safety standards are key.
Ready to transform your garage? Share this guide with your friends on social media who might be considering a similar renovation! Let’s help each other build smarter, more functional homes.
Leave a Reply