Introduction
There’s nothing quite as unsettling as discovering tiny droppings or hearing scratching sounds in your garage at night. Mice can squeeze through openings as small as a dime, making your garage door’s bottom gap an inviting entrance. If you’re wondering how to seal bottom of garage door from mice, you’re not alone—thousands of homeowners face this issue every year. The good news? With the right approach, you can create an impenetrable barrier that keeps these unwelcome guests where they belong: outside.
Why Mice Target Your Garage Door
Before diving into solutions, it’s crucial to understand why mice are so attracted to your garage. Garages offer the perfect storm of shelter, warmth, and potential food sources. According to the National Pest Management Association, mice can reproduce rapidly, with a single pair producing up to 60 offspring annually. This exponential growth means that addressing the problem early is essential.
The bottom of your garage door typically has a gap ranging from 1/4 inch to 1 inch, depending on the door’s age and condition. While this might seem insignificant to us, it’s a wide-open highway for mice. These rodents have flexible skeletons that allow them to compress their bodies and slip through remarkably small spaces.
Best Materials for Sealing Garage Door Bottoms
Not all sealing materials are created equal when it comes to rodent prevention. Here’s a comprehensive comparison of the most effective options:
Steel Wool vs. Rubber Weatherstripping vs. Metal Threshold Plates
| Material | Durability | Mouse Resistance | Cost | Installation Difficulty |
|---|---|---|---|---|
| Steel Wool | Medium | High (if combined) | $5-15 | Easy |
| Rubber Weatherstrip | High | Medium | $20-40 | Moderate |
| Metal Threshold | Very High | Very High | $30-80 | Moderate-Hard |
| Foam Sealant | Low-Medium | Low | $10-25 | Easy |
Steel wool remains one of the most cost-effective solutions because mice cannot chew through it. However, it rusts over time and works best when combined with other materials. Rubber weatherstripping provides excellent flexibility and weather resistance but may need replacement every 2-3 years. Metal threshold plates offer the most permanent solution, though they require more effort to install properly.
For optimal results, consider using a combination approach: steel wool packed into gaps, topped with rubber weatherstripping for weather protection, and reinforced with metal plates in high-traffic areas.
Step-by-Step Guide: How to Seal Bottom of Garage Door From Mice
Follow these detailed steps to create a mouse-proof barrier:
Step 1: Clean and Inspect the Area
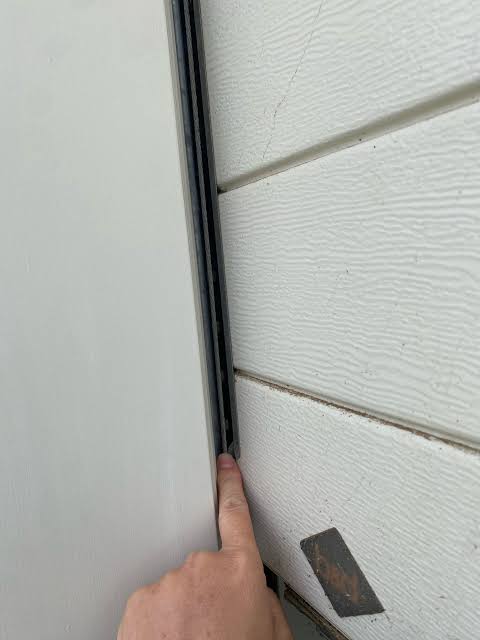
Begin by thoroughly cleaning the bottom edge of your garage door and the concrete floor beneath it. Remove any debris, old sealant, or rust using a wire brush and vacuum cleaner. Pay special attention to corners where the door meets the side tracks, as these are common entry points.
Measure the gap between the door bottom and the floor at multiple points. Most gaps should be consistent, but older doors may have uneven spacing. Note any measurements exceeding 1/4 inch, as these require extra attention.
Step 2: Choose Your Primary Sealing Method
For most homeowners, installing a heavy-duty rubber weatherstrip provides the best balance of effectiveness and ease. Purchase a weatherstrip specifically designed for garage doors, typically available in 10-20 foot lengths. Look for products rated for extreme temperatures if you live in areas with harsh winters or hot summers.
Cut the weatherstrip to match your garage door’s width, leaving an extra inch on each end for adjustment. Many quality weatherstrips come with pre-drilled holes or adhesive backing for easier installation.
Step 3: Install the Weatherstrip
If your weatherstrip uses screws:
- Hold the strip against the bottom of the door
- Mark screw hole positions every 6-8 inches
- Pre-drill holes to prevent wood splitting
- Secure with stainless steel screws (rust-resistant)
For adhesive-backed strips:
- Clean the surface with rubbing alcohol
- Allow to dry completely
- Peel backing and press firmly along the entire length
- Use a roller or firm pressure to ensure proper adhesion
Step 4: Reinforce Vulnerable Areas
Pack steel wool into any remaining gaps, particularly where the door meets the side jambs. Use coarse-grade steel wool (#3 or #4) for better durability. Compress it tightly into openings, then cover with caulk or additional weatherstripping for a finished look.
Consider installing metal threshold plates at the door’s center and edges if you notice significant wear or larger gaps. These L-shaped aluminum or steel pieces bolt directly to the floor and create an additional physical barrier.
Step 5: Test and Adjust
Close your garage door slowly and inspect the seal from both inside and outside. Look for any light penetration or visible gaps. Run your hand along the bottom edge to feel for air movement. Make adjustments as needed, ensuring the door still opens and closes smoothly without excessive resistance.
Common Mistakes to Avoid
Many homeowners make critical errors when attempting to seal their garage doors. Understanding these pitfalls can save you time and money:
- Using only foam sealant: While convenient, expanding foam alone won’t stop determined mice. They can easily chew through it within days.
- Ignoring side gaps: Focusing solely on the bottom while neglecting the sides creates alternative entry points.
- Choosing cheap materials: Low-quality weatherstripping deteriorates quickly, requiring frequent replacement.
- Over-tightening the seal: Creating too much friction can damage your garage door opener or cause premature wear on moving parts.
According to Wikipedia’s article on pest control, integrated pest management combining physical barriers with sanitation practices yields the best long-term results.
Maintenance Tips for Long-Lasting Protection
Sealing your garage door isn’t a one-time task. Regular maintenance ensures continued effectiveness:
Monthly Checks: Inspect the weatherstrip for tears, compression, or detachment. Look for signs of mouse activity such as droppings or gnaw marks.
Seasonal Maintenance: Before winter and summer extremes, clean the seal and apply silicone lubricant to rubber components to prevent cracking. Replace any damaged sections immediately.
Annual Replacement Plan: Even high-quality weatherstripping typically lasts 2-3 years. Mark your calendar for annual inspections and budget for replacements as needed.
FAQ Section
Q: Can mice really chew through rubber weatherstripping?
A: Yes, mice can eventually chew through standard rubber, though it takes them longer than foam or plastic. Using reinforced rubber with embedded metal fibers or combining rubber with steel wool significantly increases resistance. Heavy-duty commercial-grade weatherstripping offers better protection than basic residential products.
Q: How often should I replace my garage door seal?
A: Quality garage door seals typically last 2-3 years under normal conditions. However, inspect them every 6 months for wear, cracking, or compression. Replace immediately if you notice gaps, tears, or if mice have compromised the seal. Harsh weather conditions may require more frequent replacement.
Q: Will sealing the garage door affect its operation?
A: Properly installed seals should not interfere with normal door operation. The weatherstrip should create contact with the floor without creating excessive drag. If your door struggles to close or the opener strains, the seal may be too thick or improperly aligned. Adjust or replace with a thinner profile if necessary.
Q: Are there natural repellents that work alongside physical barriers?
A: While peppermint oil, ultrasonic devices, and other natural repellents show some deterrent effect, they shouldn’t replace physical barriers. Studies indicate these methods work best as supplementary measures. Physical exclusion through proper sealing remains the most reliable long-term solution for preventing mouse entry.
Q: What if I already have mice in my garage?
A: Seal entry points first to prevent new mice from entering, then address the existing population using traps or professional pest control services. Sealing while mice are still inside can trap them, causing damage as they desperately try to escape. Wait until you’re confident all mice have been removed before completing the final sealing steps.
Q: Is professional installation worth the cost?
A: For standard garage doors, DIY installation is straightforward and cost-effective. However, consider professional help if you have unusual door configurations, significant structural issues, or if previous DIY attempts failed. Professional installation typically costs $150-300 but ensures proper fit and may include warranties on materials and labor.
Conclusion
Learning how to seal bottom of garage door from mice is an investment in your home’s integrity and your peace of mind. By combining quality materials like rubber weatherstripping, steel wool, and metal thresholds with proper installation techniques, you create a formidable barrier against rodent intrusion. Remember that consistency matters—regular inspection and maintenance ensure your defenses remain strong year after year.
Don’t let mice claim your garage as their territory. Take action today using the methods outlined above, and share this guide with friends and neighbors who might be facing similar challenges. Together, we can keep our homes rodent-free!
Found this helpful? Share it on social media to help others protect their garages from unwanted mouse visitors!
Leave a Reply