Introduction
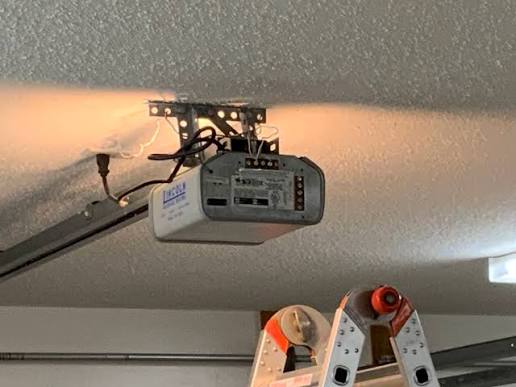
There are few things more frustrating than a burnt-out bulb in your garage, especially when the plastic lens seems impossible to open. If you are searching for how to remove light cover from Chamberlain garage door opener, you are likely dealing with a stubborn tab or simply want to avoid cracking the aged plastic. This guide provides safe, model-specific instructions to help you replace your bulb without damaging the unit or voiding your warranty.
Understanding Your Chamberlain Light Lens Type
Before grabbing a screwdriver, it is vital to identify which generation of opener you own. Chamberlain has manufactured garage door openers for decades, and the mechanism for accessing the light bulb varies significantly between models. Misidentifying the latch type is the most common cause of broken lenses.
Generally, Chamberlain openers fall into three categories regarding light cover removal:
- Snap-On Lenses (Newer Models): Common in belt-drive and newer chain-drive units (e.g., B970, C450). These use flexible plastic tabs that require compression rather than prying.
- Screw-Secured Lenses (Older/Industrial Models): Found on legacy LiftMaster/Chamberlain units. These feature one or two visible Phillips-head screws holding the diffuser in place.
- Slide-Out Trays (Commercial/Heavy Duty): Rare in residential settings but present in some high-lift models where the entire light assembly slides out.
Expert Insight: According to product documentation archived by Wikipedia, Chamberlain’s design philosophy shifted in the mid-2010s toward tool-less maintenance to reduce service calls. Identifying whether your unit predates or postdates this shift will save you significant time.
Safety First: Pre-Removal Checklist
Working with electrical fixtures requires caution. Even though you are only changing a bulb, the proximity to the motor capacitor and wiring harness demands respect.
- Disconnect Power: Unplug the opener from the ceiling outlet or turn off the dedicated circuit breaker. Do not rely solely on the wall button.
- Allow Cooling: LED bulbs run cool, but incandescent bulbs can reach temperatures exceeding 200°F. Wait at least 15 minutes after last use.
- Secure Your Ladder: Ensure your stepladder is on flat ground and fully locked. Never stand on the top rung while applying force to a ceiling-mounted unit.
- Wear Eye Protection: Aged polycarbonate lenses can become brittle and shatter unexpectedly when pressure is applied.
Step-by-Step: How To Remove Snap-On Light Covers
This method applies to the majority of modern Chamberlain residential openers. The goal is to flex the tab, not break it.
Step 1: Locate the Release Tab
Stand directly under the opener. Look at the side of the light lens closest to the front of the garage (the side facing the door opening). You should see a textured grip area or a small indentation labeled “Push” or marked with an arrow.
Step 2: Apply Inward Pressure
Place your thumb firmly on the release tab. Push inward toward the center of the opener housing. You must compress the internal spring clip.
- Critical Detail: Do not pull down yet. Pulling before compressing will snap the retention tab.
Step 3: Pivot Downward
While maintaining inward pressure, gently pivot the bottom edge of the lens downward. The lens should swing open like a hinge, revealing the bulb socket.
Step 4: Replace and Re-engage
Swap the bulb (see specifications below). To close, align the top hinge tabs first, then push the bottom edge up until you hear a distinct audible click. If it does not click, the lens is not secured and may vibrate loose during door operation.
Step-by-Step: Removing Screw-Secured Lenses
If your unit lacks a push-tab, it likely uses fasteners.
- Identify Fasteners: Inspect the perimeter of the lens for Phillips #2 screws. Some models hide these under decorative caps.
- Support the Lens: Hold the lens with one hand to prevent it from falling when the screw is removed.
- Loosen Completely: Remove the screw(s) and set them in a magnetic tray. Never leave screws partially threaded; they can fall into the motor housing.
- Detach Hinge Pins: Older models often have metal hinge pins on the opposite side of the screw. Slide the lens laterally to disengage these pins after unscrewing.
Choosing the Correct Replacement Bulb
Using the wrong bulb is a leading cause of premature lens discoloration and opener malfunction. Chamberlain openers have specific wattage and vibration tolerances.
| Bulb Type | Max Wattage | Vibration Resistant? | Recommended For |
|---|---|---|---|
| Incandescent A19 | 60W | No | Legacy models only |
| CFL Rough Service | 14W (60W eq) | Yes | Budget replacements |
| LED Garage Door Specific | 8W (60W eq) | Yes | All modern units |
| Smart Wi-Fi Bulb | Varies | No | Not recommended |
Warning: Avoid using standard household LEDs. Many emit RF interference that disrupts the opener’s logic board and remote range. Always select bulbs explicitly labeled “Garage Door Opener Compatible” or those listed in your Chamberlain manual.
Troubleshooting Stuck or Brittle Lenses
Plastic degrades over time due to heat cycles and UV exposure. If your lens refuses to budge:
- Apply Gentle Heat: Use a hairdryer on low setting for 30–45 seconds to soften brittle plastic. Never use a heat gun.
- Use a Plastic Pry Tool: Insert a nylon spudger into the seam to distribute pressure evenly. Metal screwdrivers will gouge the housing.
- Check for Paint Buildup: Previous owners may have painted over the seam. Score the paint line with a utility knife before attempting removal.
- Order a Replacement: If the lens cracks, do not operate the opener without a cover. Exposed bulbs pose a fire risk if debris contacts the hot surface. Replacement part numbers are typically printed inside the lens frame.
FAQ: Common Questions About Chamberlain Light Covers
Q1: Why won’t my Chamberlain light cover snap back into place?
The retention tabs are likely bent outward from previous forced removals. Gently bend the internal metal or plastic clips back toward the center using needle-nose pliers. Alternatively, the lens itself may be warped from heat; if so, replacement is the only permanent fix.
Q2: Can I upgrade to LED bulbs in my old Chamberlain opener?
Yes, but verify compatibility first. Some pre-2015 models have dimmer circuits incompatible with LED drivers, causing flickering. Check your manual or test with a single “opener-safe” LED before converting all sockets.
Q3: How often should I clean the light lens?
Every 6–12 months. Dust accumulation reduces light output by up to 30% and traps heat. Wipe with a microfiber cloth and mild soap solution. Avoid ammonia-based cleaners, which cloud polycarbonate.
Q4: Is it normal for the light cover to feel warm?
Slight warmth is expected with incandescent bulbs. However, if the lens is hot to the touch or shows brown scorch marks, immediately disconnect power. This indicates either excessive wattage or a failing socket/wiring issue requiring professional inspection.
Q5: Does removing the light cover void my warranty?
No. Routine maintenance including bulb replacement and lens cleaning is considered user-serviceable under Chamberlain’s limited warranty. Damage caused by improper tools or excessive force, however, is not covered.
Q6: My opener has two lights but only one cover opens. What gives?
Some dual-light models share a single large lens, while others have independent covers. If one side appears sealed, check for hidden screws along the center divider. Certain commercial-grade units require removing the entire light bar assembly rather than individual lenses.
Conclusion
Knowing how to remove light cover from Chamberlain garage door opener is an essential homeowner skill that ensures safety, proper illumination, and longevity of your equipment. By identifying your lens type, following the correct release mechanism, and selecting compatible bulbs, you can complete this task in under five minutes without damage. Remember: patience prevents breakage, and the right bulb prevents future headaches.
Found this guide helpful? Share it with fellow homeowners on Facebook, Pinterest, or Nextdoor who might be struggling with their garage lighting. Proper maintenance keeps our garages safe and functional—pass the knowledge forward!
Leave a Reply