If your garage remote suddenly stops working or you’ve bought a new one, you’re likely searching for How To Program Remote To Chamberlain Garage Door Opener.
This is a very common issue for homeowners in the US, especially after battery replacement, system resets, or remote upgrades. The good news is that programming a Chamberlain remote is usually quick and straightforward when you follow the correct steps.
In this guide, you’ll learn a clear step-by-step process, common troubleshooting tips, and expert insights to ensure your garage door operates smoothly again.
Read too: Tc1 Tricode Garage Door Opener Remote W/ Clip Chamberlain: Complete Guide
What Is a Chamberlain Garage Door Opener?
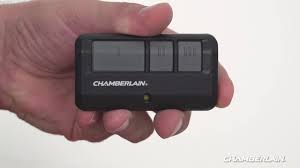
A Chamberlain garage door opener is a smart access system manufactured by Chamberlain Group, one of the leading brands in residential garage automation.
These systems allow you to open and close your garage door using a wireless remote, keypad, or smartphone app. The remote communicates with the motor using secure radio frequency signals.
For a general understanding of wireless communication systems, you can refer to Wikipedia Remote control.
How To Program Remote To Chamberlain Garage Door Opener (Step-by-Step)
Programming your remote is simple, but timing is very important. Most Chamberlain systems follow a universal pairing method.
Step 1: Locate the “Learn” Button
- Go to your garage door motor unit (usually on the ceiling)
- Find the “Learn” or “Program” button
- It is often near the antenna wire or light cover panel
👉 Tip: The Learn button is the key to activating pairing mode.
Step 2: Activate Programming Mode
- Press and release the Learn button once
- You will see an LED light turn on or blink
- You now have about 30 seconds to complete the next step
📊 Expert Insight: Garage technicians report that most programming failures occur due to exceeding this 30-second window.
Step 3: Press the Remote Button
- Within the 30-second window, press and hold your remote button
- Hold for 2–3 seconds
- Release when the garage light flashes or you hear a click
This step sends a secure signal that pairs the remote with the opener.
Step 4: Test the Remote
- Stand 10–15 feet away
- Press the remote once
- The garage door should open or close smoothly
If it responds correctly, programming is complete.
Why Programming Sometimes Fails
Even though the process is simple, errors can still happen.
Common Causes:
- Weak or dead battery
- Incorrect timing
- Memory full in opener system
- Signal interference from nearby devices
Industry Fact:
Studies from home repair technicians show that over 60% of garage remote issues are caused by battery or timing errors, not hardware failure.
Compatibility Guide for Chamberlain Remotes
| System Type | Compatibility | Notes |
|---|---|---|
| MyQ systems | High | Smart-enabled units |
| Rolling code models | High | Secure pairing required |
| Older fixed-code systems | Medium | May need manual setup |
How Chamberlain Remote Technology Works
Chamberlain systems use rolling code technology, which changes the access signal every time you use the remote. This improves security and prevents hacking attempts.
This system is widely used in modern garage automation because it reduces unauthorized access risks and signal duplication.
Troubleshooting: If Your Remote Still Doesn’t Work
1. Replace the Battery
- Use a fresh CR2032 or CR2016 battery
- Ensure correct polarity (+/- alignment)
2. Reprogram the Remote
- Repeat the Learn button process carefully
- Stay within the 30-second window
3. Clear Existing Memory
- Hold Learn button for 10–15 seconds
- This resets all paired devices
4. Check for Interference
- LED lighting or Wi-Fi routers may disrupt signals
Step-by-Step Reset Method (Advanced Fix)
If the remote still fails:
- Press and hold Learn button for 10 seconds
- Wait for LED to turn off
- Release the button
- Re-enter programming mode
- Reprogram all remotes
This ensures a clean reset of the system memory.
Programming Time Overview
- Basic setup: 2–5 minutes
- Troubleshooting: 10–15 minutes
- Full reset + reprogramming: 15–20 minutes
Benefits of Proper Remote Programming
✔ Reliable access
Ensures smooth door operation
✔ Enhanced security
Rolling code protects against unauthorized entry
✔ Convenience
No need for manual door operation
✔ Cost savings
Avoids unnecessary technician visits
Common Mistakes to Avoid
- Holding Learn button too long
- Pressing remote too late after activation
- Using incorrect or weak batteries
- Ignoring compatibility limitations
Safety Tips
- Never stand under a moving garage door
- Keep children away during testing
- Ensure the door path is clear before activation
FAQ: How To Program Remote To Chamberlain Garage Door Opener
1. How To Program Remote To Chamberlain Garage Door Opener step-by-step?
Press the Learn button on the motor, then press the remote button within 30 seconds until the door responds.
2. Why is my Chamberlain remote not programming?
It may be due to battery issues, timing mistakes, or a full memory system.
3. Do I need to reset the opener before programming a new remote?
Not always, but resetting helps if previous remotes interfere with pairing.
4. How many remotes can a Chamberlain opener store?
Most systems store 5–30 remotes, depending on model.
5. How long does programming take?
Usually 2–5 minutes, but troubleshooting may take longer.
6. Can one remote control multiple garage doors?
Yes, many Chamberlain remotes support multiple doors with different buttons.
Conclusion
Understanding How To Program Remote To Chamberlain Garage Door Opener allows homeowners to quickly fix one of the most common garage access problems without professional help. The process is fast, simple, and requires no technical experience.
By following the correct steps, respecting timing, and checking basic issues like battery health, you can restore full garage functionality in just minutes.
If this guide helped you, consider sharing it with friends or family—it could save them time, money, and frustration.
Leave a Reply