Introduction
Losing your garage door remote or buying a used Range Rover without one can be incredibly frustrating, especially when you just want to get your car safely parked at home. If you are searching for how to program Range Rover garage door opener without remote, you will be relieved to know that the built-in HomeLink system allows you to sync directly with your garage motor’s learn button. This comprehensive guide walks you through the exact process, safety precautions, and troubleshooting steps to get your vehicle connected quickly and securely.
Understanding HomeLink Technology in Range Rovers
Before diving into the programming steps, it is essential to understand what makes this possible. Range Rover vehicles (and most modern Land Rover models) come equipped with HomeLink, a universal transceiver integrated into the rearview mirror or overhead console.
According to Wikipedia, HomeLink is an automotive-based universal transceiver that can be programmed to activate radio frequency (RF) devices such as garage doors, gates, and home lighting systems. Unlike traditional remotes that store a fixed code, HomeLink acts as a cloning device or a direct learner, depending on the age of your garage door opener.
Why You Don’t Need the Original Remote
Many owners believe they must have the original handheld transmitter to program the car. This is a myth. Modern garage door openers manufactured after 1996 feature a “Learn” or “Smart” button on the motor unit itself. This button allows the motor to accept a new signal directly from your Range Rover’s HomeLink buttons, completely bypassing the need for a handheld remote.
Expert Note: Always verify your garage door opener’s manufacturing date. Units made before 1996 may use DIP switches and require a compatible external receiver adapter to work with HomeLink.
Pre-Programming Checklist: Safety and Preparation
Programming requires physical access to your garage ceiling motor. Safety and preparation are paramount.
| Preparation Step | Details |
|---|---|
| Clear the Area | Ensure no people, pets, or objects are near the garage door during programming. The door may move unexpectedly. |
| Locate the Learn Button | Find the colored button (yellow, purple, red, orange, or green) on the back or side of the overhead motor unit. |
| Check Battery Health | A weak car battery can interrupt the programming sequence. Ensure your Range Rover is running or in accessory mode with adequate voltage. |
| Identify Opener Type | Determine if your opener uses rolling-code technology (most post-1996 units) or fixed-code. Rolling-code requires a two-step process. |
| Read Vehicle Manual | Consult your specific Range Rover owner’s manual for button locations, as they vary between Evoque, Sport, Velar, and full-size models. |
Step-by-Step: How to Program Range Rover Garage Door Opener Without Remote
Follow these precise instructions. Patience is key; rushing causes failed syncs.
Step 1: Clear Previous HomeLink Memory (If Needed)
If your Range Rover was previously owned or you are reprogramming a button, clear the old codes first.
- Locate the three HomeLink buttons in your mirror or overhead console.
- Press and hold the two outer buttons simultaneously for approximately 10–20 seconds.
- Release when the indicator light changes from slow flashing to rapid flashing.
- Your HomeLink system is now reset and ready for new programming.
Step 2: Initiate Programming Mode on the Vehicle
- Turn your Range Rover’s ignition to the ON/RUN position (engine does not need to be running, but ignition must be active).
- Press and hold the desired HomeLink button you wish to program.
- Watch the indicator light above the button. It should begin to flash slowly, indicating it is in learning mode.
Step 3: Activate the Garage Door Motor’s Learn Button
This is the critical step that replaces the handheld remote.
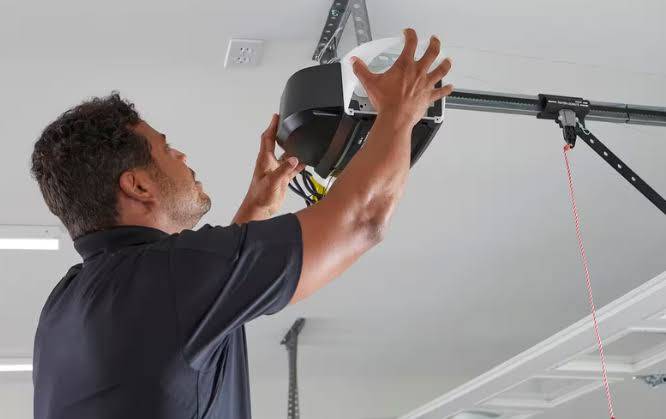
- Go to your garage door opener motor unit mounted on the ceiling.
- Press and release the “Learn” or “Smart” button. The LED next to it will typically illuminate or begin blinking.
- You now have exactly 30 seconds to complete the next step. Move quickly but calmly back to your vehicle.
Step 4: Complete the Sync from the Vehicle
- Return to your Range Rover within the 30-second window.
- Press and hold the same HomeLink button you selected in Step 2.
- Hold for 2 seconds, then release. Repeat this press-hold-release cycle up to three times.
- Watch the indicator light. When programming is successful, the light will change from slow flashing to solid illumination or rapid flashing (depending on model year).
Step 5: Test the System
Press the programmed HomeLink button once. The garage door should activate. If it responds, congratulations—you have successfully learned how to program Range Rover garage door opener without remote.
Safety Warning: Never attempt to program while the garage door is partially open or obstructed. Always ensure the path is clear before testing.
Troubleshooting Common Programming Failures
Even professionals encounter hiccups. Here are solutions to the most frequent issues:
- Light Flashes But Door Doesn’t Move: The sync may have partially completed. Repeat Steps 3 and 4, ensuring you return to the vehicle within the 30-second window.
- Indicator Light Never Changes Pattern: Your garage door opener may use rolling-code technology requiring a second confirmation step. After Step 4, press the Learn button on the motor again, then immediately press the HomeLink button twice more.
- Opener Has No Learn Button: Your unit likely predates 1996 and uses DIP switches. You will need to purchase a HomeLink Compatibility Bridge or upgrade your garage door opener.
- Intermittent Operation: Weak signal can result from LED bulbs in the opener interfering with RF transmission. Try replacing garage opener lights with incandescent bulbs temporarily to test.
- Vehicle Ignition Issue: Some Range Rover models require the engine to be running (not just accessory mode) for programming. Try starting the vehicle and repeating the process.
Rolling Code vs. Fixed Code: What’s the Difference?
Understanding this distinction prevents frustration during programming.
| Feature | Fixed Code (Pre-1996) | Rolling Code (Post-1996) |
|---|---|---|
| Security Level | Low – codes can be cloned | High – code changes each use |
| Programming Method | Clone from existing remote only | Direct learn from motor unit |
| Remote Required? | Yes (usually) | No – uses motor Learn button |
| HomeLink Compatibility | May need adapter bridge | Natively supported |
| Identification | DIP switches inside remote | Colored Learn button on motor |
Most Range Rover owners today have rolling-code openers, which is precisely why programming without a remote is not only possible but is actually the recommended method by both Land Rover and garage door manufacturers.
FAQ: Frequently Asked Questions
Q1: Can I program my Range Rover HomeLink if my garage door opener is older than 1996?
Possibly, but not directly. Older fixed-code openers typically require the original remote to clone the signal. However, you can purchase a HomeLink Compatibility Bridge that acts as an intermediary, allowing your modern Range Rover to communicate with vintage openers without the original remote.
Q2: How many devices can I program into my Range Rover’s HomeLink system?
Most Range Rover models support three programmable buttons, allowing you to store up to three separate devices (e.g., home garage, office parking gate, and community entrance). Each button operates independently and can be reprogrammed at any time.
Q3: Will programming HomeLink erase my existing programmed buttons?
Only if you perform the full factory reset (holding both outer buttons). If you are programming a single unused button, your other two buttons remain unaffected. Always double-check which button you are holding during Step 2 to avoid accidental overwrites.
Q4: My Range Rover is a 2024 model—does the process differ?
Newer Range Rover models (2022+) may feature an updated HomeLink interface accessed through the Pivi Pro infotainment touchscreen rather than physical buttons. Navigate to Settings > Vehicle > HomeLink and follow the on-screen prompts. The underlying principle—using the motor’s Learn button instead of a remote—remains identical.
Q5: Is it safe to program the garage door opener myself, or should I hire a professional?
DIY programming is completely safe and intended by the manufacturer. The only risk is accidental door movement, which is mitigated by clearing the area beforehand. Professional help is only necessary if your opener lacks a Learn button and requires hardware modification or replacement.
Q6: Why does my HomeLink work intermittently even after successful programming?
Intermittent operation is often caused by LED bulb interference in the garage door opener. Many modern LED bulbs emit RF noise that disrupts HomeLink signals. Replace the opener’s light bulbs with rough-service incandescent bulbs or RF-shielded LEDs specifically rated for garage door openers. Also, ensure your vehicle’s battery is healthy and the antenna wire on the opener motor is intact.
Conclusion
Learning how to program Range Rover garage door opener without remote empowers you to take full advantage of your vehicle’s integrated technology without relying on lost or broken handheld transmitters. By following the step-by-step process outlined above—clearing memory, activating the motor’s Learn button, and completing the sync within the critical 30-second window—you can achieve reliable, secure garage access in under five minutes.
Remember to prioritize safety, understand your opener’s technology type, and don’t hesitate to troubleshoot systematically if the first attempt doesn’t succeed. The convenience of seamless, remote-free entry is well worth the few minutes of setup.
Found this guide helpful? Share it with fellow Range Rover owners on Facebook, Twitter, or your favorite Land Rover forum! Helping others avoid the frustration of a missing remote is what our community is all about. 🚗🏡
Disclaimer: Always consult your specific Range Rover owner’s manual and garage door opener manufacturer guidelines. Procedures may vary by model year and region. This article is for informational purposes and does not replace professional automotive or electrical service.
Leave a Reply