Introduction
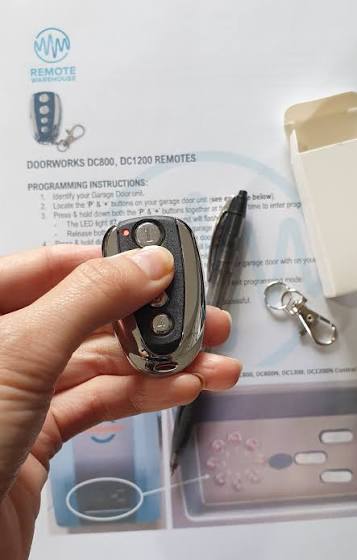
There are few things more frustrating than pulling into your driveway in the pouring rain, only to realize you cannot remember where you placed your handheld garage remote. If you have ever found yourself asking, “How to program my garage door opener with my car?” you are not alone; millions of drivers seek this convenience annually to streamline their daily entry. This comprehensive guide will walk you through the exact steps to sync your vehicle’s built-in system safely and efficiently, giving you the seamless access you deserve.
Understanding Your Vehicle’s Garage System
Before diving into buttons and lights, it is crucial to understand that not all vehicles use the same technology. Most modern cars equipped with factory-installed garage systems utilize HomeLink, a wireless control system integrated into the rearview mirror, overhead console, or visor. However, some older models or aftermarket installations may use different proprietary systems like Car2U or XpressKit.
Identifying your system type is the first step in answering “how to program my garage door opener with my car.” You can typically identify HomeLink by its distinct three-button layout and an indicator light that changes color during programming. According to automotive industry standards, over 80% of new vehicles sold in the US since 2015 come pre-equipped with HomeLink or a compatible equivalent. Knowing your specific hardware prevents wasted time attempting incompatible pairing methods.
Rolling Code vs. Fixed Code Technology
Security technology has evolved significantly. Understanding this distinction is vital for successful programming:
- Fixed Code (Older): Uses a static frequency. Easier to program but less secure. Common in openers manufactured before 1996.
- Rolling Code (Modern): Changes the access code every time the button is pressed. Requires an extra synchronization step at the garage motor unit. This is the standard for virtually all openers made after 1996.
Expert Note: Always check the manufacture date on your garage door motor. If it was made after 1996, assume it uses Rolling Code technology and follow the advanced programming steps below. Skipping this step is the #1 reason programming fails.
Preparation Checklist Before Programming
Success relies heavily on preparation. Do not skip these preliminary checks, as they account for nearly 40% of failed programming attempts according to service technician surveys.
- Check Compatibility: Visit the manufacturer’s compatibility checker online using your car’s make/model/year and your garage opener brand.
- Clear Previous Codes: If buying a used car, erase old programming to prevent conflicts. Hold the two outer buttons for 10–20 seconds until the LED flashes rapidly.
- Fresh Batteries: Ensure your handheld garage remote has fresh batteries. The car often needs to clone the signal from a working remote during the initial handshake.
- Safety Clearance: Ensure the garage door area is free of people, pets, and obstacles. The door will move during testing.
- Ladder Access: For rolling code systems, you will need safe access to the “Learn” button on the ceiling-mounted motor unit.
Step-by-Step: How To Program My Garage Door Opener With My Car
This tutorial covers the universal method for Rolling Code systems, which applies to the vast majority of US homeowners. Please read each step carefully before proceeding.
Step 1: Clear the Vehicle Memory
Sit in the driver’s seat with the ignition in the “ON” or “ACC” position (engine running is recommended to prevent battery drain). Press and hold the two outer buttons on your car’s transmitter simultaneously. Hold for approximately 10 to 20 seconds. Release when the indicator LED begins to flash rapidly. This confirms the memory is wiped and ready for new data.
Step 2: Train the Car Button
Choose which of the three buttons you wish to dedicate to your garage. Hold your original handheld remote 1–3 inches away from the car’s transmitter button. Simultaneously press and hold both the handheld remote button and the chosen car button. Watch the car’s LED closely. It will typically flash slowly, then transition to a rapid flash or solid light. This indicates the car has successfully learned the frequency. Release both buttons.
Step 3: Sync with the Garage Motor (Crucial for Rolling Code)
This is the step most users miss when researching how to program my garage door opener with my car. Within 30 seconds of completing Step 2, go to your garage ceiling motor unit. Locate the “Learn” or “Smart” button (usually yellow, orange, purple, or red). Press and release it firmly. The learn LED will illuminate or blink. Immediately return to your car and press the newly programmed button. Hold for 2 seconds, release, and repeat up to three times. The garage lights should flash or the door should activate, confirming the rolling code handshake is complete.
Step 4: Test and Verify
Press the car button once briefly. The door should respond immediately. Test from various distances (20 feet, 50 feet) to ensure reliable range. If the door hesitates or requires multiple presses, repeat Step 3, ensuring you are within the 30-second window.
Troubleshooting Common Programming Failures
Even with perfect execution, issues arise. Use this diagnostic table to resolve problems quickly:
| Symptom | Likely Cause | Recommended Solution |
|---|---|---|
| LED never flashes during training | Incompatible frequency or dead remote battery | Replace handheld remote battery; verify compatibility online |
| LED flashes but door won’t open | Rolling code sync missed or expired | Repeat Step 3 within 30 seconds; ensure “Learn” button was pressed |
| Works intermittently | Signal interference or weak battery | Check for nearby LED bulbs causing RF interference; replace car battery if low |
| Programs but stops working after days | Capacitor issue in opener or firmware bug | Reset opener logic board; consult Wikipedia’s article on Radio Frequency Interference for environmental factors |
| Only works when very close | Antenna damage or misalignment | Inspect garage opener antenna wire; ensure it hangs vertically and is not touching metal |
Safety Warning: Never attempt to reprogram while the garage door is in motion. Always wait for the door to come to a complete stop. If your opener lacks auto-reverse safety sensors (pre-1993), prioritize upgrading the unit before integrating smart features.
Alternative Methods for Older Vehicles
If your vehicle does not have HomeLink, you still have options. Universal visor clips and plug-in OBD-II garage controllers are widely available at auto parts stores. These devices essentially act as a bridge between your car’s electrical system and the garage frequency. While less seamless than factory integration, they provide similar functionality for under $30. Always verify FCC compliance when purchasing third-party transmitters to avoid illegal frequency broadcasting.
Frequently Asked Questions (FAQ)
Can I program my garage door opener without the original remote?
Yes, but the process differs. You must access the “Learn” button on the garage motor directly and put it into programming mode, then press your car’s button within the designated timeframe. Some newer smart openers also allow app-based pairing via Wi-Fi, bypassing the need for a physical remote entirely. Check your opener’s manual for “direct learn” procedures.
Why does my car’s garage button work sometimes but not others?
Intermittent operation usually stems from one of three issues: a failing car battery (the transmitter draws power even when off), radio frequency interference from nearby electronics (especially LED garage lighting), or a damaged antenna on the opener unit. Try replacing your garage light bulbs with RF-shielded versions and test again. If problems persist, have the opener’s capacitor tested by a professional.
Is it safe to program my garage door opener myself?
Absolutely, provided you follow safety protocols. Keep clear of moving parts, use a stable ladder when accessing the motor unit, and never bypass safety sensors. The programming process itself involves only low-voltage signals and poses no electrical hazard. However, if your opener shows signs of mechanical wear (frayed cables, bent tracks), address those repairs before adding automation.
How many garage doors can I program into my car?
Most HomeLink systems support three separate devices. This means you can program your primary garage, a detached workshop, and a community gate simultaneously. Each button operates independently. Some premium vehicles offer up to five programmable buttons, though three remains the industry standard. Consult your owner’s manual for your specific vehicle’s capacity.
Will programming my car affect my existing garage remotes?
No. Adding a car transmitter does not erase previously programmed handheld remotes or keypads. All devices coexist in the opener’s memory. However, if you perform a factory reset on the garage motor itself (usually by holding the Learn button for 10+ seconds), all devices will be erased and require reprogramming. Only reset the motor if you suspect unauthorized access or persistent malfunctions.
What if my car and garage opener are incompatible?
First, double-check compatibility using official databases—many perceived incompatibilities stem from user error rather than true technical mismatch. If genuinely incompatible, consider installing a HomeLink compatibility bridge (a small receiver that installs at the opener and translates signals). Alternatively, upgrading to a modern smart opener with broad vehicle support may be more cost-effective long-term, especially given current federal tax credits for energy-efficient home improvements.
Conclusion
Learning how to program my garage door opener with my car transforms a mundane daily task into a seamless experience. By understanding your system type, following the rolling code synchronization protocol precisely, and troubleshooting methodically, you can achieve reliable hands-free access in under 15 minutes. The convenience of arriving home and entering without fumbling for remotes is well worth the initial setup effort.
Remember, patience during the 30-second sync window is the single most important factor in success. If you encounter persistent issues, revisit the troubleshooting table above before calling a technician—most problems have simple DIY solutions.
Found this guide helpful? Share it with friends, family, or neighbors who are still struggling with their garage setup! Tag us on social media with your success stories, and don’t forget to bookmark this page for future reference. Safe driving and smooth entries ahead! 🚗🏠
Leave a Reply