Introduction
There is nothing quite as frustrating as fumbling for a visor clip or digging through your center console in the pouring rain just to get into your home. If you are searching for how to program my car to open my garage door, you are ready to upgrade your daily routine from clumsy to seamless. This guide will walk you through the exact steps to sync your vehicle’s built-in system with your garage opener, ensuring you enjoy hands-free convenience and enhanced security without needing a professional technician.
Understanding Your Vehicle’s Garage System
Before pressing any buttons, it is vital to identify which technology your vehicle uses. Not all cars operate on the same frequency or protocol. According to automotive industry standards, most modern vehicles utilize one of three primary systems:
- HomeLink: The most common integrated system found in over 90% of new vehicles sold in North America. It supports rolling code and fixed-code openers.
- Car2U: An older system primarily found in certain Chrysler, Dodge, and Jeep models manufactured before 2014.
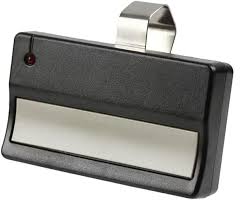
- Universal Aftermarket Remotes: Clip-on or plug-in devices for older vehicles lacking built-in transmitters.
Expert Insight: “The biggest mistake DIYers make is assuming their car is compatible with their opener without checking the frequency first. Always verify your opener’s ‘Learn’ button color and your vehicle’s manual before attempting synchronization.” — Certified Automotive Electronics Specialist
For a deeper technical understanding of radio-frequency identification and garage door protocols, you can refer to the comprehensive overview on Wikipedia.
Step-by-Step: How to Program HomeLink Systems
If your vehicle features the ubiquitous HomeLink buttons (usually located on the rearview mirror, overhead console, or visor), follow this precise tutorial. This method works for the vast majority of rolling-code garage door openers manufactured after 1996.
Phase 1: Clear Previous Codes
If you bought a used car or have never programmed these buttons, start fresh to avoid signal conflicts.
- Locate the two outer HomeLink buttons.
- Press and hold both simultaneously for 10–20 seconds.
- Release when the indicator light changes from solid amber to flashing green (or turns off completely depending on the model).
- All previous programming is now erased.
Phase 2: Train the Vehicle Button
- Turn your vehicle’s ignition to the ON/ACC position (engine does not need to be running, but accessory power must be active).
- Hold your original handheld garage remote 1–3 inches away from the HomeLink button you wish to program.
- Simultaneously press and hold the chosen HomeLink button AND the button on your handheld remote.
- Watch the HomeLink indicator light. It will flash slowly at first, then rapidly.
- Release both buttons once the light becomes solid or flashes quickly (typically takes 5–10 seconds).
Phase 3: Sync with the Garage Motor (Rolling Code Only)
This step is mandatory for modern security openers.
- Go to your garage door motor unit. Locate the “Learn” or “Smart” button (usually yellow, purple, orange, or red).
- Press and release the Learn button. You typically have 30 seconds to complete the next step.
- Return to your vehicle and press the newly programmed HomeLink button three times, holding each press for 2 seconds.
- Test the system. The door should activate. If it moves partially or lights flash without movement, repeat Phase 3.
Programming Universal and Aftermarket Remotes
Not every vehicle has HomeLink. If you are using a universal clip-on remote or an aftermarket replacement, the process differs slightly.
| Feature | HomeLink (Built-In) | Universal Aftermarket Remote |
|---|---|---|
| Power Source | Vehicle Battery | Coin Cell / 12V Adapter |
| Compatibility | Rolling & Fixed Code | Varies by Model |
| Setup Time | 5–10 Minutes | 2–5 Minutes |
| Aesthetics | Seamless/OEM Look | Visible Clip-On Device |
| Cost | Free (Included) | $25–$60 USD |
Universal Remote Instructions
- Open the battery compartment of the new remote.
- Locate the DIP switches or the “Learn” button inside the casing.
- Match the DIP switch pattern to your existing remote exactly, OR press the learn button if it is a digital universal model.
- For digital universals: Press the learn button on the remote until the LED blinks, then press the button on your old remote to clone the signal.
- Test range immediately; universal remotes sometimes require antenna extension for optimal performance.
Troubleshooting Common Programming Failures
Even professionals encounter hiccups. If you are still wondering how to program my car to open my garage door because the above steps failed, check these specific variables:
- Frequency Mismatch: Older openers use 315 MHz, while newer ones may use 390 MHz or dual-band. Verify compatibility on the manufacturer’s website.
- Battery Issues: A weak battery in your handheld remote during training can cause incomplete signal transfer. Replace it before programming.
- Ignition State: Some European vehicles require the engine to be fully running, not just in accessory mode, due to CAN-bus safety protocols.
- LED Bulb Interference: Cheap LED bulbs in garage fixtures can emit RF noise that blocks programming signals. Try turning off garage lights during sync.
- Max Memory Reached: Most motors store only 5–7 remotes. Clear the motor’s memory entirely and reprogram all devices if adding a new one fails repeatedly.
Safety First: Critical Precautions
Programming involves interacting with heavy mechanical equipment. Never bypass safety sensors or test the door while standing directly underneath it. Ensure your photo-eye sensors are aligned and clean before beginning any programming session. If your door reverses unexpectedly or makes grinding noises, stop immediately and consult a certified technician. Your safety is infinitely more valuable than convenience.
Frequently Asked Questions (FAQ)
Can I program my car to open my garage door without the original remote?
Yes, but it requires direct access to the garage motor unit. You can use the motor’s “Learn” button to put it into pairing mode, then train your car’s HomeLink button directly without an intermediary remote. However, some older fixed-code systems may require cloning from an existing remote.
Why does my HomeLink work intermittently after programming?
Intermittent operation usually indicates RF interference or a failing capacitor in the garage motor. First, replace LED bulbs with garage-door-rated LEDs. Second, check if nearby wireless devices (baby monitors, Wi-Fi routers) share the same frequency. Finally, test with a fresh battery in your handheld remote to rule out weak signal training.
Is it safe to program my car myself, or should I hire a pro?
DIY programming is completely safe and intended by manufacturers. No electrical wiring is involved during the sync process. However, if your door exhibits mechanical issues, broken springs, or misaligned tracks, hire a professional for repair before attempting programming.
Will programming my car erase other remotes stored in the garage opener?
No. Adding a new vehicle transmitter simply adds another entry to the opener’s memory bank. Existing keypads, wall consoles, and other remotes will continue functioning normally unless you manually clear the opener’s entire memory.
How do I know if my garage opener uses rolling code or fixed code?
Check the color of the “Learn” button on the motor unit. Yellow, purple, orange, and red buttons typically indicate rolling code technology (post-1996). Green or black buttons often signify older fixed-code systems. You can also check the manufacture date; anything after 1996 is likely rolling code.
Can electric vehicles like Tesla or Rivian program garage doors differently?
Many EVs integrate garage control directly into the touchscreen infotainment system rather than physical buttons. The software-based process mirrors HomeLink but requires navigating Settings > Garage Door Opener. Consult your EV’s owner app or manual for model-specific UI navigation.
Conclusion
Mastering how to program my car to open my garage door transforms a mundane daily task into a moment of effortless automation. By identifying your system type, following precise training sequences, and respecting safety protocols, you can achieve reliable hands-free access in under fifteen minutes. Remember to maintain fresh batteries in backup remotes and periodically test safety sensors to ensure long-term reliability.
Found this guide helpful? Share it with friends, family, or neighbors who are still struggling with clipped-on remotes and rainy-day fumbles! Tag us on social media with your success story, and help others discover the convenience of seamless garage integration. Your future self—and your dry clothes—will thank you.
Leave a Reply