Introduction
Is your new remote refusing to sync with your garage door? Or perhaps you’ve just installed a fresh Craftsman unit and feel overwhelmed by the manual? You are not alone. Many homeowners struggle with the initial setup, but knowing how to program Craftsman 3/4 HP garage door opener systems is simpler than it looks. With the right steps, you can regain full control of your home’s security in under ten minutes.
The 3/4 horsepower model is a workhorse for residential homes, offering enough power to lift heavy wooden or insulated doors smoothly. However, its advanced security features, such as rolling code technology, require specific programming sequences to ensure safety. This guide will walk you through every step, from locating the learn button to troubleshooting common connectivity issues, ensuring your garage operates flawlessly.
Understanding Your Craftsman 3/4 HP Model
Before pressing any buttons, it is crucial to identify the specific generation of your opener. Craftsman has produced several versions of the 3/4 HP motor over the years, and the programming method varies slightly between them. Most modern units use a “Learn” button located on the back or side of the motor head.
Older models might use DIP switches, but these are largely obsolete due to security vulnerabilities. The newer models utilize intelligent security+ 2.0 technology, which changes the access code every time you use the remote. This prevents code grabbing by thieves. Understanding this technology helps you appreciate why precise timing during programming is essential. If you miss the window, the system rejects the signal to protect your home.
Identifying the Learn Button Color
The color of the Learn button is the single most important indicator for programming instructions. Here is a quick reference table:
| Learn Button Color | Typical Protocol | Compatibility Notes |
|---|---|---|
| Yellow | Security+ (Older) | Compatible with most universal remotes from 2005–2010. |
| Purple | Security+ 2.0 | Requires specific compatible remotes; higher security. |
| Red/Orange | Legacy/Pre-2005 | Often uses DIP switches; less secure. |
| Green | Intelligent Security+ | Common in newer Chamberlain/Craftsman hybrids. |
Note: Always check the label on your motor unit for the exact model number if you are unsure.
Step-by-Step: How to Program a Remote Control
Programming a handheld remote is the most common task. Whether you have a single-button visor clip or a multi-button panel, the core process remains consistent for the 3/4 HP series. Ensure you have a sturdy ladder and good lighting before starting.
Step 1: Locate the Learn Button
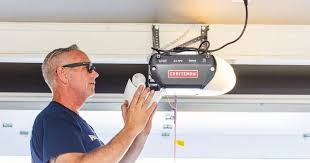
Climb your ladder and look at the back panel of the motor unit. You will see a small square button, usually labeled “Learn” or accompanied by an LED light. It is often near the antenna wire. Do not press it yet. Just identify its location and color.
Step 2: Clear Old Codes (Optional but Recommended)
If you are replacing lost remotes or suspect unauthorized access, clear the memory first. Press and hold the Learn button for about 6–10 seconds until the indicator light turns off. This erases all previously programmed remotes and keypads. Warning: You will need to reprogram every device after this step.
Step 3: Initiate Programming Mode
Press and release the Learn button once. The indicator LED will turn on or start blinking. You now have a 30-second window to complete the next step. If the light goes out before you finish, simply press the Learn button again to restart the timer.
Step 4: Sync the Remote
While the LED is active, take your remote control and press and hold the button you wish to program. Hold it for 2–3 seconds. Watch the motor unit’s LED; it should blink or flash to confirm it received the signal. Release the remote button immediately after the flash.
Step 5: Test the Connection
Step down from the ladder and press the remote button again. The garage door should activate. If it does not, repeat Steps 3 and 4, ensuring you are within 10 feet of the motor during the syncing process.
Programming a Wireless Keypad
Many homeowners prefer wireless keypads for guest access or when they forget their remote. Programming a keypad to a Craftsman 3/4 HP opener requires a slightly different approach because you must set a PIN code.
- Enter Programming Mode: Press the Learn button on the motor unit. The LED will illuminate.
- Input Your PIN: Within 30 seconds, go to your wireless keypad. Enter your desired 4-digit PIN.
- Confirm the Code: Press and hold the “Enter” or “Send” button on the keypad. Keep holding it until the motor unit’s lights blink. This may take up to 10 seconds.
- Finalize: Release the button. Test the keypad by entering the PIN and pressing Enter. The door should respond.
For added security, choose a PIN that is not easily guessable, such as your birth year or address. Avoid simple sequences like 1234 or 0000.
Troubleshooting Common Programming Issues
Even with careful following of instructions, things can go wrong. Here are the most frequent issues users face when learning how to program Craftsman 3/4 HP garage door opener units and how to fix them.
The Remote Won’t Sync
If the motor light does not blink when you press the remote, the issue is likely battery-related or distance-related.
- Check Batteries: Replace old batteries with fresh alkaline ones. Weak batteries cannot send a strong enough signal to trigger the learn mode.
- Check Distance: Stand closer to the motor unit during programming. Radio frequency interference from Wi-Fi routers or neighbors’ devices can block signals.
The Door Moves But Reverses Immediately
This is not a programming error but a safety sensor issue. The photo-eye sensors near the floor must be aligned perfectly. If the beam is blocked or misaligned, the door will reverse to prevent crushing objects. Clean the lenses with a soft cloth and ensure the LED lights on both sensors are solid, not blinking.
The Learn Button Light Is Solid On
If the LED stays solid and does not blink when pressed, the logic board may be frozen. Unplug the opener from the power source for 60 seconds. Plug it back in and try again. This hard reset often clears minor software glitches.
Enhancing Security with MyQ Technology
Modern Craftsman 3/4 HP openers often come with MyQ smart technology. This allows you to control your garage door via a smartphone app. To enable this, you must first program your remote using the physical Learn button as described above. Once the basic RF connection is established, you can link the opener to your Wi-Fi network.
According to Wikipedia, modern garage door openers have evolved from simple radio transmitters to complex IoT devices. Integrating your opener with smart home ecosystems like Amazon Alexa or Google Assistant adds a layer of convenience and monitoring. You can receive alerts if the door is left open, enhancing home security significantly.
Maintenance Tips for Longevity
Programming is just the beginning. To keep your 3/4 HP opener running smoothly for years, follow these maintenance tips:
- Lubricate Moving Parts: Use a silicone-based lubricant on the chain or screw drive every six months. Avoid WD-40, as it attracts dust and gumms up the mechanism.
- Inspect Rollers and Tracks: Check for rust or debris in the tracks. Clean them with a damp cloth and ensure rollers spin freely.
- Test Safety Features Monthly: Place a 2×4 piece of wood on the floor under the door. Close the door. It should reverse immediately upon contact. If it doesn’t, call a professional technician.
FAQ Section
Q1: Can I program a universal remote to my Craftsman 3/4 HP opener?
Yes, most universal remotes are compatible with Craftsman openers. However, you must match the frequency and protocol. Check the universal remote’s packaging for compatibility with “Security+” or “Security+ 2.0” systems. The programming process is similar: press the Learn button on the motor, then hold the universal remote button.
Q2: Why does my remote only work when I am very close to the garage?
This indicates weak signal strength. First, replace the remote’s batteries. If the issue persists, the antenna wire on the motor unit might be damaged or obstructed. Ensure the antenna hangs down freely and is not wrapped around metal brackets. Metal interferes with radio frequencies.
Q3: How do I know if my Craftsman opener uses rolling codes?
If your opener was manufactured after 1997, it almost certainly uses rolling code technology. Look for a “Learn” button rather than DIP switches. Rolling codes change the access code with every use, making it impossible for thieves to copy the signal. This is a standard feature in all 3/4 HP Craftsman models from the last two decades.
Q4: Can I program multiple remotes to the same opener?
Yes, a single Craftsman 3/4 HP opener can store codes for multiple remotes and keypads. The exact number varies by model, but most can handle at least 8–10 devices. Simply repeat the programming steps for each additional remote. You do not need to clear previous codes unless you want to remove lost remotes.
Q5: What should I do if I lost all my remotes?
If you have no working remotes, you cannot enter programming mode via the remote. You must use the wall-mounted control panel inside the garage. Some models allow you to initiate pairing from the wall console. If not, you may need to purchase a new remote and use the Learn button on the motor unit directly. Consider changing the access code if you suspect theft.
Conclusion
Mastering how to program Craftsman 3/4 HP garage door opener systems empowers you to maintain your home’s security and convenience without relying on expensive service calls. By identifying your Learn button color, following the precise timing steps, and troubleshooting common issues, you can ensure seamless operation for all your remotes and keypads.
Remember, regular maintenance and security updates are just as important as the initial setup. Keep your sensors clean, your batteries fresh, and your firmware updated if you use MyQ technology. If you found this guide helpful, please share it with friends or family who might be struggling with their garage door setup. A well-programmed garage door is a safe garage door.
Leave a Reply