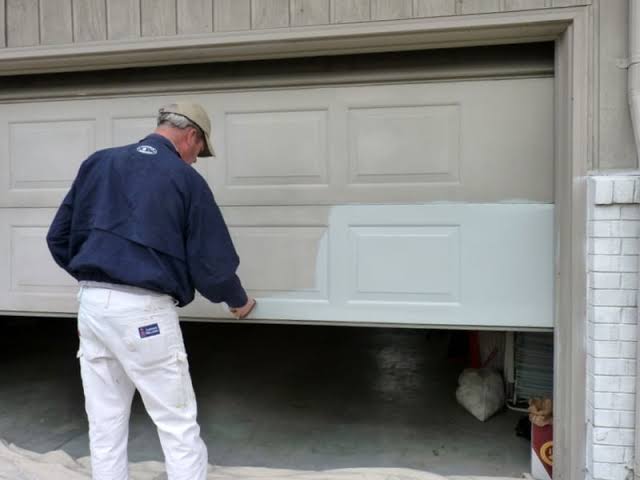
Introduction
Is your garage door looking faded, chipped, or just plain outdated? You’re not alone. Many homeowners face the same dilemma: they want a fresh look but dread the hassle of removing the entire door for painting. The good news? You don’t have to. With the right techniques and tools, you can learn how to paint a garage door without removing it and achieve a stunning result that boosts curb appeal and protects your investment.
In this comprehensive guide, we’ll walk you through every step—from preparation to final touches—so you can tackle this project with confidence. Whether you’re a seasoned DIYer or a beginner, these tips will help you save time, avoid common mistakes, and get a flawless finish.
Why Paint Your Garage Door Without Removing It?
Before diving into the “how,” let’s address the “why.” Removing a garage door is a labor-intensive process that requires specialized tools, multiple people, and significant time. By painting it in place, you:
- Save hours of work: No need to disconnect springs, tracks, or panels.
- Reduce risk of damage: Avoiding removal minimizes the chance of misalignment or breakage.
- Cut costs: Skip hiring professionals for reinstallation.
- Maintain security: Your garage stays locked and secure throughout the project.
According to a 2025 Home Improvement Trends Report by Angi, 68% of homeowners prefer DIY methods that minimize structural disruption, making in-place painting a top choice.
Step 1: Gather Your Supplies
Preparation is key to a successful paint job. Here’s what you’ll need:
Essential Tools & Materials
- High-quality exterior paint (acrylic latex or oil-based, depending on your door material)
- Primer (if painting over bare metal or previously unpainted surfaces)
- Paintbrushes (angled sash brushes for edges, flat brushes for large areas)
- Roller with extension pole (for smooth, even coverage)
- Painter’s tape (to protect windows, handles, and trim)
- Drop cloths or plastic sheeting (to protect driveway and surrounding areas)
- Sandpaper (120–220 grit for smoothing rough spots)
- TSP cleaner or mild detergent (for thorough cleaning)
- Safety gear (gloves, goggles, mask)
Pro Tip: Choose paint specifically formulated for exterior use. Look for labels like “weather-resistant” or “UV-protected” to ensure longevity.
Step 2: Clean the Garage Door Thoroughly
A clean surface ensures proper paint adhesion. Follow these steps:
- Remove loose dirt and debris using a soft brush or vacuum.
- Wash the door with a mixture of warm water and TSP cleaner (or mild dish soap). Use a sponge or soft-bristle brush.
- Rinse thoroughly with a garden hose. Avoid high-pressure washers, as they can force water into seams and damage mechanisms.
- Let it dry completely (at least 24 hours in humid conditions).
Note: If your door has grease or oil stains, use a degreaser before washing.
Step 3: Repair and Prep the Surface
Inspect your garage door for any damage that needs fixing before painting:
- Fill dents or holes with automotive body filler or epoxy putty.
- Sand rough areas lightly to create a smooth surface.
- Remove rust from metal doors using a wire brush or sandpaper, then apply a rust-inhibiting primer.
- Scrape off peeling paint with a putty knife.
For wooden doors, check for rot or warping. Replace damaged sections if necessary.
Step 4: Mask Off Areas You Don’t Want to Paint
Protect non-paintable surfaces with painter’s tape and drop cloths:
- Windows and glass panels: Cover edges with tape.
- Handles, locks, and hinges: Wrap with tape or remove if possible.
- Weather stripping: Tape along edges to prevent paint buildup.
- Driveway and walls: Lay down drop cloths to catch drips.
Take your time here—rushing this step leads to messy cleanup later.
Step 5: Apply Primer (If Needed)
Primer is essential if:
- You’re painting over bare metal or wood.
- The existing paint is chalky or peeling.
- You’re changing from dark to light colors.
How to apply primer:
- Stir well before use.
- Use a brush for edges and corners.
- Roll onto large flat areas using even strokes.
- Let it dry according to manufacturer instructions (usually 2–4 hours).
Step 6: Paint the Garage Door
Now for the fun part! Follow these best practices for a professional finish:
Technique Tips
- Work in sections: Start from the top and move downward to catch drips.
- Use thin coats: Two thin layers are better than one thick coat.
- Maintain wet edges: Blend each new stroke into the previous one to avoid lap marks.
- Follow the grain: For wooden doors, paint in the direction of the wood grain.
Recommended Paint Types
| Door Material | Best Paint Type | Why? |
|---|---|---|
| Steel | Acrylic Latex | Flexible, resists cracking |
| Aluminum | Oil-Based | Better adhesion to metal |
| Wood | Exterior Latex | Breathable, prevents moisture trapping |
Expert Insight: According to Sherwin-Williams, applying paint in temperatures between 50–90°F (10–32°C) yields the best results. Avoid painting in direct sunlight or high humidity.
Step 7: Allow Proper Drying Time
Patience is crucial. Rushing the drying process can lead to:
- Sticky surfaces
- Poor adhesion
- Visible brush marks
Drying guidelines:
- Touch-dry: 2–4 hours
- Recoat time: 4–6 hours
- Full cure: 7–14 days (avoid heavy use during this period)
Check the paint can for specific instructions, as formulas vary.
Step 8: Clean Up and Inspect
Once the paint is dry:
- Remove painter’s tape carefully at a 45-degree angle.
- Clean brushes and rollers with soap and water (for latex) or mineral spirits (for oil-based).
- Inspect for missed spots or uneven coverage. Touch up if needed.
- Dispose of materials properly according to local regulations.
Common Mistakes to Avoid
Even experienced DIYers make errors. Here’s how to steer clear:
- Skipping prep work: Cleaning and sanding are non-negotiable.
- Using interior paint: It won’t withstand weather conditions.
- Painting in poor weather: Rain, wind, or extreme temps ruin finishes.
- Applying thick coats: Leads to drips and longer drying times.
- Ignoring manufacturer instructions: Each product has unique requirements.
For more on paint chemistry and durability, visit Wikipedia’s page on Paint.
FAQ Section
Q1: Can I paint my garage door in one day?
A: Yes, but it depends on drying times. If you use fast-drying paint and work efficiently, you can complete the job in 8–10 hours. However, allowing extra time for curing ensures better durability.
Q2: What’s the best time of year to paint a garage door?
A: Spring and early fall are ideal. Temperatures between 50–90°F (10–32°C) with low humidity provide optimal conditions. Avoid painting in winter or peak summer heat.
Q3: Do I need to prime if the old paint is still in good condition?
A: Not always. If the existing paint is intact, clean, and compatible with your new paint, you can skip priming. However, priming improves adhesion and longevity, so it’s recommended for best results.
Q4: How often should I repaint my garage door?
A: Every 5–10 years, depending on climate and paint quality. Harsh sun, rain, or salt air may require more frequent touch-ups.
Q5: Can I use a spray gun instead of brushes and rollers?
A: Yes, but it requires more skill and masking. Spray guns provide a smoother finish but can overspray onto surrounding areas. Beginners should stick with brushes and rollers.
Q6: Will painting void my garage door warranty?
A: Check your warranty terms. Most manufacturers allow painting as long as you use appropriate materials and don’t damage structural components. When in doubt, contact the manufacturer.
Conclusion
Learning how to paint a garage door without removing it is a rewarding DIY project that enhances your home’s appearance and value. By following these steps—cleaning, prepping, masking, priming, and painting—you can achieve a professional-looking finish without the hassle of disassembly.
Remember, patience and preparation are your best friends. Take your time, use quality materials, and enjoy the transformation. Once you’re done, snap a photo and share your before-and-after on social media! Tag us so we can celebrate your success.
Happy painting! 🎨🏠
Leave a Reply