Water pooling under your garage door isn’t just an annoyance—it’s a threat to your property, vehicles, and stored belongings. If you’re wondering how to keep water from running under garage door, you’re not alone. Thousands of homeowners face this issue every rainy season, and the good news is that effective solutions exist for every budget and skill level.
In this comprehensive guide, we’ll walk you through practical, tested methods to stop water infiltration, explain why it happens, and help you choose the right solution for your specific situation. Let’s dive in.
Why Does Water Run Under Your Garage Door?
Before fixing the problem, understanding its root cause is essential. Water doesn’t just appear randomly—it follows physics and structural weaknesses.
Common Causes of Garage Door Water Intrusion
- Improper grading: If the ground slopes toward your garage instead of away from it, water naturally flows underneath the door.
- Worn or damaged weatherstripping: The rubber seal at the bottom of your garage door degrades over time, creating gaps.
- Cracked concrete threshold: Even small cracks in the driveway or garage floor can channel water inward.
- Heavy rainfall or flash flooding: Extreme weather events overwhelm standard drainage systems.
- Poorly installed garage door: Misalignment creates uneven gaps where water seeps through.
According to the Federal Emergency Management Agency (FEMA), water damage accounts for nearly 30% of all homeowner insurance claims, with garage flooding being a significant contributor. Addressing this issue proactively saves money and stress in the long run.
Method 1: Install a Garage Door Threshold Seal
A threshold seal is one of the most effective and affordable solutions. It creates a physical barrier between your garage door and the driveway.
Step-by-Step Installation Guide
- Measure the width of your garage door opening accurately. Standard single-car garages are 8–9 feet wide; double-car garages range from 16–18 feet.
- Clean the area thoroughly. Remove dirt, debris, and old sealant using a wire brush and degreaser. The surface must be completely dry.
- Cut the threshold seal to match your garage door width using a utility knife. Most seals come in rolls of 10–20 feet.
- Apply adhesive backing (if included) or use high-quality construction adhesive. Press firmly along the entire length.
- Allow curing time. Wait at least 24 hours before exposing the seal to water or closing the garage door repeatedly.
Pro Tip: Choose a threshold seal made from EPDM rubber or vinyl for durability. These materials withstand temperature extremes from -40°F to 180°F without cracking.
| Material Type | Durability | Cost Range | Installation Difficulty |
|---|---|---|---|
| EPDM Rubber | High | $20–$40 | Easy |
| Vinyl | Medium | $15–$30 | Easy |
| Aluminum | Very High | $50–$100 | Moderate |
Method 2: Improve Drainage Around Your Garage
Sometimes the problem isn’t the door itself—it’s the surrounding landscape. Redirecting water away from your garage addresses the source.
Key Drainage Improvements
- Regrade the driveway: Ensure the slope drops at least 1/4 inch per foot away from the garage. This subtle angle prevents water accumulation.
- Install a French drain: A perforated pipe buried in gravel channels water away from the foundation. Ideal for areas with heavy clay soil.
- Add gutter extensions: Downspouts should discharge water at least 6 feet away from your garage foundation.
- Create a swale: A shallow, grassy ditch directs surface water around your property rather than toward it.
For detailed landscaping principles, refer to Wikipedia’s article on surface water drainage, which provides foundational knowledge applicable to residential settings.
Method 3: Upgrade Your Garage Door Weatherstripping
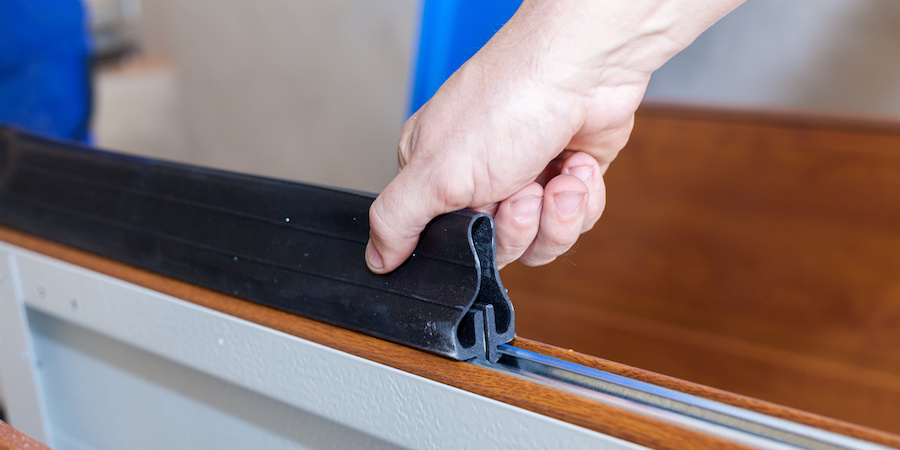
The bottom weatherstrip (also called a garage door sweep) is your first line of defense. Over time, it compresses, cracks, or detaches.
When to Replace Weatherstripping
- Visible cracks or tears
- Gaps larger than 1/8 inch when the door is closed
- Age exceeding 5–7 years
- Previous water intrusion despite other fixes
Replacement Process
- Remove the old strip by pulling it out of the aluminum retainer channel at the bottom of the door.
- Inspect the channel for rust or damage. Clean with steel wool if necessary.
- Insert the new weatherstrip, ensuring it fits snugly. Most modern strips slide in without tools.
- Test the seal by closing the door and checking for light penetration from inside the garage.
Expert Insight: John Mitchell, a certified garage door technician with 15 years of experience, states: “I recommend replacing weatherstripping every 5 years as preventive maintenance, even if it looks fine. Rubber degrades invisibly.”
Method 4: Apply Waterproof Sealant to Concrete Cracks
If water enters through cracks in your garage floor or driveway threshold, sealing them is critical.
Recommended Products
- Polyurethane concrete crack filler: Flexible and durable, ideal for moving cracks.
- Epoxy injection kits: Best for structural cracks wider than 1/4 inch.
- Hydraulic cement: Quick-setting option for emergency repairs.
Application Steps
- Widen cracks slightly using a chisel to create a “V” shape. This helps the sealant bond better.
- Vacuum out debris thoroughly.
- Apply sealant using a caulking gun, pressing it deep into the crack.
- Smooth the surface with a putty knife and allow 48 hours to cure fully.
Method 5: Install a Garage Door Dam or Flood Barrier
For severe flooding risks, consider a removable flood barrier. These devices sit in front of the garage door and block water entry during storms.
Types of Flood Barriers
- Rubber dam strips: Inflatable or gravity-based barriers that conform to uneven surfaces.
- Modular flood panels: Interlocking plastic or aluminum panels stacked to desired height.
- Sandbag alternatives: Reusable fabric bags filled with water-absorbing polymers.
While more expensive ($100–$500), these solutions provide peace of mind in flood-prone areas.
Frequently Asked Questions
Q1: How much does it cost to stop water from running under a garage door?
Costs vary by method. DIY threshold seals range from $15–$40, while professional drainage improvements can cost $500–$2,000. Most homeowners find success with combinations totaling under $100.
Q2: Can I install a threshold seal myself?
Absolutely. Threshold seals are designed for DIY installation. With basic tools (utility knife, measuring tape, adhesive), you can complete the job in under 2 hours.
Q3: Will improving drainage fix all garage water problems?
Not always. Drainage addresses external water flow, but if your weatherstripping is damaged, water may still enter. Combine both approaches for best results.
Q4: How often should I check my garage door seal?
Inspect seals seasonally, especially before heavy rain seasons. Look for cracks, compression, or detachment. Early detection prevents costly water damage.
Q5: Is it normal for some water to enter during extreme storms?
Minor seepage during historic rainfall events may occur despite precautions. However, consistent water entry during normal rain indicates a fixable problem. Don’t accept it as “normal.”
Q6: Can ice cause water to run under my garage door?
Yes. Ice buildup prevents the door from sealing properly. Installing a heated garage floor mat or using ice melt products near the threshold can mitigate this issue.
Conclusion: Take Action Before the Next Rainstorm
Learning how to keep water from running under garage door empowers you to protect your home, vehicles, and valuables. Whether you choose a simple threshold seal, improved drainage, or professional-grade flood barriers, the key is acting proactively.
Start with a thorough inspection this weekend. Identify weak points, prioritize fixes based on severity, and implement solutions step by step. Your future self will thank you when the next storm rolls through.
Found this guide helpful? Share it with friends, family, or neighbors who struggle with garage flooding. Together, we can build drier, safer homes. Bookmark this page for future reference, and don’t hesitate to revisit these strategies as seasons change.
Stay dry, stay protected! 🏠💧
Leave a Reply