Introduction
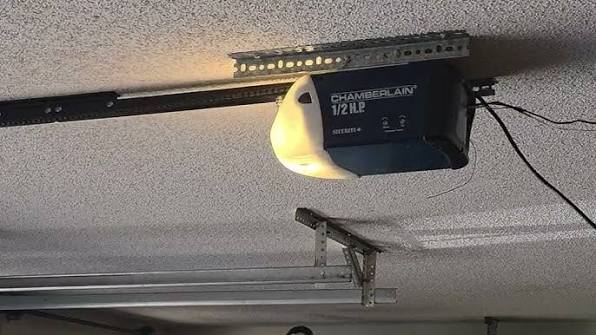
Upgrading your home’s entry point can feel intimidating, especially when heavy machinery is involved. If you are searching for how to install Chamberlain 1/2 HP garage door opener without hiring an expensive contractor, you have come to the right place. This comprehensive guide breaks down the process into manageable steps, ensuring you achieve a safe, professional-grade installation while saving hundreds of dollars on labor costs.
Pre-Installation Safety and Tool Checklist
Before you unbox your new unit, understanding safety protocols is non-negotiable. According to the U.S. Consumer Product Safety Commission (CPSC), garage door openers are responsible for thousands of injuries annually, often due to improper installation or bypassed safety sensors. Taking thirty minutes to prepare can prevent serious accidents and ensure your warranty remains valid.
Essential Tools Required
Having the right tools prevents frustration and ensures structural integrity. Gather these items before starting:
- Stepladder: Minimum 8-foot height for safe ceiling access.
- Power Drill & Bits: For mounting brackets and rail assembly.
- Adjustable Wrenches: Two 7/16-inch wrenches are typically needed.
- Tape Measure & Level: Precision is key for smooth operation.
- Locking Pliers/Vise Grips: To secure the door during installation.
- Safety Glasses: Protect eyes from metal shavings and dust.
- Helper: Never attempt this installation alone. A second person is required to lift the motor assembly safely.
Critical Safety Warnings
- Disconnect Power: Always unplug existing openers and turn off circuit breakers.
- Release Tension: If replacing a torsion spring system, hire a professional. Spring tension can cause fatal injuries.
- Check Door Balance: Manually lift your door halfway. It should stay in place. If it falls or rises, fix the springs before installing the opener. An unbalanced door will burn out your new 1/2 HP motor within months.
What Is Included in Your Chamberlain 1/2 HP Kit?
Understanding your components streamlines the Chamberlain 1/2 HP garage door opener installation. While models vary slightly, most kits contain:
| Component | Function | Installation Note |
|---|---|---|
| Motor Unit | Houses the 1/2 HP drive mechanism | Heaviest component; requires two people |
| Rail Sections | Guides the trolley movement | Assemble on floor first |
| Trolley & Chain/Belt | Transfers power to door | Ensure proper tension per manual |
| Header Bracket | Anchors rail above door | Must hit solid wood framing |
| Safety Sensors | Prevents closing on obstacles | Mount 4-6 inches above floor |
| Wall Control Panel | Manual operation & programming | Place 5 feet high, out of child reach |
| Remote Controls | Wireless entry | Program after mechanical install |
Expert Insight: “The most common mistake DIYers make is ignoring the specific rail alignment instructions for their door type. Standard doors use straight rails, while low-headroom doors require specialized curved adapters. Verify your door configuration against the Chamberlain compatibility chart before assembly.” — Certified Garage Door Technician Association Guidelines
For foundational knowledge on how these electromechanical systems integrate with residential architecture, refer to the Garage door opener overview on Wikipedia, which explains the evolution of safety standards and drive mechanisms.
Step-by-Step: How To Install Chamberlain 1/2 HP Garage Door Opener
Follow these precise steps for a successful Chamberlain 1/2 HP garage door opener installation. Allocate 4–6 hours for first-time installers.
Step 1: Assemble the Rail System on the Floor
Lay out all rail sections on a clean, flat surface. Connect them using the provided bolts and locking nuts. Do not fully tighten until all sections are aligned. Use your level to confirm the assembled rail is perfectly straight. A warped rail causes premature wear and noisy operation. Attach the idler pulley and trolley to the rail as specified in your model’s diagram.
Step 2: Install the Header Bracket
This bracket bears the entire operational load. Locate the structural header above your garage door opening—never mount to drywall alone. Mark the centerline of your door opening on the header. Position the bracket according to the manual’s specified height (typically 2–4 inches above the door’s highest travel point). Secure with lag screws into solid wood framing. Test stability by applying downward pressure; any movement means repositioning is necessary.
Step 3: Mount the Motor Unit to Ceiling
With your helper supporting the motor, attach the hanging brackets to the ceiling joists. Use the provided angle iron or adjustable struts to create a stable suspension frame. The motor must hang level and at the correct distance from the header bracket. Measure twice: Improper spacing causes chain/belt misalignment. Temporarily secure with C-clamps while verifying measurements before final bolting.
Step 4: Connect Rail to Motor and Header Bracket
Slide the assembled rail onto the motor shaft and secure with the master link or coupling bolt. Lift the free end of the rail and attach it to the previously installed header bracket. Ensure the trolley moves freely along the entire rail length without binding. Adjust the motor’s hanging position if resistance occurs.
Step 5: Install the Door Attachment (J-Arm or Straight Arm)
Connect the appropriate arm to your door’s top fixture plate. Sectional doors typically use a J-arm; one-piece doors use a straight arm. Critical: The arm must be perpendicular to the door when closed. An angled arm creates lateral stress that damages both door and opener. Secure all pivot points with cotter pins to prevent detachment during operation.
Step 6: Wire Safety Sensors and Wall Control
Run sensor wires along the wall, securing every 18 inches with staples. Mount sending and receiving units 4–6 inches above floor on opposite sides of the door opening. Align lenses precisely; indicator lights confirm proper alignment. Connect wall control wiring to designated terminals on the motor unit. Never splice sensor wires with electrical tape; use wire nuts inside junction boxes for code compliance.
Step 7: Set Travel Limits and Force Sensitivity
Power on the unit and enter programming mode per your manual. Set the “open” limit so the door fully clears the header without strain. Set the “close” limit so the door seals evenly without reversing. Test force sensitivity by placing a 2×4 board under the door during closure; the door must reverse immediately upon contact. Repeat testing monthly to maintain safety compliance.
Step 8: Program Remotes and Keypad
Hold the “Learn” button on the motor until the LED activates. Press your remote button within 30 seconds; the light should flash or click to confirm pairing. Repeat for additional remotes and wireless keypads. Test each device from multiple distances to identify potential signal interference zones.
Pros and Cons of DIY Chamberlain Installation
| Advantages | Disadvantages |
|---|---|
| Save $200-$400 on professional labor | Requires 4-6 hours and physical effort |
| Learn valuable home maintenance skills | Risk of voiding warranty if done incorrectly |
| Immediate satisfaction of completed project | Potential safety hazards without proper precautions |
| Customizable settings to personal preference | Troubleshooting complex issues may need pro help |
Frequently Asked Questions (FAQ)
How long does it take to install a Chamberlain 1/2 HP garage door opener?
Most experienced DIYers complete the Chamberlain 1/2 HP garage door opener installation in 3–4 hours. First-time installers should budget 5–6 hours, including safety checks and troubleshooting. Rushing increases error risk; prioritize precision over speed.
Can I install this opener on a heavy wooden door?
A 1/2 HP motor suits standard residential doors up to 180 pounds. Heavy wooden or insulated steel doors exceeding this weight require a 3/4 HP or belt-drive model. Weigh your door using a bathroom scale and lifting jack before purchase. Overloading a 1/2 HP unit voids warranties and creates fire hazards.
Why does my newly installed opener reverse before touching the floor?
This indicates incorrect close-limit settings or obstructed safety sensors. First, verify sensor alignment and clean lenses. Next, adjust the close-limit screw incrementally until the door seals properly. If reversal persists, reduce the closing force setting slightly. Persistent issues suggest track misalignment requiring professional assessment.
Do I need a permit to install a garage door opener myself?
Permit requirements vary by municipality. Most jurisdictions exempt like-for-like replacements but require permits for new installations involving electrical work. Check your local building department website or call directly. Unpermitted work may complicate future home sales or insurance claims.
How often should I maintain my Chamberlain 1/2 HP opener?
Perform quarterly visual inspections of hardware tightness, sensor alignment, and auto-reverse function. Lubricate chain/belt and rollers biannually with manufacturer-approved grease. Replace backup batteries annually. Schedule professional servicing every 3–5 years for internal gear inspection and safety calibration.
What should I do if the opener makes grinding noises after installation?
Grinding indicates rail misalignment, insufficient lubrication, or gear damage. Immediately disconnect power and inspect rail straightness with a level. Apply white lithium grease to chain/belt contact points. If noise persists after adjustments, internal gears may be damaged during installation; contact Chamberlain support under warranty before further use.
Conclusion
Mastering how to install Chamberlain 1/2 HP garage door opener empowers you with lasting home improvement confidence and significant cost savings. By following these detailed steps, prioritizing safety, and respecting mechanical tolerances, you achieve reliable daily operation indistinguishable from professional installation. Remember: patience during setup prevents years of frustrating repairs.
Ready to showcase your DIY success? Share this guide on Facebook, Pinterest, or Reddit to help fellow homeowners tackle their garage upgrades safely. Tag us with your installation photos—we love celebrating your wins! Don’t forget to bookmark this page for future maintenance reminders and troubleshooting tips. Your secure, smoothly operating garage door starts with informed action today.
Leave a Reply