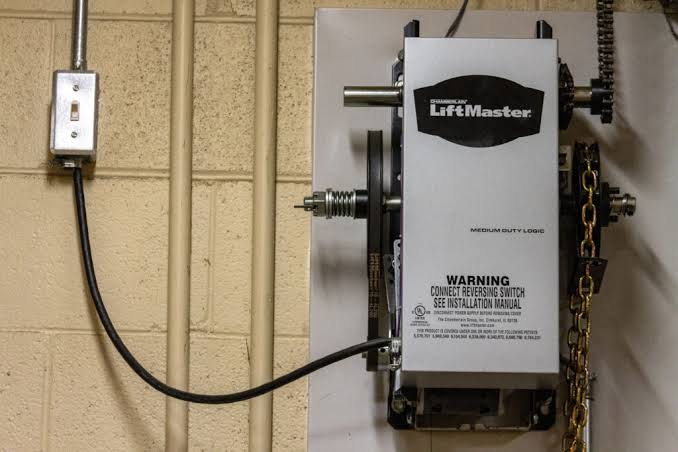
Getting locked out or dealing with an unresponsive remote is incredibly frustrating, especially when you just want to park your car after a long day. If you are wondering how to connect a garage door opener to a Liftmaster system, you are in the right place to get your vehicle remotes, keypads, and smart devices synced perfectly. Let’s dive into the simple, stress-free steps to get your system working seamlessly again.
Step-By-Step Guide On How To Connect A Garage Door Opener To A Liftmaster
Before we grab our step stools and start pressing buttons, it is important to understand how your system actually communicates. Modern Liftmaster units use secure radio frequencies to talk to your remotes and keypads.
To connect any new device to your main motor unit, you will need to locate the “Learn Button.” This is the master key to your garage door system.
Typically, you will find this button on the back or the left side of the motor unit hanging from your garage ceiling. It is usually located near the antenna wire (a single hanging wire) or behind the light lens cover.
Depending on the age and model of your Liftmaster opener, the Learn button will be one of four distinct colors: Yellow, Purple, Red/Orange, or Green. Identifying this color is crucial because it dictates the frequency and security protocol your new devices must use.
Grab a sturdy ladder, ensure the area around the garage door is clear of obstructions, and let’s get your system paired!
Understanding The Liftmaster Learn Button Colors
Buying the wrong replacement remote is one of the most common mistakes homeowners make. To save you a trip back to the hardware store, here is a quick comparison table of the Learn button colors and what they mean for your connectivity.
| Learn Button Color | Manufacturing Era | Frequency & Security Type | Compatible Accessories |
|---|---|---|---|
| Yellow | 2011 – Present | 315 MHz (Security+ 2.0) | Yellow Learn Button Remotes & Keypads |
| Purple | 2006 – 2014 | 315 MHz (Security+) | Purple Learn Button Remotes |
| Red/Orange | 1997 – 2005 | 390 MHz (Security+) | Red/Orange Learn Button Remotes |
| Green | 1993 – 1996 | 390 MHz (DIP Switch Era) | Green Learn Button / 9-Switch Remotes |
Pro Tip: If your unit is older than 1993, it likely uses physical sliding DIP switches inside the remote instead of a digital Learn button.
How To Sync A Standard Remote Control
Syncing a standard visor remote to your Liftmaster is a breeze and takes less than two minutes. Follow these concrete steps for a flawless connection:
- Locate the Learn Button: Climb your ladder safely and find the colored Learn button on the motor unit.
- Initiate Pairing Mode: Press and release the Learn button. You will notice the LED indicator light next to it turn on and stay solid.
- Act Quickly: You now have exactly 30 seconds to complete the next step before the system times out.
- Press the Remote: Press and hold the button on your new remote that you wish to use for the garage door.
- Confirm Connection: Hold the button until the main motor unit’s lights blink (usually twice) or you hear a distinct clicking sound.
- Test It: Press the remote button once more. Your garage door should immediately begin to open or close.
Connecting A Wireless Exterior Keypad
A wireless keypad is fantastic for letting the kids in after school or granting access to dog walkers without giving away your primary remote. Here is exactly how to connect it:
- Wake the Motor: Press and release the Learn button on the motor unit. The LED light will illuminate.
- Move to the Keypad: Walk over to your exterior wireless keypad. You must complete the next step within 30 seconds.
- Enter Your PIN: Type in a brand new 4-digit PIN of your choosing.
- Confirm: Press and hold the ENTER button on the keypad.
- Wait for the Blink: Keep holding the ENTER button until the garage door opener’s lights flash. Release the button once the light blinks.
- Final Test: Type your new 4-digit PIN and press ENTER. The door should activate smoothly.
Integrating Smart Hubs and Vehicle Systems (myQ & HomeLink)
Today, connecting your garage door goes far beyond simple plastic remotes. Smart home integration is the modern standard.
According to recent smart home security reports, over 70% of homeowners now integrate their entry points with smart hubs to deter package theft and monitor deliveries in real-time.
At its core, the mechanism relies on radio frequencies to communicate between your remote and the motor unit. As explained in the comprehensive guide on Garage door opener technology, modern systems use rolling codes to prevent thieves from copying your signal, ensuring that every time you press the button, a completely new code is generated.
Connecting to myQ Smart App: If your Liftmaster has a built-in Wi-Fi hub (usually indicated by a blue LED light on the unit), you can connect it directly to the myQ app. Simply download the myQ app on your smartphone, create an account, tap the “+” sign, select “Garage Door Opener,” and follow the on-screen prompts to connect to your home’s 2.4 GHz Wi-Fi network.
Connecting to Vehicle HomeLink: To sync your car’s built-in HomeLink buttons, press and hold your desired car button and your old Liftmaster remote button simultaneously until the car’s indicator flashes rapidly. Then, press the Learn button on your garage ceiling motor, and quickly return to your car to press the newly programmed HomeLink button three times.
Expert Tips For A Flawless Connection
When troubleshooting or setting up a new system, a little expert knowledge goes a long way.
“Always clear the old memory if you are moving into a new home or selling a house,” advises John Davis, a certified home automation technician based in Chicago. “Holding down the Learn button for 10 seconds until the LED goes out wipes the slate clean, ensuring old tenants or lost remotes can never access your property again.”
Additionally, always use high-quality, brand-name alkaline batteries in your remotes and keypads. Extreme temperatures in the garage and outside environments can drain cheap batteries rapidly, leading to connection failures that mimic broken hardware.
Frequently Asked Questions (FAQ)
1. Why is my Liftmaster remote not connecting after I press the Learn button?
The most common culprits are a dead battery in the remote, incompatible remote frequencies, or pressing the remote button after the 30-second pairing window has closed. Double-check your Learn button color to ensure you bought a compatible remote, replace the battery, and try the 30-second pairing process again.
2. How do I clear all old connections from my Liftmaster opener?
To wipe the memory of all previously synced remotes and keypads, press and hold the Learn button on the motor unit for about 10 seconds. The LED light will turn on, and then it will turn off. Once the light goes out, all accessories have been successfully erased from the system’s memory.
3. Can I connect multiple cars and remotes to one Liftmaster opener?
Absolutely! Liftmaster openers can typically store up to 30 different remote controls and keypads in their memory at one time. You simply repeat the standard pairing process for each individual remote or vehicle you wish to add.
4. What happens if my Liftmaster Learn button is blinking continuously?
A continuously blinking Learn button usually indicates an issue with the safety sensors located at the bottom of your garage door tracks. Check to ensure the sensor “eyes” are perfectly aligned, free of cobwebs, and that nothing is blocking the invisible beam between them. If the beam is broken, the door will not operate, and the system may refuse to learn new codes.
5. Do I need special batteries for my exterior wireless keypad?
Most modern Liftmaster wireless keypads require a standard 9-volt alkaline battery. Avoid using rechargeable 9V batteries, as they often output a slightly lower voltage (around 7.4V to 8.4V) which is not enough to push the signal through the exterior casing to the main motor unit reliably.
Conclusion
Learning how to connect a garage door opener to a Liftmaster system is a highly rewarding DIY project that saves you the cost of an expensive service call. Whether you are pairing a brand-new remote, setting up an exterior keypad for the family, or integrating your garage into a modern smart home hub, the process always revolves around the magical Learn button.
By following the exact timeframes, utilizing the correct frequencies, and prioritizing security rolling codes, you guarantee your home remains safe and accessible.
Found this guide helpful? Don’t keep it to yourself! Share this article on your favorite social media platforms like Facebook, X (Twitter), or Pinterest to help a friend fix their garage door today!
Leave a Reply