Introduction
There is nothing quite as unsettling as realizing your garage door code might be compromised or simply forgotten at the worst possible moment. Whether you have moved into a new home, lost a key fob, or suspect unauthorized access, knowing how to change the passcode on a garage door opener is an essential skill for modern homeownership. This guide provides clear, empathetic, and manufacturer-verified steps to help you regain control of your home’s security without needing to call an expensive technician.
Why You Should Regularly Update Your Garage Door Code
Before diving into the technical steps, it is vital to understand why this maintenance matters. According to crime statistics, garages are often the primary entry point for burglars because homeowners tend to neglect their security compared to front doors. Changing your passcode is not just about memory; it is about proactive safety.
Security Risks of Old Codes
- Previous Owners/Tenants: If you recently moved, old codes may still be active.
- Lost Keypads: A misplaced wireless keypad is a direct key to your home.
- Service Workers: Contractors or cleaners who no longer need access should be digitally “locked out.”
- Wear Patterns: Over time, physical wear on keypad buttons can reveal your code to observant intruders.
Expert Insight: Security professionals recommend changing garage entry codes every 6 to 12 months, or immediately after any personnel change in your household. Treat your garage code with the same level of secrecy as your banking PIN.
Identifying Your Garage Door Opener Type
The method for changing a passcode varies significantly by brand and age of the unit. Before you grab a ladder, identify your system. Most residential openers fall into three categories:
| Opener Type | Common Brands | Reset Method Complexity | Typical Location of Learn Button |
|---|---|---|---|
| Rolling Code (Post-1996) | LiftMaster, Chamberlain, Craftsman | Low | Back panel or under light lens |
| Fixed Code / DIP Switch (Pre-1996) | Older Genie, Stanley | High | Inside motor housing |
| Smart Wi-Fi Enabled | MyQ, Aladdin Connect | Variable (App-based) | N/A (Managed via Smartphone) |
For comprehensive background on the evolution of these security protocols, you can refer to the Garage Door Opener Wikipedia page, which details the transition from fixed DIP switches to modern rolling-code encryption that prevents code grabbing.
Step-by-Step: How to Change the Passcode on a Garage Door Opener (Rolling Code Models)
This is the most common procedure for units manufactured after 1996. Always prioritize safety: ensure the garage door area is clear of people and pets before testing.
Step 1: Locate the “Learn” Button
Find the motor unit mounted on your ceiling. Look for a square or circular button labeled “Learn,” “Program,” or “Set.” It is typically located on the back panel or under the LED light cover. The button color often indicates the frequency type (Yellow, Purple, Orange, Red, or Green).
Step 2: Clear the Old Memory (Optional but Recommended)
If you want to erase all existing codes (recommended when moving in):
- Press and hold the Learn button for approximately 6–10 seconds.
- Release when the indicator LED turns off.
- All previously programmed remotes and keypads are now deactivated.
Step 3: Program the New Passcode
- Press the Learn button once briefly. The LED will illuminate or begin blinking, indicating programming mode (usually active for 30 seconds).
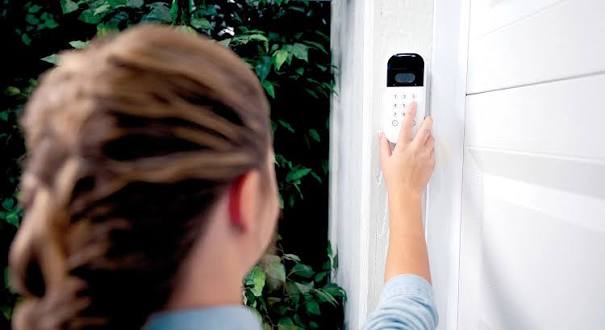
- Go to your exterior wireless keypad.
- Enter your desired 4-digit PIN. Choose a code that avoids sequential numbers (e.g., 1234) or birth years.
- Press and hold the ENTER button on the keypad.
- Watch the motor unit lights. They should flash or click to confirm acceptance.
- Release the ENTER button.
Step 4: Test the System
Wait 5 seconds after programming. Enter your new PIN and press ENTER. The door should activate smoothly. If it does not, repeat Step 3, ensuring you complete the sequence within the 30-second window.
Troubleshooting: When the Keypad Won’t Accept New Codes
Even with perfect execution, technology sometimes fails. Here are data-backed solutions for common issues:
- Dead Batteries: This accounts for over 70% of keypad failures. Replace with fresh alkaline batteries (usually 9V or AAA) before assuming the unit is broken.
- Signal Interference: LED bulbs in the opener can interfere with radio frequencies. Ensure you are using RF-compatible garage door opener bulbs.
- Lock Mode Activated: Many keypads have a “Lock” feature that disables programming. Hold the Lock button for 3 seconds to toggle it off.
- Antenna Issues: Check that the hanging wire antenna on the motor unit is fully extended and not touching metal surfaces.
Pros and Cons of Wireless vs. Smart App Access
As you update your passcode, consider whether a traditional keypad still meets your needs.
Wireless Keypad
- Pros: No internet required, simple battery operation, guest-friendly, low cost ($25–$40).
- Cons: Limited to one location, no remote monitoring, battery replacement needed annually.
Smart App Integration
- Pros: Remote access anywhere, real-time alerts, temporary digital keys for guests, integration with Alexa/Google Home.
- Cons: Requires Wi-Fi, dependent on server uptime, higher initial cost, potential cybersecurity vulnerabilities if passwords are weak.
Frequently Asked Questions (FAQ)
1. Can I change my garage door passcode without the original remote?
Yes. The “Learn” button on the motor unit allows you to program a new keypad independently. You do not need an existing remote to add or change a keypad passcode, though you may need one if you are trying to sync multiple devices simultaneously.
2. How many digits should my new garage door passcode be?
Most modern systems support 4-digit codes, while newer models allow up to 6 digits. We strongly recommend using at least 5 digits if your system permits it, as this increases possible combinations from 10,000 to 100,000, significantly reducing brute-force vulnerability.
3. Will changing the passcode delete my car remotes?
Only if you perform a “factory reset” by holding the Learn button for 10+ seconds. If you simply press the Learn button once and enter a new keypad code, your existing car remotes will continue to function normally. Always test all remotes after programming.
4. What should I do if my keypad has no Learn button?
If your keypad lacks a Learn button and your motor unit uses tiny sliding switches inside the housing, you have a pre-1996 fixed-code system. In this case, you must manually match the DIP switch positions on both the keypad and motor unit. Due to severe security vulnerabilities, upgrading to a rolling-code system is highly recommended.
5. How often should I replace my garage door keypad batteries?
Replace batteries proactively every 12 months, or immediately if you notice delayed response times or dim LED indicators. Cold climates can drain batteries faster; consider lithium batteries for superior cold-weather performance.
6. Is it safe to write my garage code on the keypad cover?
Absolutely not. This defeats the purpose of having a passcode. Instead, store the code in a secure password manager app, or share it verbally only with trusted household members. Never leave written codes in vehicles parked outside.
Conclusion
Understanding how to change the passcode on a garage door opener empowers you to take immediate ownership of your home’s perimeter security. By following the steps outlined above, you can eliminate unauthorized access risks in under five minutes, without professional service fees. Remember: a secure garage is the foundation of a secure home.
Found this guide helpful? Share it with friends, family, or neighbors who might be struggling with their garage security. Tag us on social media or send this article via text to someone who just moved into a new home—your small action could prevent a major security breach. Stay safe, stay secure, and keep your garage working for you!
Leave a Reply