Introduction
A dark garage isn’t just an inconvenience; it can be a genuine safety hazard when you’re navigating around tools, vehicles, or storage boxes at night. If your overhead light has burned out, knowing how to change light bulb in Chamberlain garage door opener is a quick DIY fix that restores visibility and security in minutes. This guide walks you through the safe, manufacturer-approved process so you can get back to a fully functional garage without calling a technician.
Why Your Chamberlain Garage Door Opener Light Matters
Before grabbing a ladder, it helps to understand why this specific maintenance task differs from changing a standard household lamp. Chamberlain openers integrate the lighting circuit directly into the logic board, meaning vibration, heat, and electrical surges all impact bulb lifespan. According to product documentation from Wikipedia, modern residential openers typically use candelabra-base or A19 bulbs ranging from 40W to 60W incandescent equivalents, though newer models increasingly support LED retrofitting.
Ignoring a burnt-out bulb doesn’t just leave you in the dark. Many Chamberlain units use the light as a diagnostic indicator; a non-functioning light can sometimes signal underlying issues with the capacitor or wiring harness. Addressing the bulb promptly ensures your system’s self-diagnostic features remain accurate.
Safety First: Pre-Replacement Checklist
Electrical safety is non-negotiable. Follow these precautions before touching any components:
- Disconnect Power: Unplug the opener unit from the ceiling outlet or turn off the dedicated circuit breaker. Never rely solely on the wall switch.
- Allow Cooling Time: Incandescent bulbs can exceed 250°F (121°C). Wait at least 15 minutes after last use to prevent burns.
- Use Proper Equipment: Employ a fiberglass or wooden ladder (not aluminum) to reduce conductivity risk. Wear safety glasses to protect against glass shards if the old bulb breaks during removal.
- Verify Model Number: Locate the label on the motor housing. Bulb specifications vary significantly between Chain Drive, Belt Drive, and Smart Hub models.
What Type of Bulb Does My Chamberlain Opener Need?
Using the wrong bulb is the most common cause of premature failure or logic board damage. Refer to this compatibility table:
| Chamberlain Series | Recommended Bulb Type | Max Wattage | LED Compatible? | Notes |
|---|---|---|---|---|
| B2205 / B2215 | A19 Standard Base | 60W Incandescent | Yes (Non-dimmable) | Avoid smart/Wi-Fi LEDs |
| C450 / C870 | Candelabra (E12) | 40W | Yes | Check base size carefully |
| RJO20 / RJ070 | Integrated LED Panel | N/A | No | Factory-sealed; service required |
| Legacy Models (Pre-2010) | Rough Service A19 | 60W | Not Recommended | Older circuits sensitive to LED drivers |
Critical Warning: Many Chamberlain manuals explicitly advise against using dimmable, smart, or Wi-Fi-enabled LED bulbs. These contain internal electronics that can interfere with the opener’s radio frequency signals, causing remote range reduction or phantom activation. Always choose “garage door opener rated” LEDs that are FCC Part 15 compliant for RF interference.
Step-by-Step: How To Change Light Bulb In Chamberlain Garage Door Opener
Follow this precise sequence to avoid damaging the socket or lens cover.
1. Access the Light Lens Assembly
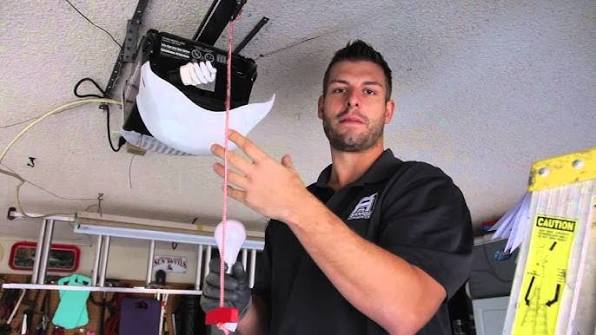
Most Chamberlain units feature a translucent plastic lens secured by either a single Phillips-head screw or spring-loaded tabs. For screw-type lenses, loosen (do not fully remove) the fastener and pivot the cover downward. For tab-style covers, gently squeeze the sides inward while pulling down. Set the lens aside on a soft surface to prevent scratching.
2. Remove the Old Bulb
Grip the bulb firmly but gently near its base. Rotate counterclockwise approximately ¼ turn until it releases from the socket. If the bulb is stuck due to corrosion, apply gentle pressure while turning—never yank straight out, as this can rip the socket contacts from the housing. If the glass separates from the metal base, use needle-nose pliers to grip the remaining base edge and twist free.
3. Inspect the Socket and Wiring
Before installing the new bulb, examine the socket interior for:
- Blackened or melted plastic (indicates overheating)
- Corroded copper contacts (clean with electrical contact spray if minor)
- Loose wire nuts behind the socket housing
If damage is evident, stop here and consult a licensed electrician. Continuing could create a fire hazard.
4. Install the New Bulb
Insert the replacement bulb into the socket and rotate clockwise until snug. Do not overtighten. Excessive torque cracks the glass-to-metal seal, leading to early failure. For LED bulbs, ensure the orientation matches any directional markings (some are single-directional).
5. Reassemble and Test
Reattach the lens cover securely. Restore power at the breaker or outlet. Activate the light via wall console, remote, or motion sensor (depending on model). The bulb should illuminate instantly without flickering. If it doesn’t, recheck seating and verify the bulb isn’t defective.
Troubleshooting: New Bulb Still Not Working?
If you’ve confirmed correct installation and proper bulb type, consider these diagnostics:
- Test the Bulb Elsewhere: Verify functionality in a known-working lamp.
- Check GFCI Outlet: Garage outlets are often GFCI-protected. Press “Reset” on nearby receptacles.
- Inspect Logic Board Fuse: Some Chamberlain models have a replaceable 3A fuse on the main board. Consult your manual for location.
- Evaluate Vibration Damage: If bulbs burn out repeatedly within weeks, the opener may need anti-vibration pads or professional realignment. Chronic vibration fractures filament supports even in LED assemblies.
Frequently Asked Questions (FAQ)
Can I use any LED bulb in my Chamberlain garage door opener?
No. Only use LEDs specifically labeled “garage door opener compatible” or “RF interference tested.” Standard household LEDs, especially dimmable or smart variants, emit electromagnetic noise that disrupts the opener’s 315MHz/390MHz communication band, reducing remote range or causing erratic behavior.
How often should I replace the garage door opener light bulb?
Incandescent bulbs typically last 1,000–2,000 hours in opener applications due to vibration stress. Quality opener-rated LEDs can reach 15,000–25,000 hours. Replace proactively every 2–3 years for LEDs, or immediately upon dimming/flickering for any type.
Why does my new bulb burn out so quickly?
Premature failure usually stems from three causes: excessive vibration (loose mounting hardware), voltage spikes (lack of surge protection), or incompatible bulb type. Ensure your opener is securely bolted to ceiling joists—not just drywall anchors—and install a whole-house or point-of-use surge protector rated for motor loads.
Is it normal for the light to stay on after closing the door?
Many Chamberlain models include adjustable auto-off timers (typically 4.5 or 9 minutes). If the light remains on indefinitely, check timer settings via DIP switches or smartphone app (for MyQ-enabled units). Persistent illumination beyond programmed duration may indicate a faulty control board or misaligned safety sensor.
Do I need to reprogram my remote after changing the bulb?
Generally, no. Bulb replacement doesn’t affect rolling-code memory. However, if you used an incompatible smart bulb that caused RF interference, remotes may require re-syncing after switching to a compliant bulb. Hold the “Learn” button on the motor unit until the indicator blinks, then press your remote button once.
Can moisture in the garage affect bulb life?
Absolutely. High humidity accelerates socket corrosion and promotes condensation inside sealed bulbs, causing thermal shock. Maintain garage humidity below 60% RH using dehumidification or ventilation. Consider vapor-tight fixtures if your garage doubles as a workshop with steam or water exposure.
Final Thoughts: Brighter Garage, Safer Home
Mastering how to change light bulb in Chamberlain garage door opener empowers you to maintain both convenience and safety without unnecessary service calls. By selecting the correct bulb type, following proper safety protocols, and understanding your specific model’s requirements, you extend equipment life and eliminate nighttime hazards. Remember: the right bulb isn’t just about brightness—it’s about preserving your opener’s electronic integrity.
Found this guide helpful? Share it with fellow homeowners on Facebook, Pinterest, or Nextdoor! Someone in your community is probably staring at a dark garage right now, wondering where to start. Tag a friend who loves DIY projects, and let’s keep garages bright and safe together. 💡🔧
Leave a Reply