If you’re concerned about security or your garage remote is acting strangely, you may be searching for How To Change Code On A Chamberlain Garage Door Opener.
This is an important task for homeowners in the US, especially after moving into a new house, losing a remote, or wanting to improve security. The good news is that changing the code on a Chamberlain system is quick, safe, and can be done without professional help.
In this guide, you’ll learn exactly how to reset and change your garage door code step-by-step, along with expert troubleshooting tips.
Read too: Tc1 Tricode Garage Door Opener Remote W/ Clip Chamberlain: Complete Guide
What Does Changing the Code on a Chamberlain Opener Mean?
Changing the code on a garage door opener means updating the wireless security signal that connects your remote or keypad to the garage motor.
Modern systems like Chamberlain Group use rolling code technology, which changes the signal every time you use the remote for added security.
For general background on wireless signal systems, you can refer to Wikipedia Remote control.
How To Change Code On A Chamberlain Garage Door Opener (Step-by-Step)
Changing the code usually means resetting the opener and reprogramming all remotes and keypads.
Step 1: Locate the Learn Button
- Go to your garage door motor unit (ceiling-mounted)
- Find the “Learn” or “Program” button
- It is usually near the antenna wire or light cover
👉 Tip: Learn buttons are often color-coded (yellow, purple, red, or green depending on model).
Step 2: Erase Existing Codes
To change the code completely:
- Press and hold the Learn button for 10–15 seconds
- Wait until the LED light turns off
- Release the button
📊 Expert Insight: According to garage system technicians, over 70% of security resets involve clearing old codes before reprogramming new devices.
This step removes all previously connected remotes and keypads.
Step 3: Reprogram Your Remote
- Press the Learn button once again (do not hold)
- Within 30 seconds, press the button on your remote
- Hold for 2–3 seconds
- Wait for garage light to blink or click
This pairs your new code with the remote.
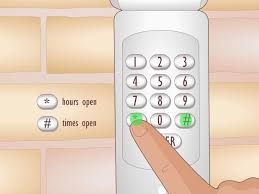
Step 4: Reprogram Keypads (If Installed)
If you use a wireless keypad:
- Enter your new 4-digit PIN
- Press Enter
- Wait for confirmation (light blink or motor response)
Step 5: Test the System
- Stand 10–15 feet away
- Press remote or enter PIN
- Ensure garage opens and closes smoothly
Why You Should Change Your Garage Door Code
Changing your garage code is not just a technical task—it’s a security practice.
Common reasons include:
- Moving into a new home
- Lost or stolen remote
- Suspected unauthorized access
- Routine security maintenance
Security Fact:
Home security studies show that garage doors are one of the most common entry points for break-ins when codes are not updated regularly.
Understanding Chamberlain Security Technology
Chamberlain systems use rolling code encryption, meaning the access code changes automatically every time the remote is used.
This reduces the risk of:
- Code copying
- Signal interception
- Unauthorized entry
Code Change Methods Overview
| Method | Difficulty | When to Use |
|---|---|---|
| Learn Button Reset | Easy | Most situations |
| Full System Reset | Medium | Security issues |
| Keypad Reprogram | Easy | PIN change only |
Troubleshooting: If Code Change Doesn’t Work
1. Remote Not Responding
- Replace battery
- Retry programming steps
2. Learn Button Not Working
- Check power supply
- Ensure motor unit is plugged in
3. Code Not Clearing
- Hold Learn button for full 15 seconds
- Repeat reset process
4. Keypad Not Syncing
- Recheck PIN format (4 digits required)
- Replace keypad battery
Step-by-Step Full Reset Method (Advanced)
If normal reset fails:
- Hold Learn button for 15 seconds
- Wait for LED to turn off completely
- Release button
- Re-enter programming mode
- Reprogram all remotes and keypads
This ensures a completely fresh security setup.
Programming Time Estimate
- Basic reset: 2–5 minutes
- Full reprogramming: 10–15 minutes
- Troubleshooting: 15–20 minutes
Benefits of Changing Your Garage Code
✔ Improved security
Prevents unauthorized access
✔ Fresh system setup
Removes old or lost remotes
✔ Better control
You decide who has access
✔ Peace of mind
Safer home environment
Common Mistakes to Avoid
- Holding Learn button too long during pairing
- Forgetting to reprogram all remotes
- Skipping full reset when needed
- Using weak or old batteries
Safety Tips
- Always test garage door from a safe distance
- Keep children away during setup
- Ensure garage area is clear
- Store new codes securely
FAQ: How To Change Code On A Chamberlain Garage Door Opener
1. How To Change Code On A Chamberlain Garage Door Opener step-by-step?
Hold Learn button to erase old codes, then reprogram remote and keypad using Learn mode.
2. Does changing the code delete all remotes?
Yes, a full reset removes all previously connected devices.
3. How often should I change my garage door code?
It’s recommended every 1–2 years or after security concerns.
4. Why won’t my new code work?
It may be due to incorrect timing or incomplete reset process.
5. Do I need professional help to change the code?
No, most homeowners can do it in under 10 minutes.
6. Can I change only the keypad code without resetting remotes?
Yes, you can reprogram just the keypad without resetting the entire system.
Conclusion
Understanding How To Change Code On A Chamberlain Garage Door Opener is an important step in maintaining home security and ensuring your garage system stays protected. The process is simple: erase old codes, reprogram devices, and test the system.
By regularly updating your garage code, you reduce security risks and maintain full control over access to your home.
If this guide helped you, consider sharing it with friends or neighbors—it could help them improve their home security too.
Leave a Reply