If your garage door remote suddenly stops working or only functions at close range, a dead battery is usually the cause. Many homeowners search for how to change battery in garage door opener remote when faced with this issue. The good news? It’s a quick and easy fix that takes just a few minutes and requires minimal tools.
Why Your Garage Door Remote Battery Matters
Your remote control depends entirely on battery power to send signals to your garage door opener. When the battery weakens:
- The signal becomes inconsistent
- You must stand closer to the door
- The remote may stop working completely
Read too: How Do You Change Code On Garage Door Keypad Fast?
📊 Industry Insight: Over 70% of remote malfunctions are caused by low or dead batteries, not hardware failure.
For more details on battery technology, visit:
https://en.wikipedia.org/wiki/Battery_(electricity)
How To Change Battery In Garage Door Opener Remote (Step-by-Step)
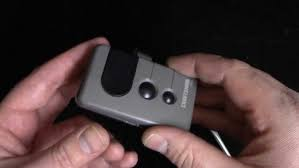
Step 1: Identify Your Remote Type
Garage door remotes vary slightly by brand, but most fall into these categories:
- Slim keychain remotes
- Multi-button remotes
- Visor clip remotes
💡 Tip: Check your remote model if unsure—it’s usually printed on the back.
Step 2: Open the Remote Case
- Look for a small notch or seam
- Use a flathead screwdriver or coin to gently pry it open
- Twist slightly until the case separates
⚠️ Be careful not to crack the plastic housing.
Step 3: Remove the Old Battery
- Take out the battery carefully
- Note the battery type and orientation (+/-)
- Common types include CR2032, CR2025, or CR2016 coin batteries
Step 4: Insert the New Battery
- Place the new battery in the same orientation
- Ensure it fits snugly in the compartment
- Avoid touching both sides excessively (can reduce lifespan)
📌 Example: Most remotes use a CR2032 lithium coin battery.
Step 5: Close the Remote Case
- Snap the case back together
- Ensure all edges are secure
- No gaps should remain
Step 6: Test the Remote
- Press the button
- Check if the garage door responds
- Test from different distances
✔️ If the door responds instantly, your battery replacement was successful.
Signs Your Remote Battery Needs Replacement
Recognizing early signs can prevent inconvenience.
Common Symptoms:
- Reduced operating range
- Delayed response
- LED light dim or not lighting up
- Intermittent functionality
Ignoring these signs can leave you locked out unexpectedly.
Battery Types Comparison
| Battery Type | Common Use | Lifespan | Cost Range |
|---|---|---|---|
| CR2032 | Most remotes | 2–3 years | $3–$10 |
| CR2025 | Slim remotes | 1–2 years | $3–$8 |
| CR2016 | Compact remotes | 1–2 years | $3–$8 |
Troubleshooting After Battery Replacement
If your remote still doesn’t work:
1. Incorrect Battery Placement
- Ensure correct polarity (+/-)
2. Dirty Battery Contacts
- Clean gently with a dry cloth
3. Remote Needs Reprogramming
- Sync the remote with the opener again
4. Faulty Remote
- Replace if older than 5–7 years
Pro Tips to Extend Remote Battery Life
Simple but Effective Tips:
- Replace batteries every 12–24 months
- Store remotes away from extreme temperatures
- Avoid pressing buttons unnecessarily
- Use high-quality lithium batteries
🔋 Expert Tip: Premium batteries can last up to 30% longer than cheaper alternatives.
Advantages vs Disadvantages of DIY Battery Replacement
Advantages:
- Takes less than 5 minutes
- Very low cost
- No technical skills required
Disadvantages:
- Temporary solution
- Requires periodic replacement
- Risk of incorrect installation
When Should You Replace the Remote Instead?
Sometimes replacing the battery isn’t enough.
Consider a new remote if:
- Buttons are worn out
- Remote casing is damaged
- Signal remains weak after battery change
- Device is older than 7–10 years
Common Mistakes to Avoid
Even simple tasks can go wrong.
Avoid These Errors:
- Installing the battery upside down
- Using the wrong battery type
- Forcing the case open
- Forgetting to test after replacement
FAQ: How To Change Battery In Garage Door Opener Remote
1. How long does it take to change the battery?
Typically 2–5 minutes.
2. What battery do most garage remotes use?
Most use CR2032 lithium coin batteries.
3. Why is my remote still not working after replacing the battery?
It may need reprogramming or could be damaged.
4. Can I use any battery brand?
Yes, but high-quality brands are recommended for better performance.
5. How often should I replace the battery?
Every 1–2 years, depending on usage.
6. Is it safe to replace the battery myself?
Yes, it’s completely safe with basic precautions.
Conclusion
Knowing how to change battery in garage door opener remote is a simple yet essential skill for any homeowner. With just a few minutes and a small investment, you can restore your remote’s performance and avoid unnecessary frustration.
Regular maintenance ensures your garage door operates smoothly and reliably every day. If you found this guide helpful, share it on social media and help others fix their garage door remotes quickly and easily!
Leave a Reply