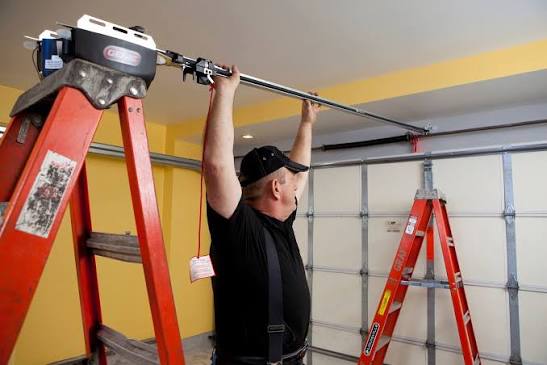
Replacing a garage door opener can feel like a daunting task, especially if you have never handled electrical components or heavy machinery before. Many homeowners wonder how hard is it to replace garage door opener because they want to save money on professional installation but fear making costly mistakes. The good news is that with the right preparation, basic tools, and clear instructions, most people with moderate DIY skills can successfully complete this project in a single afternoon.
Understanding the Difficulty Level of Garage Door Opener Replacement
The difficulty of replacing a garage door opener largely depends on your experience level, the type of opener you are installing, and the condition of your existing setup. For someone with basic handyman skills who has used power drills and followed assembly instructions before, the task rates as moderately easy. However, if you have never worked with electrical wiring or mounted heavy objects overhead, you may find it more challenging.
According to home improvement experts, approximately 65% of homeowners with intermediate DIY experience can successfully replace their garage door opener without professional help. The key factors that influence difficulty include:
- Weight of the new unit: Modern openers weigh between 20-35 pounds, requiring careful handling during installation
- Ceiling height and accessibility: Higher ceilings may require ladders or scaffolding
- Electrical wiring complexity: Some installations need new electrical outlets or circuit work
- Compatibility with existing door systems: Older doors may need additional adjustments
Most manufacturers design modern garage door openers with user-friendly installation in mind, including pre-assembled rail systems and clear instruction manuals. This means that while the task requires attention to detail and physical effort, it does not demand specialized technical knowledge.
What Tools and Materials Do You Need?
Before starting your garage door opener replacement project, gather all necessary tools and materials. Having everything ready beforehand will make the process smoother and prevent frustrating mid-project trips to the hardware store.
Essential Tools List
| Tool | Purpose |
|---|---|
| Power drill with bits | Mounting brackets and securing hardware |
| Socket wrench set | Tightening bolts and nuts |
| Screwdrivers (Phillips and flathead) | Various screw types throughout installation |
| Wire strippers and connectors | Electrical connections |
| Level | Ensuring proper alignment |
| Tape measure | Accurate positioning |
| Ladder (6-8 feet) | Reaching ceiling mounting points |
| Safety glasses and gloves | Personal protection |
Additional Materials
- New garage door opener unit
- Mounting hardware (usually included with opener)
- Electrical wire (if extending power source)
- Cable ties for wire management
- Lubricant for door tracks and rollers
Pro tip: Check your new opener’s manual for any specific tool requirements, as some models may need specialized bits or adapters.
Step-by-Step Guide to Replacing Your Garage Door Opener
Step 1: Disconnect and Remove the Old Opener
Safety should always be your top priority when working with garage door systems. Begin by disconnecting power to the old opener at the circuit breaker. This prevents accidental activation during removal. Next, disconnect the emergency release cord and unplug the unit from its power source.
Carefully support the old opener while removing the mounting brackets. Most units are secured with 2-4 bolts to ceiling joists. Have a helper assist you if possible, as openers can be awkward to handle alone. Once disconnected, lower the unit carefully and set it aside for disposal or recycling.
Step 2: Prepare the Installation Area
Inspect your ceiling structure to ensure it can support the new opener’s weight. Locate solid wood joists using a stud finder—never mount directly to drywall or thin metal supports. Mark your mounting points according to the new opener’s specifications, typically 2-4 inches from the garage door’s center line.
If your electrical outlet is not conveniently located, you may need to extend wiring or install a new outlet. For complex electrical work, consider hiring a licensed electrician to ensure code compliance and safety.
Step 3: Assemble the New Opener Rail System
Most modern garage door openers come with pre-assembled or partially assembled rail systems. Follow the manufacturer’s instructions carefully to connect the motor unit to the rail. Ensure all connections are secure and that the rail extends properly toward the garage door.
Attach the trolley assembly to the rail and connect it to the garage door using the provided arm bracket. The connection point should be centered on the door and positioned according to the manual’s specifications, usually 2-4 inches above the door’s top section.
Step 4: Mount the Opener Unit
With the rail system assembled, lift the motor unit into position and secure it to the ceiling joists using the provided mounting brackets. Use a level to ensure the unit is perfectly horizontal, as improper alignment can cause operational issues later. Tighten all bolts securely, but avoid over-tightening which could strip the threads.
For added stability, some installations benefit from additional support brackets attached to nearby wall studs. Check your local building codes for specific requirements in your area.
Step 5: Connect Electrical Wiring and Program the Unit
Connect the power cord to your electrical outlet or hardwire it according to local electrical codes. Install the wall-mounted control button at a convenient height, typically 4-5 feet from the floor and away from moving parts. Run the wires neatly along walls or ceiling joists, securing them with cable ties.
Program the remote controls and keypad following the manufacturer’s instructions. Most modern openers use rolling code technology for enhanced security, which requires a simple programming sequence. Test all functions thoroughly before considering the installation complete.
Common Challenges and How to Overcome Them
Even with careful planning, you may encounter obstacles during your garage door opener replacement. Here are the most common issues and their solutions:
Challenge 1: Insufficient ceiling clearance Solution: If your garage has low ceilings, consider a jackshaft opener that mounts beside the door rather than overhead. These units save vertical space and work well in tight areas.
Challenge 2: Incompatible door springs or cables Solution: Older garage doors may have worn springs or cables that need replacement before installing a new opener. Consult a professional if you are unsure about spring tension adjustments, as these components store significant energy and can be dangerous.
Challenge 3: WiFi connectivity issues Solution: Modern smart openers require stable internet connections. Ensure your garage has adequate WiFi signal strength, or consider a WiFi extender if needed. Place the opener’s antenna away from metal objects that might interfere with signals.
Challenge 4: Noisy operation after installation Solution: Check that all bolts are properly tightened and that the rail system is aligned correctly. Apply lubricant to moving parts and ensure the door tracks are clean and straight.
When Should You Call a Professional?
While many homeowners can successfully replace their garage door opener, certain situations warrant professional assistance:
- Complex electrical work: If you need to install new circuits or modify existing wiring beyond simple plug-in connections
- Structural concerns: When ceiling joists are damaged or insufficient to support the opener’s weight
- Older door systems: Doors older than 15 years may need significant modifications to work with modern openers
- Safety sensor issues: If safety sensors do not align properly or malfunction repeatedly
- Lack of confidence: If you feel uncomfortable working at heights or with electrical components
According to Wikipedia’s comprehensive guide on garage door openers, professional installation typically costs between $200-$500, which may be worthwhile if you encounter complications or prefer peace of mind.
FAQ Section
How long does it take to replace a garage door opener?
Most DIY installations take 3-5 hours for first-time installers, while experienced individuals can complete the job in 2-3 hours. Professional installers typically finish within 1-2 hours due to their familiarity with the process.
Can I replace just the motor unit without changing the entire system?
Yes, in many cases you can replace only the motor unit if the rail system, trolley, and other components are still in good condition. However, ensure compatibility between the new motor and existing components, and check that the warranty covers partial replacements.
What is the average cost of a new garage door opener?
Basic chain-drive openers range from $150-$250, while belt-drive models cost $200-$400. Premium smart openers with advanced features can reach $500-$800. Professional installation adds $200-$500 to the total cost.
Do I need permits to replace my garage door opener?
Most residential garage door opener replacements do not require permits, as they are considered minor home improvements. However, if you are performing significant electrical work or structural modifications, check with your local building department for specific requirements.
How often should garage door openers be replaced?
Modern garage door openers typically last 10-15 years with proper maintenance. Signs that replacement is needed include frequent breakdowns, unusual noises, slow operation, or inability to find replacement parts for repairs.
Are smart garage door openers worth the extra cost?
Smart openers offer convenient features like remote monitoring, smartphone control, and integration with home automation systems. While they cost more upfront, many users find the convenience and security benefits justify the investment, especially for frequently used garages.
Conclusion
Understanding how hard is it to replace garage door opener helps you make an informed decision about tackling this project yourself or hiring professional help. For most homeowners with basic DIY skills, replacing a garage door opener is a manageable weekend project that can save hundreds of dollars in installation fees. With proper preparation, the right tools, and careful attention to safety protocols, you can successfully install a new opener and enjoy reliable garage door operation for years to come.
Remember that patience and methodical work yield better results than rushing through the process. Take time to read the manufacturer’s instructions thoroughly, double-check your measurements, and test all functions before considering the job complete. If you found this guide helpful, please share it with friends and family who might be considering similar home improvement projects. Your experience could help others confidently tackle their own garage door opener replacements!
Leave a Reply