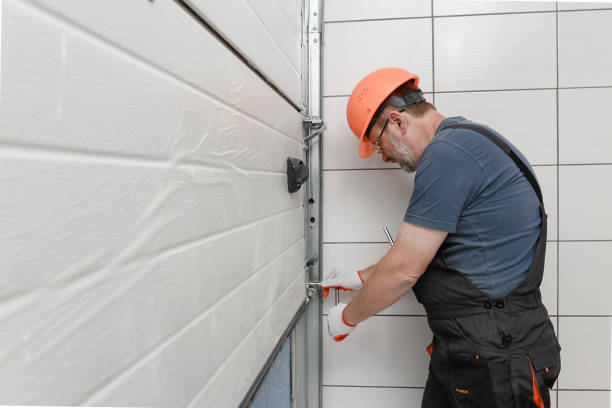
How Hard Is It To Replace A Garage Door? (2026 Guide)
If your garage door is dented, noisy, or simply past its prime, you’ve probably asked yourself: how hard is it to replace a garage door? The truth is, the difficulty depends on your skill level, the type of door you choose, and whether you’re tackling it solo or calling in a professional. In this comprehensive guide, we’ll break down everything you need to know so you can make a confident decision.
Whether you’re a weekend warrior who loves a good DIY project or someone who’d rather leave heavy lifting to the experts, understanding what’s involved will save you time, money, and frustration. Let’s dive in.
What Does Replacing a Garage Door Actually Involve?
Before we talk about difficulty, let’s clarify what a full garage door replacement means. It’s not just swapping out panels — it involves removing the old door, tracks, springs, rollers, and opener hardware, then installing an entirely new system from scratch.
Here’s a quick overview of the major components you’ll deal with:
- Door panels (steel, wood, aluminum, or fiberglass)
- Torsion or extension springs (under extreme tension)
- Rollers and hinges
- Tracks and brackets
- Garage door opener (if included)
- Weatherstripping and seals
Each of these parts requires careful handling, proper alignment, and — in the case of springs — serious safety precautions. According to the U.S. Consumer Product Safety Commission, garage door springs store enough energy to cause severe injury if mishandled, making this one of the most dangerous home improvement tasks for untrained individuals.
How Hard Is It To Replace A Garage Door? A Difficulty Breakdown
The honest answer: it ranges from moderately challenging to very difficult, depending on several factors. Let’s look at what influences the complexity.
1. Type of Spring System
| Spring Type | Difficulty Level | Risk Level |
|---|---|---|
| Extension Springs | Moderate | Medium |
| Torsion Springs | High | Very High |
Torsion springs sit above the door and are wound under extreme pressure — often over 200 pounds of torque. Releasing or installing them incorrectly can lead to serious injury. Most professionals strongly recommend leaving torsion spring work to trained technicians.
2. Door Material and Weight
A single-car steel door might weigh 80–130 lbs, while a double-car insulated wood door can exceed 400 lbs. Heavier doors require more helpers, stronger hardware, and precise track alignment.
3. Existing Infrastructure
If your current tracks, framing, and header are in good shape, the job gets easier. If they’re rusted, bent, or out of square, you’ll need to repair or replace them first — adding significant time and effort.
4. Your Experience Level
- Beginner DIYer: Expect this to be a very difficult multi-day project.
- Intermediate DIYer: Manageable with research, patience, and at least one helper.
- Experienced Handyman: Challenging but doable in a full day.
Step-by-Step: How To Replace a Garage Door
If you decide to go the DIY route, here’s a detailed walkthrough. Please note: this is a general guide. Always follow the manufacturer’s specific instructions that come with your new door.
Step 1: Gather Tools and Materials
You’ll need:
- Socket wrench set and adjustable wrenches
- Power drill with bits
- Level (4-foot minimum)
- Tape measure
- C-clamps or locking pliers
- Ladder or scaffolding
- Safety glasses and heavy-duty gloves
- Winding bars (for torsion springs — never use screwdrivers)
- Helper(s) — minimum of 2 people recommended
Step 2: Disconnect the Opener and Release Spring Tension
- Unplug the garage door opener from power.
- Pull the emergency release cord to disconnect the door from the opener carriage.
- Carefully release spring tension. For torsion springs, insert winding bars into the winding cone and slowly unwind in quarter-turn increments. For extension springs, secure the door in the open position with clamps before disconnecting.
⚠️ Safety Warning: Never attempt to remove or adjust springs without proper winding bars and safety gear. This step alone accounts for thousands of emergency room visits each year.
Step 3: Remove the Old Door
- Starting from the top panel, unbolt hinges connecting each section.
- Carefully lower each panel and set it aside.
- Remove rollers from the tracks.
- Unbolt and remove the tracks from the wall and ceiling brackets.
- Remove the old header bracket and any remaining hardware.
Step 4: Inspect and Prepare the Opening
- Check the door frame for rot, warping, or structural damage.
- Ensure the header is level and the side jambs are plumb.
- Measure the rough opening: standard single-car is 8′ x 7′ or 9′ x 7′; double-car is typically 16′ x 7′.
- Install new weatherstripping along the bottom and sides if needed.
Step 5: Install the New Bottom Panel and Tracks
- Place the bottom panel into the opening, ensuring it sits flush on the floor.
- Attach the vertical tracks to both sides using lag bolts, checking for plumb with your level.
- Insert rollers into the bottom panel’s hinge brackets.
Step 6: Stack Remaining Panels
- Lift the second panel onto the first, aligning hinge holes.
- Bolt hinges together securely.
- Repeat for all remaining panels.
- Attach horizontal tracks to the ceiling brackets and connect them to the vertical tracks.
Step 7: Install Springs and Cables
- Mount the torsion spring assembly (or extension springs) according to manufacturer specs.
- Wind torsion springs to the exact number of turns specified — usually 7–9 quarter turns for a standard 7-foot door.
- Thread lift cables through the bottom brackets and over the cable drums.
Step 8: Test Balance and Operation
- Manually lift the door halfway. It should stay in place without drifting up or down.
- If it falls, springs need more tension. If it rises, reduce tension.
- Once balanced, reconnect the opener and test automatic operation.
- Adjust travel limits and force settings on the opener per the manual.
Total estimated DIY time: 6–12 hours for experienced individuals; 2+ days for beginners.
DIY vs. Professional Installation: Pros and Cons
| Factor | DIY Installation | Professional Installation |
|---|---|---|
| Cost | $500–$1,500 (door only) | $1,200–$3,500+ (door + labor) |
| Time | 1–2 days | 3–6 hours |
| Warranty | Manufacturer only (may void if self-installed) | Full warranty including labor |
| Safety Risk | High (especially springs) | Minimal (trained technicians) |
| Quality Guarantee | Depends on your skill | Backed by company reputation |
| Permits/Code | Your responsibility | Handled by installer |
Bottom line: If you value safety, speed, and peace of mind, hiring a licensed professional is almost always worth the extra cost. Many companies offer free estimates, so there’s no harm in comparing quotes.
How Much Does It Cost To Replace a Garage Door in 2026?
National averages for a complete garage door replacement (including installation) fall within these ranges:
- Single-car non-insulated steel door: $800–$1,500
- Single-car insulated steel door: $1,200–$2,200
- Double-car insulated steel door: $1,800–$3,500
- Custom wood or carriage-house style: $3,000–$7,000+
Factors that affect price include insulation R-value, window inserts, smart opener integration, and regional labor rates.
Signs You Need To Replace Your Garage Door
Not sure if replacement is necessary? Look for these red flags:
- Visible damage: Large dents, cracks, or holes in panels
- Excessive noise: Grinding, squeaking, or banging during operation
- Slow response: Door takes more than 15 seconds to open or close
- Off-track operation: Door wobbles, sticks, or comes off the rails
- Failed balance test: Door won’t stay open when lifted manually
- Age: Most garage doors last 15–30 years; beyond that, parts wear out faster
- Rising energy bills: Poorly insulated doors let heat escape in winter and enter in summer
FAQ Section
Q1: Can I replace a garage door by myself?
Yes, but it’s one of the more dangerous DIY projects due to high-tension springs and heavy panels. If you have intermediate-to-advanced handyman skills, proper tools, and at least one strong helper, it’s possible. However, most homeowners find that hiring a professional is safer and more cost-effective when you factor in potential mistakes.
Q2: How long does it take to replace a garage door?
A professional crew can typically complete the job in 3 to 6 hours. A DIY installation may take anywhere from 6 to 12 hours spread over one or two days, depending on your experience and whether complications arise (such as damaged framing or incompatible hardware).
Q3: Do I need a permit to replace my garage door?
In most U.S. municipalities, replacing a garage door with a similar model does not require a building permit. However, if you’re changing the size of the opening, altering structural elements, or adding electrical work for a new opener, a permit may be required. Always check with your local building department before starting.
Q4: What is the hardest part of replacing a garage door?
Without question, handling the springs is the most dangerous and technically demanding part. Torsion springs store immense kinetic energy, and improper winding or removal can cause catastrophic failure. Even seasoned DIYers often hire a specialist just for the spring portion of the job.
Q5: Should I replace my garage door opener at the same time?
It’s highly recommended. If your opener is more than 10 years old, it likely lacks modern safety features like auto-reverse sensors, battery backup, and Wi-Fi connectivity. Installing a new opener alongside your new door ensures compatibility and maximizes convenience and security.
Q6: Will a new garage door increase my home’s value?
Absolutely. According to Remodeling Magazine’s Cost vs. Value Report, garage door replacement consistently ranks among the top home improvements for ROI, often recouping 90–100% or more of its cost at resale. It also dramatically boosts curb appeal, which matters in competitive housing markets.
Conclusion
So, how hard is it to replace a garage door? The short answer: it’s a complex, physically demanding, and potentially dangerous project that requires specialized tools, careful planning, and a solid understanding of mechanical systems. While ambitious DIYers can pull it off, the risks — particularly around spring tension — make professional installation the smarter choice for most homeowners.
A new garage door doesn’t just improve functionality; it enhances your home’s security, energy efficiency, and curb appeal. Whether you go DIY or hire a pro, investing in a quality door pays dividends for decades.
Found this guide helpful? Share it with friends and family on Facebook, X (Twitter), or Pinterest who might be facing the same garage door dilemma. And don’t forget to bookmark this page for future reference!
Leave a Reply