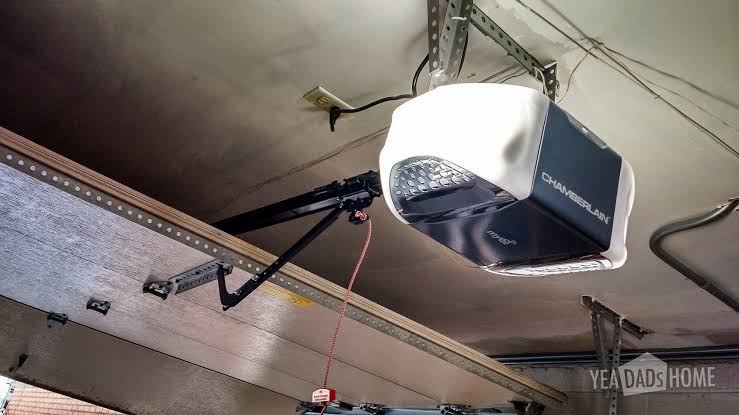
Your garage door motor just died, and now you are stuck wondering about the hassle of fixing it. Many homeowners ask, how hard is it to replace a garage door motor, especially when balancing a busy schedule and a limited DIY budget. Don’t worry; we are here to break down the process, the difficulty level, and exactly what to expect so you can make an informed decision.
How Hard Is It To Replace A Garage Door Motor? (Difficulty Level)
If you have basic DIY skills and the right tools, replacing a garage door motor is a moderately challenging task. On a difficulty scale of 1 to 10, it sits comfortably at a 6. It typically takes an average homeowner about 2 to 4 hours to complete the job from start to finish.
The process involves heavy lifting, basic electrical wiring, and precise alignment. According to home improvement experts, nearly 40% of DIYers find the electrical connections and rail alignment the most daunting parts. However, with modern motors coming with comprehensive, easy-to-read manuals, the barrier to entry is lower than ever.
DIY vs. Hiring a Professional: Pros and Cons
Before grabbing your toolbox, you need to decide if this is a weekend project for you or a job best left to the pros. Here is a quick comparison to help you choose.
| Approach | Pros | Cons | Estimated Cost |
|---|---|---|---|
| DIY Replacement | Save money, learn a new skill, work on your own schedule. | Physically demanding, risk of improper installation, voids some warranties. | $150 – $400 (Parts only) |
| Hiring a Pro | Fast, safe, guaranteed work, includes labor warranty. | More expensive, requires scheduling and waiting at home. | $400 – $800 (Parts + Labor) |
If you are uncomfortable working with electricity or climbing ladders, hiring a professional is the safest route.
Essential Tools and Materials You Will Need
To ensure a smooth installation, gather these tools before you begin. Having everything within arm’s reach will save you a lot of frustration.
- Adjustable wrenches and a socket set (specifically 7/16-inch and 1/2-inch sizes)
- Stepladder (at least 6 feet tall for safe reaching)
- Locking pliers or vice grips (to secure the door track)
- Wire strippers and electrical tape
- Power drill with a 5/16-inch drill bit
- A helper (the motor and rails are heavy and awkward to hold alone)
Step-by-Step Guide to Replacing a Garage Door Motor
Ready to tackle the project? Follow these concrete steps to ensure a safe and successful installation.
Step 1: Disconnect Power and Secure the Door Safety first! Go to your main electrical panel and flip the breaker that controls the garage. Next, close the garage door completely. Use your locking pliers or a C-clamp to secure the door track just below the bottom roller. This prevents the heavy door from accidentally springing up while you work.
Step 2: Remove the Old Motor Start by disconnecting the emergency release cord. Then, carefully unplug the old motor or disconnect the hardwired electrical connections (make sure to label the wires with tape so you remember where they go!). Use your socket wrench to unbolt the motor from the ceiling bracket. Have your helper support the weight of the motor as you remove the final bolts. Lower it gently to the ground.
Step 3: Install the New Ceiling Bracket and Rail Mount the new ceiling bracket using the provided lag screws (heavy-duty wood screws), ensuring it is perfectly centered above the door. Next, assemble the new rail according to the manufacturer’s instructions. Attach the rail to the motor head and slide the trolley (the moving carriage that pulls the door) onto the rail.
Step 4: Mount the Motor and Attach the Arm With your helper’s assistance, lift the new motor into place. Bolt it securely to the ceiling bracket. The motor should be positioned at a height of 7 to 8 inches above the highest point of the garage door’s travel. Connect the straight arm to the trolley and the curved arm to the top bracket on the garage door itself. Tighten all bolts firmly with your wrench.
Step 5: Wire the Motor and Install Sensors Run the low-voltage wires from the motor to the wall button and the safety sensors near the floor. The safety sensors must be mounted exactly 6 inches above the ground on both sides of the door track. Connect the main power wires to your home’s electrical supply or plug it into a dedicated outlet. For a deeper understanding of the mechanics involved, you can read more about the history and components of a garage door opener on Wikipedia.
Step 6: Test and Calibrate Restore power at the breaker. Press the wall button to test the door. Most modern motors have an automatic calibration sequence. Follow the manual’s prompts to set the upper and lower travel limits. Finally, test the auto-reverse feature (the safety mechanism that stops the door if it hits an object) by placing a 2×4 piece of wood on the ground under the door; the door should immediately reverse upon touching the wood.
Common Mistakes to Avoid During Installation
Even experienced DIYers can slip up. Avoid these common pitfalls to ensure your new motor runs smoothly for years to come.
- Skipping the safety sensor alignment: If the LED lights on your sensors are blinking, the door will not close. Ensure the lenses are perfectly aligned and clean.
- Overtightening the hardware: Snug is enough. Overtightening bolts on the rail can strip the threads or bend the metal, causing grinding noises later.
- Ignoring the door balance: If your garage door is heavy to lift manually, the new motor will burn out quickly. Test the manual balance by pulling the release handle and lifting the door halfway; it should stay in place.
FAQ: Your Garage Door Motor Questions Answered
1. How long does it take to replace a garage door motor? For a professional, it takes about 1 to 2 hours. For a DIYer with basic skills and a helper, expect the project to take between 2 to 4 hours, including setup and cleanup.
2. Can I replace just the motor without changing the rails? In most cases, no. Garage door motors and rails are designed as specific matching sets. Mixing an old rail with a new motor from a different brand or even a different model year can cause operational failures and void the warranty.
3. What is the average cost of a new garage door motor? A standard 1/2 HP or 3/4 HP garage door motor typically costs between $150 and $300. High-end models with smart home integration and battery backups can range from $300 to $500.
4. How often should a garage door motor be replaced? The average lifespan of a garage door motor is 10 to 15 years, depending on usage and maintenance. If your motor is constantly overheating, making loud grinding noises, or struggling to lift the door, it might be time for a replacement.
5. Do I need to recalibrate the sensors after replacing the motor? Yes. Every time you install a new motor or move the sensors, you must align the safety eyes and test the auto-reverse mechanism to comply with federal safety standards established in 1993.
Conclusion
So, how hard is it to replace a garage door motor? While it requires some physical effort, basic electrical knowledge, and a few hours of your weekend, it is a highly manageable project for a confident DIYer. By following the proper steps and prioritizing safety, you can save hundreds of dollars in labor costs and enjoy the satisfaction of a job well done.
Did you find this guide helpful? Share this article on your social media to help your friends and family tackle their own garage door repairs!
Leave a Reply