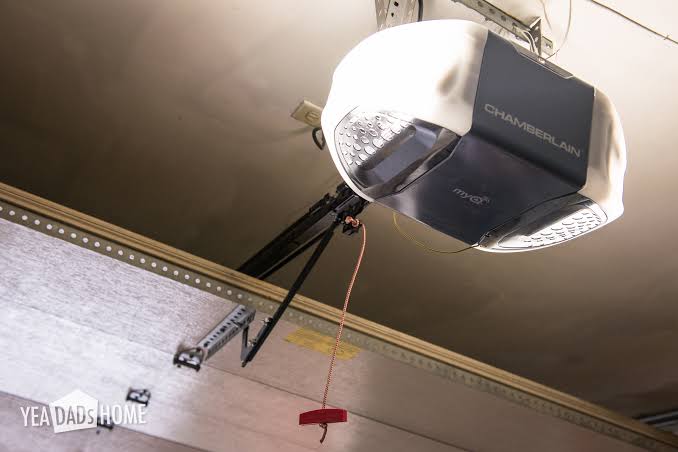
Is your old garage door opener making strange noises or failing to respond to your remote? Many homeowners ask themselves, “How easy is it to replace a garage door opener?” when facing this frustrating daily disruption. The good news is that with the right tools, a clear guide, and a bit of patience, you can easily handle this upgrade yourself.
How Easy Is It To Replace A Garage Door Opener?
If we are being completely honest, replacing a garage door opener is a moderate DIY project. It is not as simple as changing a lightbulb, but it is definitely not as complex as remodeling your kitchen.
On a difficulty scale of 1 to 10, this task sits comfortably at a 4 or 5. The physical labor involves lifting a heavy motor unit and working on a ladder, which requires some basic mechanical aptitude. However, you do not need to be a licensed electrician or a professional contractor to get the job done.
For a confident DIYer, the entire process usually takes between 3 to 5 hours. If you are a complete beginner, you might want to allocate a full weekend afternoon. The key to making it “easy” is preparation and having a helper to hold the heavy motor unit while you secure it to the ceiling.
Signs You Actually Need a Replacement
Before you grab your toolbox, you need to confirm that your current unit is truly beyond repair. According to the International Door Association (IDA), a well-maintained garage door opener typically lasts between 10 to 15 years.
Here are the clear signs that it is time for an upgrade:
- Excessive Noise: Your old chain-drive opener sounds like a freight train every time it operates.
- Frequent Repairs: You have called a technician more than twice in the last year.
- Slow Response Time: The door hesitates or reverses randomly without any obstacles in the way.
- Lack of Safety Features: Your opener lacks modern auto-reverse sensors, which have been mandatory since 1993.
- No Smart Connectivity: You want the convenience of opening your garage via a smartphone app.
DIY Installation vs. Hiring a Professional
Should you do it yourself or pay a pro? Let us break down the pros and cons so you can make an informed decision.
| Feature | DIY Installation | Hiring a Professional |
|---|---|---|
| Cost | $150 – $350 (Opener unit only) | $400 – $700 (Unit + labor fees) |
| Time Required | 3 to 5 hours (or more for beginners) | 1 to 2 hours (experts work fast) |
| Difficulty Level | Moderate (requires basic tools) | Zero (they handle everything) |
| Warranty | Standard manufacturer warranty | Labor warranty + manufacturer warranty |
| Safety Risk | Moderate (working on ladders/ceilings) | Zero (professionals are insured) |
Expert Insight: “If you are comfortable using a drill, climbing a stepladder, and following a manual, DIY is highly rewarding and saves you hundreds of dollars,” says Mark Davidson, a certified garage door technician with over 20 years of experience.
Step-by-Step Guide to Replacing Your Opener
Ready to tackle the project? Follow these concrete steps to ensure a smooth installation.
Step 1: Gather Your Tools and Disconnect Power
Safety first! Go to your circuit breaker and turn off the power to the garage. You will need the following tools:
- A stepladder
- A power drill with a 5/16-inch masonry bit (if drilling into concrete)
- A 7/16-inch socket wrench
- Wrenches, locking pliers, and a tape measure
- Pro Tip: Lay down a drop cloth to catch any dust falling from the ceiling.
Step 2: Remove the Old Opener
With the power off, unplug the old motor. Disconnect the safety sensor wires and the wall button wires.
- Important: The motor unit weighs between 20 to 30 pounds. Have a helper stand on the ladder to support the unit’s weight while you unbolt it from the ceiling hangers.
- Carefully lower the old motor and set it aside. Leave the old door bracket attached to the garage door for now; you will use it as a template.
Step 3: Assemble the New Rail and Motor
Lay the new rail pieces out on the garage floor (place a towel underneath to prevent scratching). Connect the rail sections according to the manufacturer’s manual.
- Attach the motor to the rail.
- Insert the drive mechanism (chain or belt) and tighten it according to the manual’s specifications. Usually, there should be about 1/4 inch of slack in the middle of the chain.
Step 4: Hang the New Motor Unit
This is the most physically demanding part. With your helper’s assistance, lift the assembled motor and rail onto the ceiling brackets.
- Secure the motor to the ceiling using 5/16-inch by 2.5-inch lag screws.
- Ensure the motor is perfectly centered above the garage door. Use a level to check that the rail is completely horizontal.
Step 5: Attach the Door Bracket and Arm
Connect the curved or straight door arm to the motor’s trolley. Then, attach the other end of the arm to the J-bar or bracket on the top panel of your garage door.
- Crucial Detail: The arm should be attached exactly 2 to 4 inches above the top section of the door. If it is too high, the door will bind; if it is too low, it will not open fully.
Step 6: Wire the Sensors and Wall Button
Run the low-voltage wires (usually included in a single bundled cable) from the motor to the sides of the door for the safety sensors, and to the interior wall for the control button.
- Use a staple gun to secure the wires to the wall studs and door frame, keeping them at least 6 inches above the floor for the sensors.
Step 7: Program and Test the System
Restore power at the circuit breaker. Program your remote controls and keypad.
- The Safety Test: Place a standard 2×4 piece of wood flat on the ground under the center of the door. Close the door. When the door touches the wood, it must immediately reverse. If it does not, adjust the “down limit” and “force” settings on the motor’s back panel until it passes this test.
The Smart Upgrade: Adding Wi-Fi Connectivity
One of the best parts about replacing your unit is upgrading to a smart garage door opener. Modern Wi-Fi-enabled openers allow you to check if you left the garage open from your office, grant temporary access to dog walkers, and integrate with voice assistants like Alexa or Google Home.
If you want to learn more about the evolution of automated doors and smart home technology, you can read the comprehensive history on Wikipedia’s Garage Door Opener page.
Frequently Asked Questions (FAQ)
1. How long does it take to replace a garage door opener? For a DIYer with moderate experience, it takes about 3 to 4 hours. If you are a beginner, expect it to take around 5 hours. A professional installer can typically complete the job in 1 to 2 hours.
2. Can I install a garage door opener by myself? Yes, you can install it yourself if you are comfortable using basic hand tools, working on a ladder, and following technical instructions. However, because the motor unit is heavy, it is highly recommended to have a second person help you lift and hold the unit during ceiling mounting.
3. How much does it cost to replace a garage door opener? If you do it yourself, you only pay for the unit, which ranges from $150 for a basic chain-drive to $350+ for a premium belt-drive smart opener. If you hire a professional, expect to pay between $400 and $700, which includes the cost of the unit and professional labor.
4. Do I need to replace the rails when upgrading the opener? In most cases, yes. You cannot mix and match rails from different manufacturers or even different models from the same brand. The dimensions, track widths, and trolley mechanisms are proprietary. Always buy a complete, all-in-one opener kit.
5. What is the quietest type of garage door opener? Belt-drive openers are the quietest. They use a fiberglass-reinforced rubber belt instead of a metal chain, making them ideal if your garage is attached to your house or located beneath a bedroom.
Conclusion
So, how easy is it to replace a garage door opener? As you can see, it is a highly manageable weekend project that can save you hundreds of dollars in labor costs. By taking the time to properly remove the old unit, carefully assemble the new rail, and rigorously test the safety sensors, you will enjoy a quieter, safer, and smarter garage for years to come.
Not only will you upgrade your home’s security and convenience, but you will also gain the satisfaction of completing a major home improvement task with your own two hands.
Did you find this guide helpful? Share this article on your favorite social media platforms like Facebook, Pinterest, or X (Twitter) to help your friends and family tackle their own DIY garage upgrades! Don’t forget to bookmark this page for when you are ready to start your project.
Leave a Reply