Introduction
Replacing an old, noisy mechanism or adding convenience to a new home often leads homeowners to ask: how easy is it to install a garage door opener? The answer is more nuanced than a simple yes or no. While it is certainly achievable for a handy homeowner with basic mechanical skills, it involves working with heavy springs, high-voltage electricity, and precise alignments that demand respect and caution.
If you are comfortable using power drills, reading technical manuals, and have a helper available, you can likely tackle this project over a weekend. However, understanding the specific challenges beforehand is crucial to avoiding frustration or safety hazards. This guide will walk you through the reality of the installation process, helping you decide if this is the right DIY project for you.
Assessing the Difficulty: Is It Truly a DIY Job?
Before buying parts, you must evaluate your own skill set. Installing a garage door opener is generally considered a moderate-difficulty home improvement task. It is not as simple as assembling flat-pack furniture, but it is less complex than rewiring a house.
Key Factors Influencing Difficulty
- Physical Strength: You will be lifting a motor unit that weighs between 20 to 40 pounds above your head.
- Technical Aptitude: You need to connect low-voltage wires for sensors and high-voltage wires for power.
- Precision: The rail must be perfectly aligned, or the door will bind and fail.
According to industry standards, most standard chain-drive or belt-drive openers come with detailed instructions. However, Wikipedia’s overview on garage door openers highlights that modern systems include complex safety features like photo-eye sensors and auto-reverse mechanisms that must be calibrated correctly to meet federal safety regulations.
Tools and Preparation: What You Need Before Starting
Success lies in preparation. Attempting to install an opener without the right tools will turn a 4-hour job into an 8-hour ordeal.
Essential Tool Checklist
- Stepladder: A sturdy 6-foot ladder is mandatory.
- Power Drill: With both drill bits and driver bits.
- Wrenches and Sockets: Adjustable wrenches and a socket set (typically 9/16″ and 1/2″).
- Locking Pliers: To hold brackets in place while you bolt them.
- Level: A 4-foot level is ideal for ensuring the rail is straight.
- Helper: Crucial. Do not attempt this alone. You need someone to hold the motor head while you secure the bracket.
Safety First
Always disconnect the power to the garage before starting any electrical work. If your existing door has broken springs or cables, do not proceed. Torsion springs are under extreme tension and can cause severe injury if handled incorrectly. In such cases, call a professional.
Step-by-Step Installation Overview
While every brand (LiftMaster, Chamberlain, Genie) has slight variations, the core process remains consistent. Here is what you can expect.
1. Assemble the Rail
Most openers ship with the rail in sections. Lay them out on the garage floor and bolt them together according to the manual. Ensure all bolts are tight, but do not overtighten, as this can strip the threads. Attach the trolley and the carriage assembly to the rail.
2. Install the Header Bracket
This is the anchor point above the garage door.
- Locate the center of the door opening.
- Measure the height specified in your manual (usually 2–4 inches above the door).
- Drill pilot holes and secure the bracket into the wooden header or structural support. Note: If you have steel siding, you may need toggle bolts or additional wood backing.
3. Mount the Motor Unit
This is the most physically demanding step.
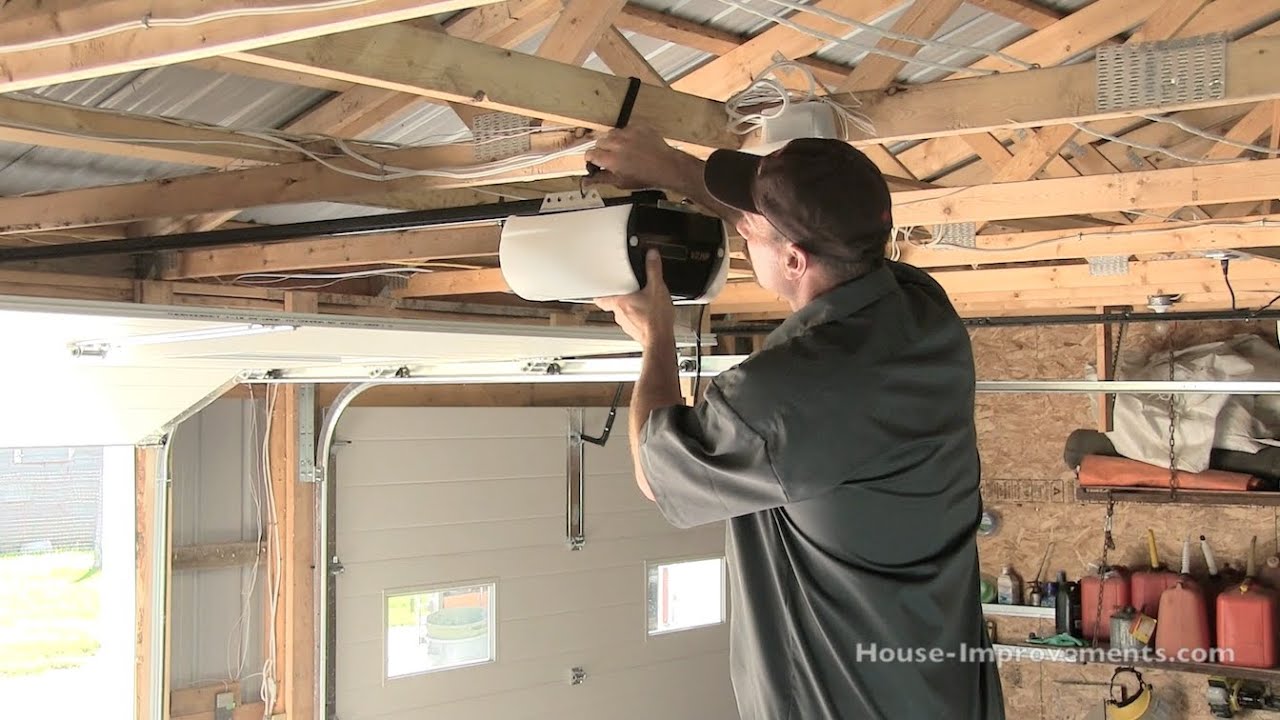
- With your helper, lift the motor head and align it with the rear of the rail.
- Insert the clevis pin and secure it with a cotter pin.
- Lift the entire assembly onto the ceiling mounting brackets. These brackets should already be installed into the ceiling joists.
- Secure the motor unit to the brackets using the provided hardware.
4. Connect the Door Arm
Attach the curved door arm to the trolley on the rail and the straight arm to the top section of the garage door. Use the provided brackets. Ensure the connection allows for smooth movement without binding.
5. Electrical Wiring and Sensors
- Power: Plug the unit into a nearby outlet. If one doesn’t exist, you may need to hire an electrician to install one. Hardwiring is an option but requires knowledge of local electrical codes.
- Safety Eyes: Install the photo-eye sensors on either side of the door, about 6 inches off the ground. They must face each other directly. If the LED light blinks, they are misaligned.
- Wall Console: Mount the wall button inside the garage, away from moving parts and out of reach of children.
Common Challenges and Troubleshooting
Even with careful planning, issues can arise. Here are the most frequent hurdles homeowners face.
| Challenge | Cause | Solution |
|---|---|---|
| Door Reverses Before Closing | Misaligned safety sensors or obstructed beam. | Clean lenses and realign sensors until solid LEDs appear. |
| Noisy Operation | Loose hardware or lack of lubrication. | Tighten all bolts and apply silicone-based lubricant to rollers. |
| Remote Not Working | Frequency interference or dead batteries. | Reprogram the remote per the manual; replace batteries. |
| Motor Humms but Doesn’t Move | Broken gear or locked mechanism. | Check the manual release cord; inspect internal gears. |
Belt Drive vs. Chain Drive: Which Is Easier to Install?
When asking how easy is it to install a garage door opener, the type of drive matters slightly.
- Chain Drive: These are the most common and generally the easiest to find parts for. They are robust but louder. The installation process is straightforward, with heavy-duty components that forgive minor alignment errors better than other types.
- Belt Drive: These use a steel-reinforced rubber belt. They are quieter and smoother but can be slightly more finicky during installation. The belt tension must be precise; too loose, and it slips; too tight, and it wears out the motor bearings.
For first-time DIYers, a chain drive is often recommended due to its simplicity and durability, unless noise is a primary concern (e.g., bedrooms above the garage).
When to Call a Professional
While learning how easy is it to install a garage door opener can empower you to save money, knowing when to stop is equally important. Hire a pro if:
- Your garage door lacks proper balance (it should stay in place when lifted halfway).
- You do not have a grounded electrical outlet near the motor location.
- The ceiling structure is insufficient (e.g., trusses instead of joists) requiring additional reinforcement.
- You feel uncomfortable working with electricity or heavy overhead objects.
FAQ Section
1. How long does it take to install a garage door opener?
For an experienced DIYer, it typically takes 3 to 5 hours. For a beginner with a helper, expect to spend 5 to 8 hours. Rushing the process can lead to misalignment and future repairs.
2. Do I need a permit to install a garage door opener?
In most US jurisdictions, replacing an existing opener does not require a permit. However, if you are adding new electrical wiring or installing an opener in a new construction where none existed, check with your local building department. Regulations vary by city and county.
3. Can I install a smart garage door opener myself?
Yes. Smart openers (like MyQ or RatGDO) follow the same mechanical installation steps as standard models. The “smart” aspect involves connecting the unit to your Wi-Fi network via an app, which is usually user-friendly and guided by on-screen instructions.
4. What is the weight limit for DIY installation?
Most residential openers handle doors up to 7 feet tall and weigh less than 400 pounds. If you have an oversized wooden door or a heavy custom door, ensure the opener’s horsepower (HP) rating matches the door’s weight. A ½ HP unit is standard, but ¾ HP or 1 HP is better for heavy doors.
5. Why does my new opener make a grinding noise?
A grinding noise usually indicates that the plastic drive gear inside the motor housing is stripped or worn. If the unit is new, this may be a manufacturing defect covered under warranty. If it’s older, the gear kit needs replacement. Ensure the door moves freely by hand before assuming the motor is at fault.
Conclusion
So, how easy is it to install a garage door opener? It is a manageable project for those who are patient, methodical, and safety-conscious. By gathering the right tools, enlisting a helper, and following the manufacturer’s instructions precisely, you can save hundreds of dollars in labor costs.
Remember, the key to success is not just speed, but precision. Take your time with the alignment of the rail and the calibration of the safety sensors. Once installed, you’ll enjoy the convenience of automated access for years to come.
If you found this guide helpful, please share it with your friends on social media who might be considering their own DIY garage upgrade. Happy installing!
Leave a Reply