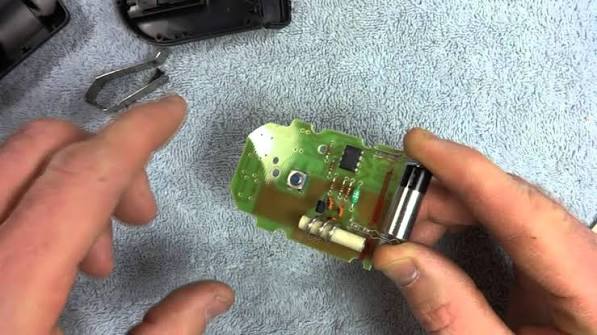
Losing your garage door remote is one of those minor household annoyances that can cause major stress. You are stuck in your car, rain pouring down, wondering if you have to manually lift that heavy door or call an expensive technician. If you are asking yourself, “How do I replace my garage door opener remote?” you are in the right place. Replacing and programming a new remote is often much simpler and cheaper than most homeowners realize, and you can usually do it yourself in under 15 minutes.
Why You Might Need a New Remote
Before we dive into the technical steps, it helps to understand why remotes fail. It is not always just about losing them. Batteries die, circuit boards corrode from humidity, or the plastic casing cracks after being dropped. According to home maintenance experts, the average lifespan of a garage door remote battery is 1–2 years, but the remote itself can last 5–10 years with proper care.
Sometimes, the issue isn’t the remote at all, but the connection to the opener. However, if your remote is physically damaged or lost, replacement is the only option. The good news is that modern technology has made this process incredibly user-friendly.
Identifying Your Garage Door Opener Model
The first step in answering “how do I replace my garage door opener remote” is knowing what system you have. Not all remotes are universal, although many modern ones are designed to be compatible with multiple brands.
Check the Motor Unit
Go into your garage and look at the motor unit hanging from the ceiling. There should be a label or sticker on the back or side. Look for:
- Brand Name: Common brands include LiftMaster, Chamberlain, Genie, Craftsman, and Ryobi.
- Model Number: This is crucial. It usually looks like a series of letters and numbers (e.g., “8500” or “GH200”).
- Frequency: Older remotes operate on 315 MHz or 390 MHz, while newer ones use 433 MHz or rolling code technology.
Check the Old Remote
If you still have the old remote, even if it is broken, check the back. It often lists the model number and frequency. This information will help you buy the exact replacement or a compatible universal remote.
Pro Tip: If you cannot find the model number, take a clear photo of the motor unit and the old remote. You can show this to a hardware store associate or use it to search online forums for compatibility.
Choosing the Right Replacement Remote
Once you know your model, you have three main options for replacement:
- OEM (Original Equipment Manufacturer) Remote: This is an exact match from the same brand. It is the safest bet for compatibility but can be more expensive.
- Universal Remote: These are designed to work with most major brands. They are cost-effective and widely available at hardware stores. Brands like Linear and Mastercraft offer popular universal models.
- Smart Garage Hub: If you want to upgrade, consider a smart hub like MyQ or Tailwind. These allow you to open your garage via smartphone app, eliminating the need for a physical remote entirely.
| Feature | OEM Remote | Universal Remote | Smart Hub |
|---|---|---|---|
| Compatibility | 100% Guaranteed | High (Check List) | Varies by Opener |
| Cost | $$ | $ | $ |
| Ease of Setup | Easy | Moderate | Moderate |
| Extra Features | None | None | App Control, Alerts |
For most users, a universal remote is the best balance of cost and convenience. Just ensure it lists your specific brand and model number on its packaging.
Step-by-Step Guide: How to Program Your New Remote
Now for the core question: How do I replace my garage door opener remote? The process varies slightly by brand, but the general logic is the same. Most modern openers use “Rolling Code” technology for security, which means the code changes every time you press the button. This prevents hackers from copying your signal.
Step 1: Locate the “Learn” Button
On your garage door motor unit, find the “Learn” or “Program” button. It is usually located on the back panel, near the antenna wire. It is often colored yellow, purple, orange, or red.
- Note: You may need a sturdy ladder to reach it safely. Ensure the ladder is stable before climbing.
Step 2: Clear Old Codes (Optional but Recommended)
If you lost your remote, it is a good security practice to clear all previously programmed remotes. Press and hold the “Learn” button for about 6–10 seconds until the indicator light blinks or turns off. This erases all paired remotes and keypads. You will need to reprogram all your existing remotes after this step.
Step 3: Initiate Programming Mode
Press the “Learn” button once briefly. The indicator light will turn on or start blinking. You typically have 30 seconds to complete the next step.
Step 4: Sync the New Remote
While standing within 5 feet of the motor unit, press and hold the button on your new remote that you want to use. Hold it for 3–5 seconds. You should see the motor unit’s light blink or hear a click. This confirms the remote has been paired.
Step 5: Test the Remote
Stand back and press the button again. The garage door should open or close. If it does, you are done! If not, repeat Steps 3 and 4, ensuring you are within range and the batteries in the new remote are fresh.
Brand-Specific Nuances
- LiftMaster/Chamberlain: Use the yellow or purple learn button. If you have a Security+ 2.0 model, the process is as described above.
- Genie: Often uses a purple or red button. Some older Genie models require you to dip switches inside the remote to match the opener. Check your manual if this applies.
- Craftsman: Many Craftsman openers are rebranded LiftMaster units, so the process is identical.
For more detailed technical specifications on rolling code security, you can refer to Wikipedia’s article on Rolling Codes.
Troubleshooting Common Issues
Even with careful following, things can go wrong. Here are common issues and fixes:
- Remote Not Responding: Check the batteries. Even new batteries can be defective. Try a different set.
- Light Blinks but Door Doesn’t Move: You may have missed the 30-second window. Press the “Learn” button again and retry.
- Interference: LED light bulbs in your garage can sometimes interfere with remote signals. Try turning off the garage lights and testing the remote. If it works, switch to incandescent bulbs or LED bulbs labeled “garage door compatible.”
- Range Issues: If the remote only works when you are very close, the antenna wire on the motor unit might be damaged or obstructed. Ensure it is hanging down freely.
FAQ Section
Q1: Can I program a used remote from someone else?
A: Yes, as long as it is compatible with your brand and frequency. You must clear the old codes from the remote (if possible) and then program it to your opener using the “Learn” button method. However, buying a new universal remote is often safer and easier.
Q2: How much does it cost to replace a garage door remote?
A: A basic universal remote costs between $15 and $30. An OEM remote can range from $30 to $50. Professional installation adds $50–$100, but DIY is highly recommended to save money.
Q3: What if I don’t have the “Learn” button on my opener?
A: Very old openers (pre-1990s) may use dip switches instead. You will need to open both the remote and the motor unit and match the tiny switches inside to the same position. If your opener is this old, consider upgrading the entire unit for better security and safety features.
Q4: Can I use my smartphone as a garage remote?
A: Yes, if you install a smart garage hub like MyQ, Tailwind, or RatGDO. These devices connect to your Wi-Fi and allow you to control the door via an app. Some newer openers come with this technology built-in.
Q5: Is it safe to leave my garage door opener code unencrypted?
A: No. Always use rolling code technology. Older fixed-code remotes are vulnerable to “code grabbing” attacks. If your opener is very old, upgrading to a modern rolling code system is a wise security investment.
Q6: How many remotes can I program to one opener?
A: Most modern openers can store 8–12 remote codes. Check your specific model’s manual for the exact limit.
Conclusion
Replacing your garage door remote does not have to be a headache. By identifying your model, choosing the right replacement, and following the simple “Learn” button programming steps, you can regain access to your garage in minutes. Remember, security is key—always use rolling code remotes and consider clearing old codes if you lose a remote.
Did this guide help you solve your problem? Share this article with friends or family who might be struggling with their own garage door woes. A quick share on social media could save someone from being locked out in the rain!
Leave a Reply