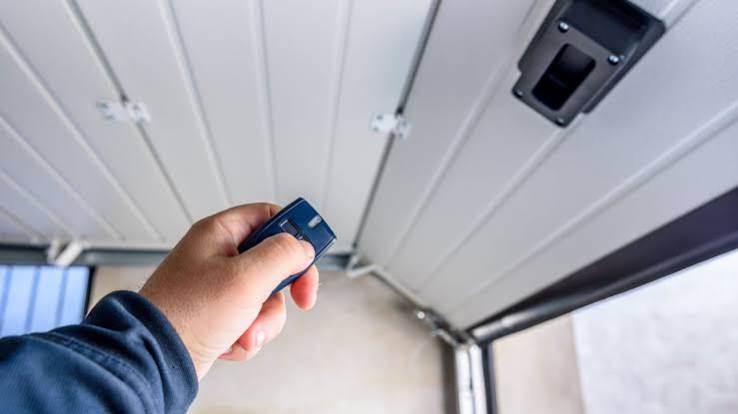
Have you ever stood in your driveway, pressing your garage door remote repeatedly, only to watch it sit there stubbornly closed? It is a frustrating scenario that many homeowners face: your garage door opener not working but wall button is functioning perfectly. This specific issue can be confusing because it suggests the motor itself is fine, but the wireless communication has broken down. Do not worry; this is usually a simple fix that does not require calling a professional technician.
In this guide, we will walk you through the most common reasons why your remote fails while the wall switch works. We will provide step-by-step solutions, safety tips, and maintenance advice to get your convenience back up and running quickly.
Why Does the Wall Switch Work When the Remote Doesn’t?
To understand the solution, we must first understand the system. Your garage door opener consists of three main components: the motor unit (the brain), the wall control panel (wired connection), and the remote controls (wireless connection).
When you press the wall button, it sends an electrical signal directly through wires to the motor. There is no radio frequency involved. However, when you press your remote, it sends a radio signal that must be received by the opener’s antenna. If the garage door opener not working but wall button is operational, the problem is isolated to the wireless link or the remote itself, not the motor mechanics.
According to general engineering principles regarding radio frequency interference, wireless signals are susceptible to environmental factors that wired connections are not. You can read more about how radio waves function in various environments on Wikipedia.
Check the Remote Control Batteries First
The most common culprit behind a non-responsive remote is dead or weak batteries. Even if the LED light on your remote blinks, it may not have enough power to send a strong enough signal to the opener.
Steps to Replace Batteries:
- Open the Battery Compartment: Slide open the back cover of your remote. Most remotes use a small screwdriver or a coin to pry it open.
- Identify the Battery Type: Most garage remotes use CR2032 coin-cell batteries or standard AA/AAA batteries. Check the label inside the compartment.
- Remove Old Batteries: Take out the old batteries carefully. Note the polarity (+ and -) orientation.
- Insert New Batteries: Place fresh, high-quality alkaline or lithium batteries in the correct orientation.
- Test the Remote: Stand within 10 feet of the garage door and press the button. Listen for a click from the motor unit.
Pro Tip: Avoid using cheap, generic batteries. They often have lower voltage stability, which can cause intermittent connectivity issues even when they are new.
Reprogram Your Remote Control
If fresh batteries do not solve the issue, the remote may have lost its synchronization with the opener. This can happen due to power surges, accidental button presses, or interference from other devices. Reprogramming resets the unique code pairing between your remote and the motor unit.
General Reprogramming Steps:
Note: These steps vary by brand (LiftMaster, Chamberlain, Genie, etc.), so consult your manual for specific instructions.
- Locate the Learn Button: Find the “Learn” or “Smart” button on the back or side of the motor unit hanging from your ceiling. It is usually yellow, purple, or red.
- Clear Old Codes (Optional): Press and hold the Learn button for 6–10 seconds until the indicator light turns off. This erases all previously programmed remotes. Warning: You will need to reprogram all your remotes and keypads after this.
- Enter Programming Mode: Press the Learn button once briefly. The indicator light will turn on or blink.
- Sync the Remote: Within 30 seconds, press and hold the button on your remote that you want to program. Hold it until the motor unit’s lights flash or you hear two clicks.
- Test the Connection: Press the remote button again to see if the door operates.
If you have multiple remotes, repeat step 4 for each one.
Inspect for Radio Frequency Interference
Garage door openers typically operate on frequencies like 315 MHz or 390 MHz. Other electronic devices can interfere with these signals, causing the garage door opener not working but wall button is still responsive.
Common Sources of Interference:
- LED Light Bulbs: Some inexpensive LED bulbs in your garage or nearby streetlights emit electromagnetic noise that jams the opener’s receiver. Try turning off garage lights and testing the remote.
- Wi-Fi Routers: If your router is mounted near the garage door motor, it may cause signal congestion.
- Nearby Transmitters: Ham radios, baby monitors, or even neighboring garage doors can occasionally cause conflicts.
Solution: If you suspect interference, try unplugging nearby electronics one by one to identify the source. Replacing garage light bulbs with high-quality, shielded LEDs often resolves this issue.
Check the Antenna on the Motor Unit
The motor unit has a small wire hanging down that acts as an antenna. If this antenna is damaged, bent, or obstructed, it cannot receive the signal from your remote.
Inspection Checklist:
- Visibility: Ensure the antenna is hanging freely and not wrapped around the motor housing.
- Damage: Look for cuts, fraying, or breaks in the wire.
- Obstructions: Make sure metal shelves, boxes, or vehicles are not blocking the line of sight between the remote and the antenna.
If the antenna is broken, you may need to purchase a replacement kit from the manufacturer or contact a professional technician.
Examine the Remote Control for Physical Damage
Sometimes the issue is not electronic but physical. Drops, moisture, or wear and tear can damage the internal circuit board or the button contacts.
What to Look For:
- Cracked Casing: Moisture can seep into cracks and corrode the circuitry.
- Sticky Buttons: If the button feels mushy or does not click, the contact pad underneath may be worn out.
- Corrosion: Open the remote and check for green or white corrosion on the battery terminals or circuit board. Clean it gently with isopropyl alcohol and a cotton swab.
If the remote is physically damaged beyond repair, consider purchasing a universal compatible remote or a direct replacement from your opener’s manufacturer.
Reset the Garage Door Opener System
If none of the above steps work, a full system reset might clear any internal glitches. This is similar to rebooting your computer.
How to Perform a Soft Reset:
- Unplug the garage door opener from the power outlet.
- Wait for at least 30 seconds to allow the capacitors to discharge.
- Plug the opener back in.
- Wait for the system to boot up (usually indicated by a light flash).
- Test the wall button first to ensure the motor is operational.
- Test the remote control.
This simple step resolves many software-related hiccups in modern smart openers.
Comparison: Wall Button vs. Remote Control Issues
| Feature | Wall Button | Remote Control |
|---|---|---|
| Connection Type | Wired (Physical) | Wireless (Radio Frequency) |
| Power Source | Opener Unit | Internal Battery |
| Common Failure | Loose Wiring | Dead Battery / Interference |
| Troubleshooting | Check Wires | Replace Battery / Reprogram |
| Reliability | High | Moderate (Susceptible to Environment) |
Understanding these differences helps you diagnose whether the problem is mechanical (motor) or communicative (remote). Since your wall button works, you can confidently rule out motor failure.
FAQ Section
1. Why does my garage door remote work only when I am very close to the door?
This indicates a weak signal, likely due to low batteries, a damaged antenna on the motor unit, or significant radio frequency interference. Try replacing the batteries first, then check the antenna.
2. Can a power outage cause my remote to stop working?
Yes. After a power outage, some openers may lose their memory settings or require a reset. Additionally, power surges upon restoration can damage the receiver board. Try reprogramming your remote after a power outage.
3. My remote works intermittently. What should I do?
Intermittent issues are often caused by loose battery contacts or minor interference. Tighten the battery compartment, clean the contacts, and check for nearby LED lights or Wi-Fi routers that might be causing signal noise.
4. Is it safe to troubleshoot the garage door opener myself?
Yes, for remote and battery issues, it is completely safe. However, avoid touching the springs, cables, or moving parts of the door itself. If the issue involves the motor’s internal wiring or mechanical components, consult a professional.
5. How often should I replace my garage door remote batteries?
It is recommended to replace batteries every 12–18 months, even if they seem to be working. Proactive replacement prevents unexpected failures during inconvenient times.
Conclusion
Dealing with a garage door opener not working but wall button is functional can be annoying, but it is rarely a catastrophic failure. In most cases, the solution is as simple as replacing a battery, reprogramming the remote, or adjusting the antenna. By following the steps outlined in this guide, you can save time and money by avoiding unnecessary service calls.
Remember, regular maintenance—such as checking batteries and keeping the antenna clear—can prevent these issues from recurring. If you found this guide helpful, please share it with friends or family who might be struggling with their garage door remotes. Stay connected, and keep your home running smoothly!
Leave a Reply