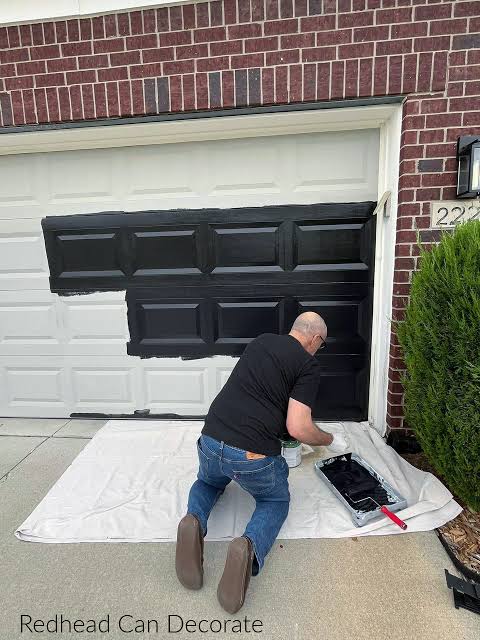
Introduction
Your garage door is one of the largest architectural features of your home’s curb appeal, yet it often gets neglected until it starts showing signs of wear. Whether you are dealing with peeling paint, rust spots, or just want a fresh color update, the preparation process is critical. Many homeowners ask themselves, “Do I need to prime my garage door before painting?” The short answer is yes, but the why and how depend heavily on your door’s material and current condition. Skipping this step can lead to premature peeling, rust recurrence, and wasted money. Let’s dive into exactly what you need to know to get it right the first time.
Why Priming Is Non-Negotiable for Longevity
Priming is not just an extra step; it is the foundation of a durable paint job. Think of primer as the double-sided tape that holds your paint to the surface. Without it, paint struggles to adhere properly, especially on non-porous surfaces like metal or slick, previously painted wood.
According to industry standards, primer serves three main functions:
- Adhesion: It creates a rougher surface for the topcoat to grip.
- Sealing: It blocks stains, tannins (in wood), and rust from bleeding through.
- Uniformity: It ensures the final color looks consistent and vibrant.
If you skip priming on a bare metal door, you risk flash rust forming within weeks. On wood, you risk moisture absorption that leads to warping and rot. For a comprehensive understanding of coating systems, you can refer to general principles outlined by Wikipedia’s entry on Paint.
Does Material Type Change the Answer?
The question “Do I need to prime my garage door before painting?” has different nuances depending on what your door is made of. Here is a breakdown by common materials.
Steel and Aluminum Doors
Metal doors are prone to oxidation. If your door is bare metal, priming is absolutely mandatory. You must use a rust-inhibitive primer designed specifically for metal. If the door is already painted and in good condition, you may only need a light sanding and a bonding primer if you are changing colors drastically.
Wood Doors
Wood is porous and breathes. Unprimed wood will absorb paint unevenly, leading to a blotchy finish. Furthermore, wood contains tannins that can discolor your topcoat. A high-quality oil-based or acrylic latex primer seals the wood grain and prevents these issues.
Fiberglass and Vinyl
These materials are low-maintenance but tricky. They often do not require traditional primers if they are factory-finished. However, if you are painting over old, chalky fiberglass, a specialized bonding primer is necessary to ensure the new paint sticks.
| Material | Primer Required? | Recommended Primer Type |
|---|---|---|
| Bare Steel | Yes, Critical | Rust-Inhibitive Oil-Based |
| Painted Steel | Optional (if sound) | Bonding Primer |
| Raw Wood | Yes, Critical | Oil-Based or Acrylic Latex |
| Fiberglass | Only if sanded/old | Bonding Primer |
| Vinyl | Rarely | Specialty Vinyl Primer |
When Can You Skip the Primer?
While the general rule is to prime, there are specific scenarios where you might save time and money. You can potentially skip priming if:
- The existing paint is in excellent condition (no peeling or chalking).
- You are using a “Paint and Primer in One” product and the surface is clean and slightly abraded.
- You are repainting with the same type of paint (e.g., latex over latex) and the color change is minimal.
However, note that “Paint and Primer in One” products are generally thinner and may not offer the same level of protection as a dedicated primer, especially for exterior garage doors exposed to harsh weather.
Step-by-Step Guide: How to Prime Correctly
If you have determined that priming is necessary, follow this detailed process to ensure professional results.
Step 1: Clean the Surface Thoroughly
Dirt, grease, and grime are the enemies of adhesion.
- Mix 1 cup of trisodium phosphate (TSP) or a heavy-duty degreaser with 4 liters of warm water.
- Scrub the door using a stiff-bristle brush or a sponge.
- Rinse thoroughly with a garden hose. Allow the door to dry completely for at least 24 hours.
Step 2: Repair and Sand
- Fill any dents or holes with an exterior-grade filler.
- Sand the entire surface with 120-grit sandpaper to create a “tooth” for the primer.
- For metal doors, remove any loose rust with a wire brush before sanding.
- Wipe away all dust with a tack cloth.
Step 3: Apply the Primer
- Choose a day with moderate temperature (10–27°C or 50–80°F) and low humidity.
- Stir the primer thoroughly. Do not shake, as this creates bubbles.
- Apply a thin, even coat using a high-quality synthetic brush for edges and a roller for flat panels.
- Ensure you cover all nooks and crannies, especially around hinges and handles.
Step 4: Drying Time
- Allow the primer to dry according to the manufacturer’s instructions. This is typically 1–4 hours for latex primers and 24 hours for oil-based primers.
- Do not rush this step. Painting over tacky primer will ruin the finish.
Common Mistakes to Avoid
Even experienced DIYers make errors. Here are the most frequent pitfalls:
- Ignoring Weather Conditions: Painting in direct sunlight or high humidity causes the primer to dry too fast or trap moisture, leading to blistering.
- Using Interior Primer: Always use exterior-grade primer. Interior primers lack the UV inhibitors and flexibility needed for outdoor temperatures.
- Skipping the Sanding: Even if the surface looks smooth, microscopic gloss remains. Sanding is crucial for mechanical adhesion.
- Applying Too Thickly: Thick coats of primer take longer to cure and can sag or crack. Two thin coats are better than one thick one.
FAQ Section
1. Can I use regular wall primer for my garage door?
No. Regular interior wall primer is not formulated to withstand temperature fluctuations, UV rays, or moisture. Using it on a garage door will likely result in peeling within a single season. Always use an exterior-grade primer.
2. How long should I wait after priming before painting?
This depends on the primer type. Water-based (latex) primers usually dry to the touch in 1 hour and can be recoated in 4 hours. Oil-based primers take longer, often requiring 24 hours before applying the topcoat. Always check the specific product label.
3. Do I need to prime if I am using spray paint?
Yes. While some spray paints claim to be self-priming, they often provide insufficient coverage for large surfaces like garage doors. For best results, apply a dedicated primer via brush or roller, then use spray paint for touch-ups or if you prefer the aerosol finish for the topcoat.
4. What happens if I don’t prime a metal garage door?
Without a rust-inhibitive primer, moisture will reach the bare metal. This leads to oxidation (rust), which spreads under the paint layer, causing it to bubble and peel. Once rust starts, it is difficult to stop without stripping the door down to bare metal again.
5. Is “Paint and Primer in One” good enough for a garage door?
For a high-traffic, high-exposure area like a garage door, a separate primer is recommended. “Paint and Primer in One” products are convenient but often lack the sealing power of a dedicated primer. If your door is in poor condition, skip the combo product and use a standalone primer.
Conclusion
So, do you need to prime your garage door before painting? In almost every case, the answer is a resounding yes. Priming ensures adhesion, prevents rust and rot, and extends the life of your paint job by years. While it adds an extra step to your weekend project, the time invested now saves you from costly repairs and repainting in the near future.
By choosing the right primer for your specific door material and following proper preparation steps, you can achieve a showroom-quality finish that boosts your home’s curb appeal. Don’t cut corners—your garage door deserves the best foundation possible.
Did you find this guide helpful? Share it with your friends on Facebook or Pinterest who are planning their next DIY home improvement project!
Leave a Reply