Introduction
Is your garage door struggling to open or making unusual noises? A failing component in your Craftsman 3/4 hp garage door opener parts list could be the culprit. Knowing exactly which part to replace can save you hundreds of dollars in service calls and get your door running smoothly again. This guide breaks down every essential component, helping you identify issues quickly and order the right replacements with confidence.
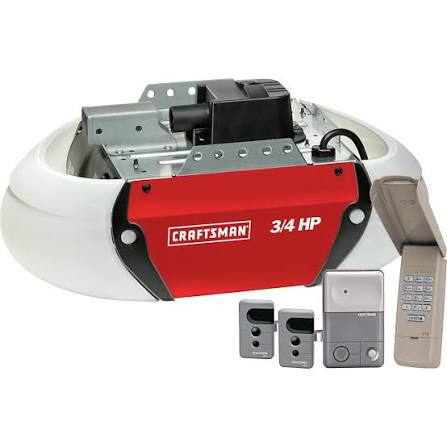
Understanding Your Craftsman 3/4 HP Garage Door Opener
Before diving into specific parts, it is crucial to understand how a 3/4 horsepower (HP) opener functions. This motor size is considered heavy-duty, designed for larger, heavier wooden or insulated steel doors. Unlike lighter 1/2 HP models, the 3/4 HP unit provides extra torque, reducing strain on internal components during daily operation.
However, even robust systems wear out over time. According to industry standards, most garage door openers have a lifespan of 10–15 years. Regular maintenance and timely part replacements can extend this significantly. Identifying the correct model number is your first step. Look for a label on the motor housing; common Craftsman series include the 139.53636, 139.53990, and newer Wi-Fi enabled models. Each has unique part configurations, so accuracy is vital.
Essential Components in the Craftsman 3/4 HP Opener Parts List
When searching for a Craftsman 3/4 hp garage door opener parts list, you will encounter several critical categories. Below are the most frequently replaced items, categorized by function.
1. Drive System Components
The drive system transfers power from the motor to the door. Failure here often results in a humming motor but no movement.
- Drive Gear and Sprocket Assembly: This is the most common failure point. The plastic drive gear wears down over time, stripping its teeth. Symptoms include a grinding noise or the motor running without lifting the door. For many Craftsman models, this is sold as a combined kit including the sprocket and worm gear.
- Chain or Belt: Depending on your model, you may have a steel chain (noisier, durable) or a rubber belt (quieter, requires tension adjustment). Check for rust, stretching, or cracks.
- Tension Spring: Keeps the chain or belt tight. If loose, the opener may slip or jerk during operation.
2. Motor and Electrical Parts
Electrical issues can prevent the opener from starting entirely.
- Capacitor: Helps start the motor. A bad capacitor often causes a humming sound without movement. It is a small, cylindrical component located near the motor.
- Logic Board (Main Circuit Board): The brain of the opener. If remote controls fail to program or lights behave erratically, the board may be faulty. Look for burnt marks or swollen capacitors on the board.
- Motor Brushes: In some older DC motor models, brushes wear out and need replacement. However, many modern Craftsman openers use sealed motors where brush replacement is not feasible, requiring a full motor swap.
3. Safety and Sensor Systems
Safety features are non-negotiable for modern garage doors.
- Photo-Eye Sensors: These infrared beams detect obstacles. If misaligned or dirty, the door will reverse immediately after closing. Ensure lenses are clean and aligned at the same height.
- Force Adjustment Knobs: Located on the motor unit, these control how much force the opener uses to open and close the door. Incorrect settings can cause safety reversals or damage to the door.
4. Remote Controls and Accessories
- Remote Transmitters: Battery replacement is the first fix. If issues persist, reprogramming may be necessary.
- Wall Control Panel: The wired button inside the garage. If unresponsive, check wiring connections or replace the unit.
Common Problems and Corresponding Parts
To help you diagnose issues faster, here is a quick reference table linking symptoms to likely faulty parts.
| Symptom | Likely Faulty Part | Solution |
|---|---|---|
| Motor hums, door doesn’t move | Drive Gear/Sprocket | Replace drive gear kit |
| Door reverses before hitting floor | Photo-Eye Sensors | Clean and realign sensors |
| Remote works intermittently | Antenna Wire | Extend or replace antenna |
| Loud grinding noise | Worn Gears or Bearings | Inspect and replace gear assembly |
| Lights stay on or won’t turn off | Logic Board | Replace main circuit board |
| Chain is loose or sagging | Tension Spring | Adjust or replace spring |
How to Identify Your Exact Model Number
Finding the right part starts with the correct model number. Craftsman has produced dozens of 3/4 HP openers over the decades. Here is how to find it:
- Locate the Label: Look on the back or side of the motor housing. You may need a ladder and a flashlight.
- Read the Code: The model number usually starts with “139.” followed by a series of digits (e.g., 139.53636SRT).
- Check the Manual: If you still have the original manual, the model number is listed on the front page.
- Online Lookup: Enter the model number into the Sears PartsDirect or Craftsman website to view the specific exploded diagram for your unit.
Using the wrong part can lead to further damage. Always double-check compatibility before purchasing. For more detailed technical specifications on garage door mechanisms, you can refer to general engineering principles outlined on Wikipedia’s Garage Door Opener page.
Step-by-Step Guide to Replacing the Drive Gear
Replacing the drive gear is a common DIY repair. Here is a simplified guide:
- Disconnect Power: Unplug the opener or turn off the circuit breaker. Safety first.
- Release Tension: Loosen the chain/belt tension to remove it from the sprocket.
- Remove Housing Screws: Take off the outer cover of the motor unit.
- Extract Old Gear: Remove the retaining clips and pull out the worn drive gear and sprocket.
- Install New Kit: Insert the new gear and sprocket assembly. Ensure the worm gear meshes correctly with the new drive gear.
- Reassemble: Put the cover back on, reattach the chain/belt, and adjust tension.
- Test: Restore power and test the opener. Lubricate moving parts with silicone-based lubricant, not grease.
Frequently Asked Questions (FAQ)
1. Can I use universal parts for my Craftsman 3/4 HP opener?
While some generic gears fit multiple models, it is risky. Craftsman openers often have proprietary gear sizes and tooth counts. Using a non-OEM (Original Equipment Manufacturer) part may lead to premature failure. Always verify compatibility with your specific model number.
2. How often should I replace the drive gear?
There is no fixed timeline, but drive gears typically last 5–10 years depending on usage frequency. If you hear grinding noises, inspect it immediately. Regular lubrication of the chain and rails can reduce stress on the gear.
3. Is it worth repairing an old Craftsman opener or should I buy a new one?
If your opener is over 15 years old, consider replacement. Newer models offer better security (rolling code technology), quieter operation, and smart home integration. However, if the motor is still strong and only the gear is worn, a $30–$50 gear kit is a cost-effective fix.
4. Where can I buy genuine Craftsman replacement parts?
Genuine parts are available through Sears PartsDirect, Amazon, Home Depot, and specialized garage door supply websites. Avoid cheap knockoffs from unknown sellers, as they often use inferior plastics that wear out quickly.
5. Why does my garage door reverse when closing?
This is usually a sensor issue. Check if the photo-eye sensors are aligned and clean. If they are fine, adjust the force settings on the motor unit. If the problem persists, the logic board may be faulty.
6. Do I need special tools to replace opener parts?
Most repairs require basic tools: a screwdriver set, pliers, a wrench set, and a ladder. For electrical components, a multimeter can help diagnose power issues. No specialized professional tools are typically needed for DIY gear or sensor replacements.
Leave a Reply