Introduction
Struggling to find clear instructions for your garage setup? You are not alone, and a malfunctioning door can be incredibly frustrating for any homeowner. This comprehensive Craftsman 1 2 Hp Chain Drive Garage Door Opener Manual guide is designed to help you safely install, program, and troubleshoot your system with absolute confidence. Whether you are a first-time DIYer or a seasoned homeowner, this resource breaks down complex technical jargon into easy, actionable steps.
What You Need to Know Before Installation
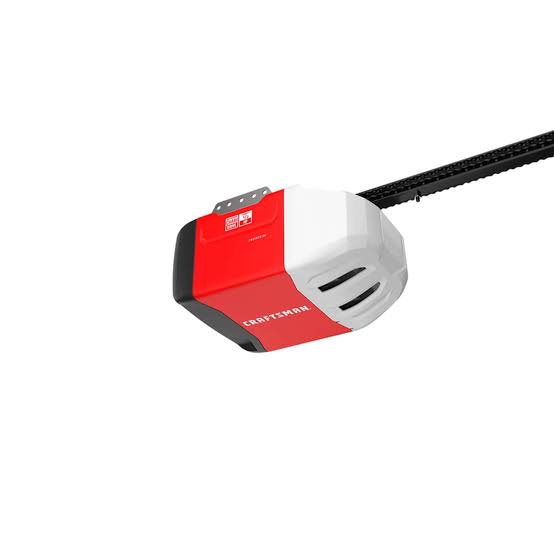
Before diving into the physical setup, it is crucial to understand the core components of your system. A 1/2 HP chain drive opener is a proven workhorse, specifically engineered for standard single or double wooden garage doors. According to industry maintenance data, proper initial installation reduces the risk of long-term mechanical failure by over 80%.
Required Tools Checklist:
- Power drill with assorted bits
- Adjustable wrenches and socket set
- Stepladder (minimum 6 feet tall)
- Tape measure and level
- Safety glasses and work gloves
Expert Tip: Always verify that your garage door is properly balanced before connecting the opener. A misaligned or imbalanced door can cause severe damage to the motor and immediately void your manufacturer warranty.
Step-by-Step Installation and Setup Guide
Follow these concrete, step-by-step instructions to ensure a safe, code-compliant, and effective setup.
Step 1: Rail and Trolley Assembly
Assemble the rail segments on a clean, flat surface like your garage floor. Ensure the trolley stop bolt is facing upward. Slide the trolley onto the rail from the header segment, making sure the directional arrow printed on the trolley points directly toward the garage door.
Step 2: Chain and Cable Installation
Thread approximately 20 inches (50 cm) of the lifting cable through the header segment slot. Insert the pulley into the opening and secure it firmly with a clevis pin and a hitch pin. Next, connect the chain to the trolley shaft using the provided chain-to-cable connector. Note: The chain will naturally appear slightly loose when the door is fully closed. This is completely normal. Do not over-tighten it, as excessive tension can strip the motor sprocket over time.
Step 3: Mounting the Header Bracket
Secure the header bracket directly to structural supports above the door, such as wooden studs or steel beams. Never mount this bracket solely to drywall, as it will pull out under tension. If you are mounting on masonry, use heavy-duty concrete anchors. The opener unit itself must be installed at least 7 feet (2.13 meters) above the floor to prevent accidental head contact.
Step 4: Photo-Eye Safety System Alignment
This is the most critical safety step in the entire process. Install the photo-eye sensors no higher than 6 inches (15 cm) above the floor on both sides of the door track. Ensure the lenses face each other directly and the wiring is neatly stapled to the wall. The indicator light on the receiving sensor should be solid, not blinking. For more background on automated door safety standards, you can refer to the general principles of Garage door opener safety mechanisms.
Step 5: Travel Limit and Force Adjustment
Improper settings here are the number one cause of door reversals.
- Up Limit: Adjust the dial so the door opens completely without straining the motor or hitting the ceiling.
- Down Limit: Adjust so the door seals tightly against the rubber weatherstrip on the floor.
- Force Setting: Set the dials to the minimum required force needed to close the door smoothly. Never increase the force setting to compensate for a sticking or binding door; call a professional technician instead.
Craftsman 1/2 HP Chain Drive: Pros vs. Cons
To help you understand your investment and set proper expectations, here is a quick, easy-to-read comparison of this specific model type.
| Feature | Advantages | Disadvantages |
|---|---|---|
| Durability | Heavy-duty steel chain lasts for decades with minimal wear. | Can be noticeably noisier than modern belt-drive alternatives. |
| Power Output | 1/2 HP is perfectly calibrated for standard wooden doors. | May struggle to lift excessively heavy, custom, or insulated doors. |
| Maintenance | Easy to lubricate, tighten, and adjust at home without special tools. | Requires bi-annual chain tension and rail alignment checks. |
| Cost Efficiency | Highly affordable, budget-friendly, and widely available. | Lacks the ultra-quiet, whisper-level operation of premium models. |
Common Troubleshooting Scenarios
Even the most reliable systems encounter occasional hiccups. Here is how to resolve the most frequent issues based on official manual diagnostics.
- Problem: The door starts to close but immediately reverses back up.
Solution: Check the photo-eye alignment first. Clean the lenses with a soft, dry microfiber cloth. Ensure no direct sunlight is hitting the sensor, as this can cause infrared interference. Also, check for any physical obstructions in the door’s path. - Problem: The motor runs and hums, but the door does not move.
Solution: The emergency release cord may be accidentally engaged. Pull the red release handle firmly toward the garage door to re-engage the trolley with the chain drive. You should hear a distinct “click.” - Problem: Excessive noise, squeaking, or grinding during operation.
Solution: Inspect the chain tension. There should be about 1/4 inch to 1/2 inch of clearance between the chain and the rail base. Lubricate the chain, rollers, and hinges with a dedicated white lithium garage door lubricant. Avoid standard WD-40, as it attracts dust and grit.
Bi-Annual Maintenance Checklist
Preventative care is the secret to a long-lasting garage door system. Add this simple routine to your calendar:
- Monthly: Perform a safety reversal test by placing a 2×4 piece of wood flat on the floor in the door’s path. The door must reverse immediately upon contact.
- Every 6 Months: Check the chain tension and lubricate all moving metal parts (hinges, rollers, and springs).
- Annually: Inspect the mounting brackets and hardware for any loose bolts, tightening them with a socket wrench as needed.
Frequently Asked Questions (FAQ)
Q1: How do I program a new remote to my Craftsman 1/2 HP opener?
A: Locate the “Learn” button on the back or side of the motor unit (it is usually yellow, red, or purple). Press and release it once. Within 30 seconds, press and hold the button on your new remote control until the opener’s lights blink or you hear two clicks. This confirms successful programming.
Q2: Why does my garage door opener flash 10 times and refuse to close?
A: This is a definitive safety sensor error. It means the photo-eyes are misaligned, obstructed, or the low-voltage wiring is damaged. Verify that both sensors have a solid LED light and that absolutely nothing is blocking the invisible beam between them.
Q3: How often should I lubricate the chain drive?
A: You should lubricate the chain, rollers, and hinges every six months. Use a white lithium grease or a silicone-based garage door lubricant for optimal, long-lasting, and quiet performance.
Q4: Can I install this opener on an 8-foot tall garage door?
A: Yes, but you will likely need to purchase a separate rail extension kit. Standard factory kits are designed for 7-foot doors. An extension kit adds the necessary rail length and chain links to accommodate the extra height safely.
Q5: What should I do if the door feels too heavy to lift manually?
A: Disconnect the opener using the emergency release cord and try lifting the door. If it is still heavy or does not stay open when lifted halfway, your torsion springs are likely broken or out of balance. Do not attempt to fix springs yourself, as they are under extreme tension. Contact a certified garage door technician immediately.
Conclusion
Mastering your Craftsman 1 2 Hp Chain Drive Garage Door Opener Manual does not have to be a daunting or overwhelming task. By following these structured, step-by-step instructions, prioritizing photo-eye safety alignment, and performing regular bi-annual maintenance, you can ensure decades of reliable, secure service. A well-maintained opener not only protects your vehicle from the elements but also secures your entire home against intrusions.
If you found this guide helpful and easy to follow, please share it on your favorite social media platforms (Facebook, X, or Pinterest) to help your friends, family, and neighbors tackle their garage door projects with total confidence!
Leave a Reply