If you’ve ever wondered where is learn button on Genie garage door opener, you’re not alone. Many homeowners struggle with programming remotes or integrating smart devices because locating the learn button can be tricky.
Knowing its exact location and how to use it is essential for quick setup, troubleshooting, and maintaining your garage door system. In this guide, we’ll show you everything step by step, with practical tips and expert advice.
Read too: How Do You Change Code On Garage Door Keypad Fast?
What Is the Learn Button and Why It Matters
The learn button is a small but critical feature on your Genie garage door opener. It allows you to:
- Pair remote controls and wireless keypads.
- Integrate smart home devices.
- Reset or clear all programmed remotes.
Without it, you cannot sync new devices or reprogram existing ones, making it central to garage door operation.
According to Wikipedia, modern garage door openers are equipped with learn buttons to simplify remote programming and improve security through rolling code technology.
Where Is the Learn Button on Different Genie Models
Genie garage door openers have several models, and the learn button location varies depending on the design:
1. Genie Chain Drive Openers
- Typically located on the back or side of the motor housing.
- Often a small round or rectangular button, sometimes under a light cover.
2. Genie Screw Drive Openers
- Found near the motor unit’s rear near the antenna wire.
- Usually labeled “Learn” in small letters.
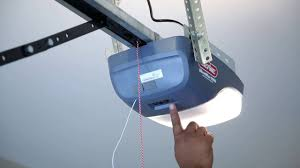
3. Genie Belt Drive / SilentMax Series
- Located on the side of the unit near the LED indicator panel.
- Sometimes recessed to prevent accidental presses.
4. Wireless Keypads
- The learn button is inside the motor unit, not on the keypad itself.
- Pressing it enables the keypad to communicate securely with the opener.
Tip: Consult your model’s user manual if you’re unsure. Most Genie manuals highlight the learn button location with a diagram.
How to Use the Learn Button: Step-by-Step Programming
Step 1: Prepare the Remote or Device
- Replace batteries with fresh ones to avoid weak signals.
- Keep the remote close to the garage door opener.
Step 2: Press the Learn Button
- Press and release the learn button on the motor unit.
- The LED indicator usually blinks, signaling it is ready to pair.
Step 3: Program the Remote
- Within 30 seconds, press the button on the remote you want to program.
- LED light should stop blinking, confirming successful programming.
Step 4: Test the Remote
- Press the remote to open and close the garage door.
- If it doesn’t work, repeat the process, ensuring the LED blinks when the learn button is pressed.
How to Reset Genie Garage Door Opener
Sometimes you may need to clear all remotes, such as when moving into a new home or replacing lost devices.
- Press and hold the learn button for 6–10 seconds.
- Release it when the LED light turns off.
- All previously programmed remotes are erased.
Warning: After clearing, you’ll need to reprogram each remote and keypad using the learn button.
Troubleshooting Common Learn Button Issues
Problem 1: Learn Button Doesn’t Blink
- Check power supply to the opener.
- Make sure you press firmly; some buttons are recessed.
- Inspect for blown fuses or tripped circuit breakers.
Problem 2: Remote Not Responding After Programming
- Ensure the remote battery is fresh.
- Repeat the process within the 30-second pairing window.
- Test with another remote to isolate the issue.
Problem 3: Multiple Remotes Fail
- Clear all remotes using the long press reset method.
- Reprogram one remote at a time.
Tips for Using Learn Button Safely
- Avoid pressing during operation – Pressing the learn button while the door moves can interfere with safety sensors.
- Keep children away – Accidental presses can erase remote programming.
- Document your remotes – Note which remotes are paired to avoid confusion after resets.
- Regular Maintenance – Clean dust around the button to prevent sticking.
Case Study: Homeowner Remote Setup
A homeowner with a Genie Chain Drive 1024 model couldn’t program their new remote.
Steps Taken:
- Located the learn button on the back panel.
- Pressed the learn button until the LED blinked.
- Pressed the remote button within 30 seconds.
Result: Remote paired successfully, and the homeowner could control the garage from multiple devices.
Lesson: Correct location and timing are key; following the manufacturer’s instructions avoids frustration.
FAQ Section
Q1: Where is the learn button on Genie garage door opener?
A: It depends on the model but is generally on the back, side, or near LED panel of the motor unit.
Q2: How long does the learn button stay active?
A: Usually 30 seconds, during which you must press the remote button to pair.
Q3: Can I program multiple remotes at once?
A: No. Each remote must be programmed individually, pressing the learn button for each one.
Q4: What if I lose the manual?
A: Genie manuals are available online as PDFs. They provide diagrams and step-by-step instructions.
Q5: Can pressing the learn button erase my current remotes?
A: A short press programs a new remote, but a long press (6–10 seconds) clears all previously programmed devices.
Q6: Do smart home devices use the learn button?
A: Yes. The learn button allows Wi-Fi or smart home integration, ensuring secure pairing with the opener.
Conclusion
Knowing where is learn button on Genie garage door opener is crucial for programming remotes, keypads, or smart devices.
By following the step-by-step instructions in this guide, homeowners can:
- Quickly pair new devices.
- Reset or clear old remotes.
- Maintain smooth, safe operation of the garage door system.
Share this article to help others easily locate and use the learn button on their Genie garage door opener, ensuring a secure and convenient setup.
Leave a Reply