Setting up a new garage system can feel overwhelming at first. If you’re searching how to set up a Genie garage door opener, you’re likely looking for a simple, clear guide that actually works. The good news? With the right steps, you can install and configure your Genie opener safely and efficiently in just a few hours.
What Is a Genie Garage Door Opener?
Before diving into how to set up a Genie garage door opener, it helps to understand what you’re installing.
Read too: Tc1 Tricode Garage Door Opener Remote W/ Clip Chamberlain: Complete Guide
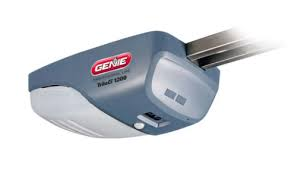
A Genie garage door opener is a motorized system that opens and closes your garage door using a remote, wall switch, or keypad. Most modern models include Intellicode technology, which enhances security by changing access codes automatically.
👉 Learn more about how garage systems work: https://en.wikipedia.org/wiki/Garage_door_opener
What Do You Need Before Installation?
Preparation is key for a smooth setup.
Tools Required
- Power drill
- Screwdriver
- Wrench set
- Ladder
- Measuring tape
Materials Included in Most Kits
- Motor unit
- Rail and chain/belt
- Wall control panel
- Remote control
- Safety sensors
📊 According to home improvement data, DIY garage opener installation takes 3–5 hours on average.
Step-by-Step: How To Set Up A Genie Garage Door Opener
Follow this structured process to ensure a successful installation.
Step 1: Assemble the Rail System
- Lay out all rail sections
- Connect them securely
- Attach the chain or belt
👉 Ensure alignment is straight to prevent issues later.
Step 2: Attach the Rail to the Motor Unit
- Connect the rail to the opener motor
- Secure with bolts and brackets
- Tighten all connections firmly
Step 3: Mount the Opener to the Ceiling
- Locate ceiling joists
- Install mounting brackets
- Lift and secure the motor unit
📏 Recommended height: 7–8 feet above the floor
Step 4: Install the Door Bracket
- Attach bracket to the garage door
- Align with the center of the door
- Secure using heavy-duty screws
Step 5: Connect the Opener Arm
- Attach the arm to the door bracket
- Connect it to the rail trolley
- Ensure smooth movement
Step 6: Install Safety Sensors
- Mount sensors on both sides of the door
- Position 4–6 inches above the ground
- Align them so they face each other
👉 Misaligned sensors are a common cause of malfunction.
Step 7: Wire the System
- Connect wall control wires to the motor
- Install wall panel near garage entrance
- Plug in the opener
⚠️ Always turn off power before wiring.
Step 8: Program the Remote and Keypad
- Press the “Learn” button on the opener
- Press the remote button
- Wait for confirmation (light blink or click)
Step 9: Test the System
- Open and close the door 3–5 times
- Check smooth operation
- Ensure sensors stop the door when blocked
Common Installation Problems and Fixes
Even when following how to set up a Genie garage door opener, issues can occur.
Troubleshooting Table
| Problem | Cause | Solution |
|---|---|---|
| Door won’t close | Sensor misalignment | Adjust sensors |
| No power | Wiring issue | Check connections |
| Noisy operation | Loose parts | Tighten bolts |
| Remote not working | Not programmed | Reprogram remote |
Tips for a Successful Setup
To make installation easier:
- Read the manual before starting
- Organize all parts in advance
- Work with a second person for lifting
- Double-check alignment at every step
Pro Tip
Experts recommend testing your opener under different conditions (day/night, cold/warm) to ensure reliability.
Genie vs Other Garage Door Openers
Comparison Table
| Feature | Genie | Other Brands |
|---|---|---|
| Security | Intellicode | Varies |
| Installation | DIY-friendly | Moderate |
| Price | Affordable | Mid–high |
| Smart Features | Available | Varies |
Safety Tips During Installation
- Never install alone when lifting heavy parts
- Keep hands away from moving components
- Use proper tools
- Test emergency release function
Advantages vs Disadvantages of DIY Installation
Pros
- Saves installation cost
- Full control over setup
- Learn system functionality
Cons
- Time-consuming
- Requires tools and effort
- Risk of incorrect installation
Preventive Maintenance After Setup
Once installed:
- Lubricate moving parts every 3–6 months
- Test sensors monthly
- Check bolts and brackets
- Replace remote batteries annually
FAQ: How To Set Up A Genie Garage Door Opener
1. How long does it take to install a Genie garage opener?
Typically 3–5 hours, depending on experience and tools.
2. Can I install a Genie opener by myself?
Yes, but having a second person helps with mounting and alignment.
3. Why won’t my Genie garage door close after setup?
This is usually due to misaligned safety sensors.
4. Do I need professional help?
Not for basic setups, but complex installations may require a technician.
5. How do I know if my opener is installed correctly?
The door should open/close smoothly and stop when sensors are blocked.
6. Can I connect my Genie opener to a smartphone?
Yes, many newer models support smart home integration.
Conclusion
Now you know exactly how to set up a Genie garage door opener—from assembling components to programming remotes. While the process may seem complex at first, following a step-by-step approach makes it manageable and rewarding.
With proper installation and regular maintenance, your Genie opener will provide reliable, secure access for years to come.
Leave a Reply