If your LiftMaster garage door opener wall control isn’t responding or you just installed a new system, knowing how to program Liftmaster garage door opener wall control is essential. Many homeowners face frustration when the wall console doesn’t sync with the motor unit, causing operational delays.
Fortunately, programming your LiftMaster wall control is straightforward. With a few precise steps and safety precautions, you can ensure your garage door operates smoothly every time.
How LiftMaster Wall Control Works
Before programming, it helps to understand how the wall console communicates with the motor unit:
- The wall control sends electronic signals via a direct wire connection or, in some newer models, wirelessly.
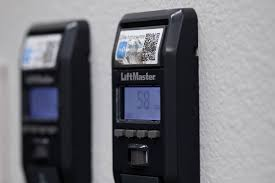
- It can perform functions such as open, close, stop, and light control.
- Most units include a Learn button on the motor, which enables synchronization with the wall console or remote.
Read too: How Do You Change Code On Garage Door Keypad Fast?
Understanding these basics ensures you know why programming is necessary and how signals are transmitted.
Common Reasons Wall Controls Fail to Work
- Incorrect wiring – Loose or misconnected wires prevent proper communication.
- Loss of power – The motor unit must be powered on during programming.
- Out-of-sync console – New remotes or wall controls may need resyncing.
- Obstructions – Dust, debris, or moisture in the console can affect function.
- Aging electronics – Older units may need a replacement for reliable operation.
Step 1: Gather Required Tools and Check Safety
Before programming, ensure you have:
- LiftMaster wall control console
- Ladder (if motor unit is mounted high)
- Screwdriver (if needed for console installation)
- User manual for reference
Safety tip: Disconnect power before adjusting wires and keep hands away from moving parts during testing.
Step 2: Locate the Learn Button on the Motor Unit
The Learn button is critical for programming:
- On most LiftMaster units, it’s on the back or side of the motor head.
- It is typically yellow, red, or purple, depending on the model.
- Pressing this button puts the motor into programming mode for syncing with wall controls or remotes.
Pro Tip: Check LiftMaster Wiki for model-specific placement if unsure.
Step 3: Prepare the Wall Control for Programming
- Remove the wall console cover if required.
- Ensure the console is connected properly to the motor unit wires (usually two low-voltage wires).
- Verify the console buttons are clean and functional.
Step 4: Programming the Wall Control
Follow these steps carefully:
- Press the Learn button on the motor unit. A light may blink to indicate programming mode.
- Within 30 seconds, press and hold the desired function button on the wall control.
- Release the button when the motor unit light blinks or clicks, indicating synchronization.
- Test the console by pressing Open/Close. The garage door should respond.
Common Issue: If the door doesn’t respond, repeat the process. Ensure batteries in remote (if wireless console) are fresh.
Step 5: Test Additional Functions
Most LiftMaster wall controls have extra features:
- Light control: Press the light button to toggle garage lights.
- Vacation mode: Some consoles allow temporary disabling of remotes for security.
- Lock function: Advanced consoles may include a lock to prevent remote operation.
Testing all functions ensures full operational integrity.
Step 6: Troubleshooting Programming Issues
| Problem | Possible Cause | Solution |
|---|---|---|
| Console won’t sync | Wiring loose | Reconnect wires, check polarity |
| Motor unit light doesn’t blink | Learn button not pressed | Press and hold until blink appears |
| Door moves in wrong direction | Incorrect wiring | Verify console wiring matches motor unit terminals |
| Wall control intermittent | Dust/moisture | Clean console and motor head |
Step 7: Upgrade or Replace Wall Control if Needed
If problems persist:
- Older consoles may lose programming memory over time.
- Upgrading to a newer LiftMaster wall console may add features like wireless control or smartphone integration.
- Replacement is usually under $50–80, with simple DIY installation.
Tips for Long-Term Maintenance
- Check connections annually to prevent loose wires.
- Clean wall control to avoid debris affecting buttons.
- Reset and reprogram after electrical outages or system updates.
- Replace batteries if using a wireless wall console.
- Label buttons for multiple garage doors to avoid accidental operation.
FAQ Section
Q1: Can I program multiple wall controls to the same opener?
A: Yes, most LiftMaster units allow multiple wall consoles. Each must be synced separately using the Learn button.
Q2: Does programming erase remote codes?
A: Not necessarily. Pressing the Learn button for wall control sync typically does not erase remote codes unless a full memory reset is performed.
Q3: What if the door operates in reverse after programming?
A: Check wiring polarity. Reversing wires may correct direction, or consult the manual for specific motor adjustments.
Q4: Can I program a wall console without pressing the motor Learn button?
A: No. The Learn button is essential to initiate synchronization between motor and console.
Q5: How often should I reprogram the wall control?
A: Only when installing a new console, replacing the motor unit, or troubleshooting connectivity issues.
Conclusion
Knowing how to program Liftmaster garage door opener wall control ensures smooth, safe, and reliable garage door operation. Following the steps—locating the Learn button, syncing the wall console, testing functions, and maintaining connections—provides years of hassle-free service.
Share this guide with friends and family to help them quickly set up or troubleshoot their LiftMaster wall control for optimal garage security and convenience.
Leave a Reply