If your wall control isn’t working or you’ve just installed a new unit, you’re probably wondering how to program Chamberlain garage door opener wall button without hassle. It can be frustrating when your garage doesn’t respond—especially when you rely on it daily.
The good news is that programming a Chamberlain wall button is simple, and you can do it yourself in just a few minutes.
How To Program Chamberlain Garage Door Opener Wall Button (Step-by-Step Guide)
Let’s go through the exact process step by step.
Step 1: Identify Your Wall Button Type
Chamberlain wall controls come in different types:
- Basic door control (single button)
- Multi-function control panel
- Smart control panel with display
👉 Programming steps may vary slightly depending on the type.
Read too: How Do You Change Code On Garage Door Keypad Fast?
Step 2: Locate the “Learn” Button on the Opener
- Go to the motor unit (ceiling-mounted)
- Find the “Learn” button
- It’s usually near the antenna wire or behind a light cover
Common colors include:
- Yellow
- Purple
- Red/orange
- Green
Step 3: Press the Learn Button
- Press and release the Learn button
- The LED light will turn on
⏱️ You now have 30 seconds to program the wall button.
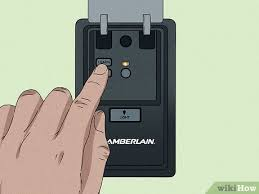
Step 4: Activate the Wall Button
- Press and hold the wall button
- Hold for 2–5 seconds, then release
👉 The opener light will blink or click to confirm programming.
Step 5: Test the Wall Control
- Press the wall button again
- The garage door should open or close
✅ Your wall button is now successfully programmed.
Why Isn’t My Chamberlain Wall Button Working?
If your wall control doesn’t respond, here are the most common reasons:
1. Wiring Issues
- Loose or damaged wires can prevent operation
2. Power Problems
- Ensure the opener is plugged in
- Check circuit breakers
3. Lock Mode Enabled
Some wall panels have a lock feature.
👉 If activated, remotes and buttons won’t work.
4. Faulty Wall Control
- Older units may need replacement
How To Reset Chamberlain Wall Control
If programming fails, try resetting the system.
Steps:
- Press and hold the Learn button for 6–10 seconds
- Wait until the LED turns off
- All devices are erased
- Reprogram everything
⚠️ This will remove all remotes and keypads.
Types of Chamberlain Wall Controls Explained
Understanding your control type helps avoid confusion.
Comparison Table
| Type | Features | Best For |
|---|---|---|
| Basic Button | Open/close only | Simple setups |
| Multi-Function | Light + lock controls | Most homes |
| Smart Panel | Timer, display, Wi-Fi | Advanced users |
Does the Wall Button Need Programming?
Not always.
Key Insight:
- Wired wall buttons often work automatically after installation
- Wireless or smart panels require programming
👉 If your button isn’t working, programming or wiring is likely the issue.
How Long Does Programming Take?
- Standard setup: 2–5 minutes
- Reset + setup: 5–10 minutes
According to home maintenance data, over 75% of garage door issues are resolved with simple reprogramming or wiring fixes.
Common Mistakes to Avoid
Avoid these common errors:
- ❌ Pressing the Learn button multiple times
- ❌ Not checking wiring connections
- ❌ Ignoring lock mode
- ❌ Programming too far from the opener
Step-by-Step Troubleshooting Checklist
If you’re stuck, follow this checklist:
- ✔️ Check power supply
- ✔️ Inspect wiring connections
- ✔️ Disable lock mode
- ✔️ Reset opener system
- ✔️ Reprogram carefully
Pros vs Cons of DIY Programming
Pros
- Saves money
- Quick process
- No professional needed
- Beginner-friendly
Cons
- Requires access to opener
- Wiring issues can be tricky
- Model differences may confuse users
How Chamberlain Technology Works
Modern Chamberlain systems use secure communication technology to prevent unauthorized access.
👉 This includes rolling code systems that change signals each time you use the opener. Learn more here:
https://en.wikipedia.org/wiki/Rolling_code
Real-Life Example
A homeowner installed a new Chamberlain wall control but found it unresponsive. After checking, the issue was a loose wire connection. Once fixed and reprogrammed, the system worked perfectly in under 10 minutes.
👉 This highlights how small issues can cause major inconvenience.
Best Practices for Smooth Programming
- ✔️ Always use proper wiring connections
- ✔️ Program devices one at a time
- ✔️ Keep your manual nearby
- ✔️ Avoid interference from nearby electronics
FAQ: How To Program Chamberlain Garage Door Opener Wall Button
1. Do all wall buttons need programming?
No. Wired wall buttons often work immediately, but smart panels may require programming.
2. Why is my wall button not responding?
Common causes include wiring issues, lock mode, or power problems.
3. Can I replace my wall button myself?
Yes. Most wall controls are easy to install and program without professional help.
4. What does the Learn button do?
It allows the opener to connect with remotes, keypads, and wall controls.
5. How do I disable lock mode?
Press and hold the lock button on the wall panel for a few seconds until the indicator light turns off.
6. Will resetting erase my remotes?
Yes. A full reset removes all programmed devices.
Conclusion
Learning how to program Chamberlain garage door opener wall button is a simple yet valuable skill. With just a few steps—locating the Learn button, activating the wall control, and testing—you can restore full functionality in minutes.
Most issues can be solved by checking wiring, disabling lock mode, or performing a quick reset.
Leave a Reply