If your garage remote isn’t working—or you’ve just bought a new one—you’re probably wondering How To Program A Clicker Remote Garage Door Opener. The process may sound technical, but it’s actually simple and can be done in minutes with the right steps. This guide will walk you through everything you need to know in a clear and beginner-friendly way.
What Is a Clicker Remote Garage Door Opener?
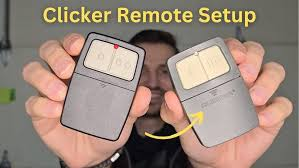
A Clicker remote is a universal garage door remote designed to work with most major opener brands.
Read too: Tc1 Tricode Garage Door Opener Remote W/ Clip Chamberlain: Complete Guide
According to general information about Garage Door Opener systems, modern remotes use radio frequencies and rolling code technology to securely communicate with the opener.
Key Features
- Compatible with multiple brands
- Uses secure rolling codes
- Easy to program without tools
How Does a Clicker Remote Work?
Clicker remotes communicate with your garage opener using a signal.
Basic Process
- Remote sends a coded signal
- Opener receives and verifies it
- Door opens or closes
👉 Programming syncs the remote with your opener’s memory.
What Do You Need Before Programming?
Prepare the following:
- Clicker remote
- Ladder (for ceiling opener access)
- Access to garage door opener unit
Important Tip
Check your opener brand (LiftMaster, Chamberlain, Genie, etc.) to ensure compatibility.
How To Program A Clicker Remote Garage Door Opener (Step-by-Step)
Step 1: Locate the “Learn” Button
- Found on the back or side of the opener motor
- Usually near the antenna wire
Common Colors
- Yellow
- Purple
- Red/Orange
- Green
👉 Each color indicates a different frequency.
Step 2: Press the Learn Button
- Press and release the button
- LED light will turn on
- You have 30 seconds to complete the next step
Step 3: Press the Remote Button
- Press and hold the desired button on the Clicker remote
- Hold for 2–3 seconds
- Release
Step 4: Wait for Confirmation
- Opener light blinks
- Or you hear a click
👉 This confirms successful programming.
Step 5: Test the Remote
- Press the button again
- The door should open or close
Alternative Method: Programming Without Learn Button
Some older systems use DIP switches.
Steps
- Open the remote casing
- Locate DIP switches
- Match them with opener switches
- Close and test
Quick Programming Overview
| Step | Action | Time Required |
|---|---|---|
| Locate Learn button | Find on opener | 1–2 minutes |
| Activate Learn mode | Press button | 10 seconds |
| Sync remote | Press remote button | 5 seconds |
| Test | Verify operation | 10 seconds |
Common Problems and Fixes
1. Remote Not Programming
Cause: Time expired after pressing Learn button
Fix: Repeat steps within 30 seconds
2. No Response from Opener
Cause: Dead battery
Fix: Replace battery
3. Remote Works Intermittently
Cause: Signal interference
Fix: Move closer or check antenna
4. Wrong Frequency
Cause: Incompatible remote
Fix: Verify compatibility
Compatibility Guide
Most Clicker remotes work with:
- LiftMaster
- Chamberlain
- Craftsman
- Genie
👉 Always check packaging or manual.
Pro Tips for Successful Programming
- Stand within 3–5 feet of opener
- Use fresh batteries
- Avoid pressing buttons too quickly
- Program one remote at a time
How Many Remotes Can You Program?
Most garage door openers allow:
- 3–7 remotes stored in memory
💡 If memory is full, you may need to reset the system.
How To Reset Garage Door Opener Memory
Steps
- Press and hold Learn button
- Hold for 6–10 seconds
- LED turns off
👉 This erases all programmed remotes.
Security Benefits of Reprogramming
- Prevents unauthorized access
- Updates rolling code system
- Useful after losing a remote
📊 Security Insight: Rolling code systems generate billions of combinations, making hacking extremely difficult.
Real-Life Example
A homeowner bought a universal Clicker remote but couldn’t get it to work. After locating the Learn button and repeating the steps correctly within 30 seconds, the remote synced instantly.
👉 Timing is critical.
Common Mistakes to Avoid
- ❌ Waiting too long after pressing Learn button
- ❌ Using weak batteries
- ❌ Ignoring compatibility
- ❌ Not testing after setup
When Should You Call a Professional?
Call a technician if:
- Learn button doesn’t respond
- Opener doesn’t enter programming mode
- Wiring or logic board issues occur
FAQ: How To Program A Clicker Remote Garage Door Opener
1. How long does programming take?
Usually 1–5 minutes.
2. Do I need tools to program the remote?
No, most setups require no tools.
3. Can I program multiple remotes?
Yes, most systems support several remotes.
4. Why is my Clicker remote not working?
It could be due to battery issues, compatibility, or incorrect programming steps.
5. Is it safe to reset the opener?
Yes, but it will erase all existing remotes.
6. Can I program a remote without the Learn button?
Yes, older systems use DIP switches instead.
Conclusion
Learning How To Program A Clicker Remote Garage Door Opener is a simple task that can save you time and hassle. By following the step-by-step process—locating the Learn button, syncing the remote, and testing—you can get your garage door working smoothly in just minutes.
Whether you’re setting up a new remote or fixing an old one, proper programming ensures convenience, security, and peace of mind.
If this guide helped you, share it on social media so others can easily program their garage door remotes too! 🚪📲
Leave a Reply