If you’re asking “How Do You Program A New Garage Door Opener”, you’re likely setting up a new system or replacing an old one. It might seem technical at first, but the process is actually straightforward once you understand the steps.
In this guide, you’ll learn exactly how to program your garage door opener safely, quickly, and correctly—even if you’re a complete beginner.
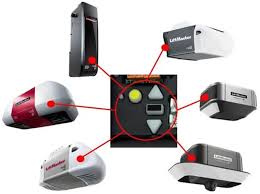
Read too: Tc1 Tricode Garage Door Opener Remote W/ Clip Chamberlain: Complete Guide
How Do You Program A New Garage Door Opener? (Step-by-Step Guide)
Programming a garage door opener usually takes 10–20 minutes and requires minimal tools.
Step 1: Locate the “Learn” Button
Most garage door openers have a “Learn” or “Program” button located on the motor unit.
Where to find it:
- On the back or side of the motor housing
- Under a light cover
- Near the antenna wire
Tip:
The button is often yellow, red, orange, or purple, depending on the manufacturer.
Step 2: Prepare Your Remote Control
Before programming:
- Insert fresh batteries
- Stand within 1–3 meters (3–10 feet) of the opener
- Ensure no other remotes are being pressed
Step 3: Press the Learn Button
- Press and release the Learn button
- A light will turn on or blink
- You now have 30 seconds to pair your remote
Step 4: Program the Remote
- Press the button on your remote
- Hold for 2–3 seconds, then release
- The opener light will blink or click
👉 This confirms successful programming.
Step 5: Test the Garage Door
- Press the remote again
- The door should open or close smoothly
If it doesn’t work, repeat the process carefully.
How Do You Program a Garage Door Opener to Your Car?
Many modern vehicles include built-in systems like HomeLink.
Steps:
- Turn your car ignition to “ON”
- Hold your garage remote near the car’s console
- Press both buttons simultaneously
- Wait for the indicator light to flash rapidly
- Press the Learn button on the opener
- Return to your car and press the programmed button
What If Your Garage Door Opener Uses Rolling Code Technology?
Modern systems use rolling code technology, which changes the signal every time you use it.
👉 This improves security and prevents hacking.
For more technical background, see:
https://en.wikipedia.org/wiki/Garage_door_opener
Important Note:
You must press the Learn button during programming—manual copying won’t work.
Common Programming Problems (And Fixes)
Here’s a quick troubleshooting guide:
| Issue | Cause | Solution |
|---|---|---|
| Remote not working | Dead batteries | Replace batteries |
| No response from opener | Out of range | Move closer |
| Programming fails | Time expired | Restart process |
| Door opens randomly | Signal interference | Reset codes |
| Car pairing not working | Compatibility issue | Check vehicle manual |
Do All Garage Door Openers Use the Same Programming Method?
Not exactly—but most follow a similar process.
Types of Openers:
- Chain-drive: Traditional and durable
- Belt-drive: Quieter and smoother
- Smart openers: App-controlled via Wi-Fi
Key Difference:
Smart openers may require:
- App installation
- Wi-Fi connection
- Account setup
How to Reset a Garage Door Opener Before Programming
If you’re replacing a remote or experiencing issues, resetting is essential.
Steps:
- Press and hold the Learn button
- Hold for 6–10 seconds
- Wait until the LED turns off
👉 This clears all previous codes.
Programming Multiple Remotes (Step-by-Step)
You can program multiple remotes using the same process.
How to do it:
- Press Learn button
- Program each remote one by one
- Repeat within the 30-second window
Pro Tip:
Most openers support 5–7 remotes simultaneously.
Advantages vs Disadvantages of DIY Programming
Pros:
- Saves money (no technician fees)
- Quick setup (under 20 minutes)
- Easy for beginners
Cons:
- Risk of incorrect setup
- Compatibility confusion
- Troubleshooting may take time
Safety Tips When Programming Your Garage Door Opener
Safety should always come first.
Important Guidelines:
- Keep children away during setup
- Ensure the door path is clear
- Test auto-reverse function
- Never stand under a moving door
According to safety experts, garage doors cause thousands of injuries annually due to improper handling or faulty sensors.
When Should You Call a Professional?
While DIY is effective, you may need expert help if:
- The opener doesn’t respond after multiple attempts
- Wiring or sensors are damaged
- Smart system setup fails
Professional services typically cost between $100–$200, depending on complexity.
FAQ: How Do You Program A New Garage Door Opener?
Q1: How long does it take to program a garage door opener?
Most setups take 10–20 minutes, depending on the system.
Q2: Can I program a garage door opener without a remote?
Yes, but you’ll need access to the wall control or smart app.
Q3: Why won’t my garage door opener program?
Common reasons include dead batteries, incorrect timing, or interference.
Q4: Do I need Wi-Fi to program my garage door opener?
No, only smart openers require Wi-Fi.
Q5: Can I program multiple garage doors to one remote?
Yes, many remotes support multiple buttons for different doors.
Q6: What happens if I reset my garage door opener?
All remotes will be erased, and you’ll need to reprogram them.
Conclusion
Programming a new garage door opener doesn’t have to be complicated. By following the simple steps in this guide, you can set up your system quickly and safely—without needing professional help.
From locating the Learn button to troubleshooting common issues, you now have everything you need to get your garage door working perfectly.
If this guide helped you, feel free to share it on social media so others can learn how to program their garage door opener with confidence!
Leave a Reply